Conversion 2
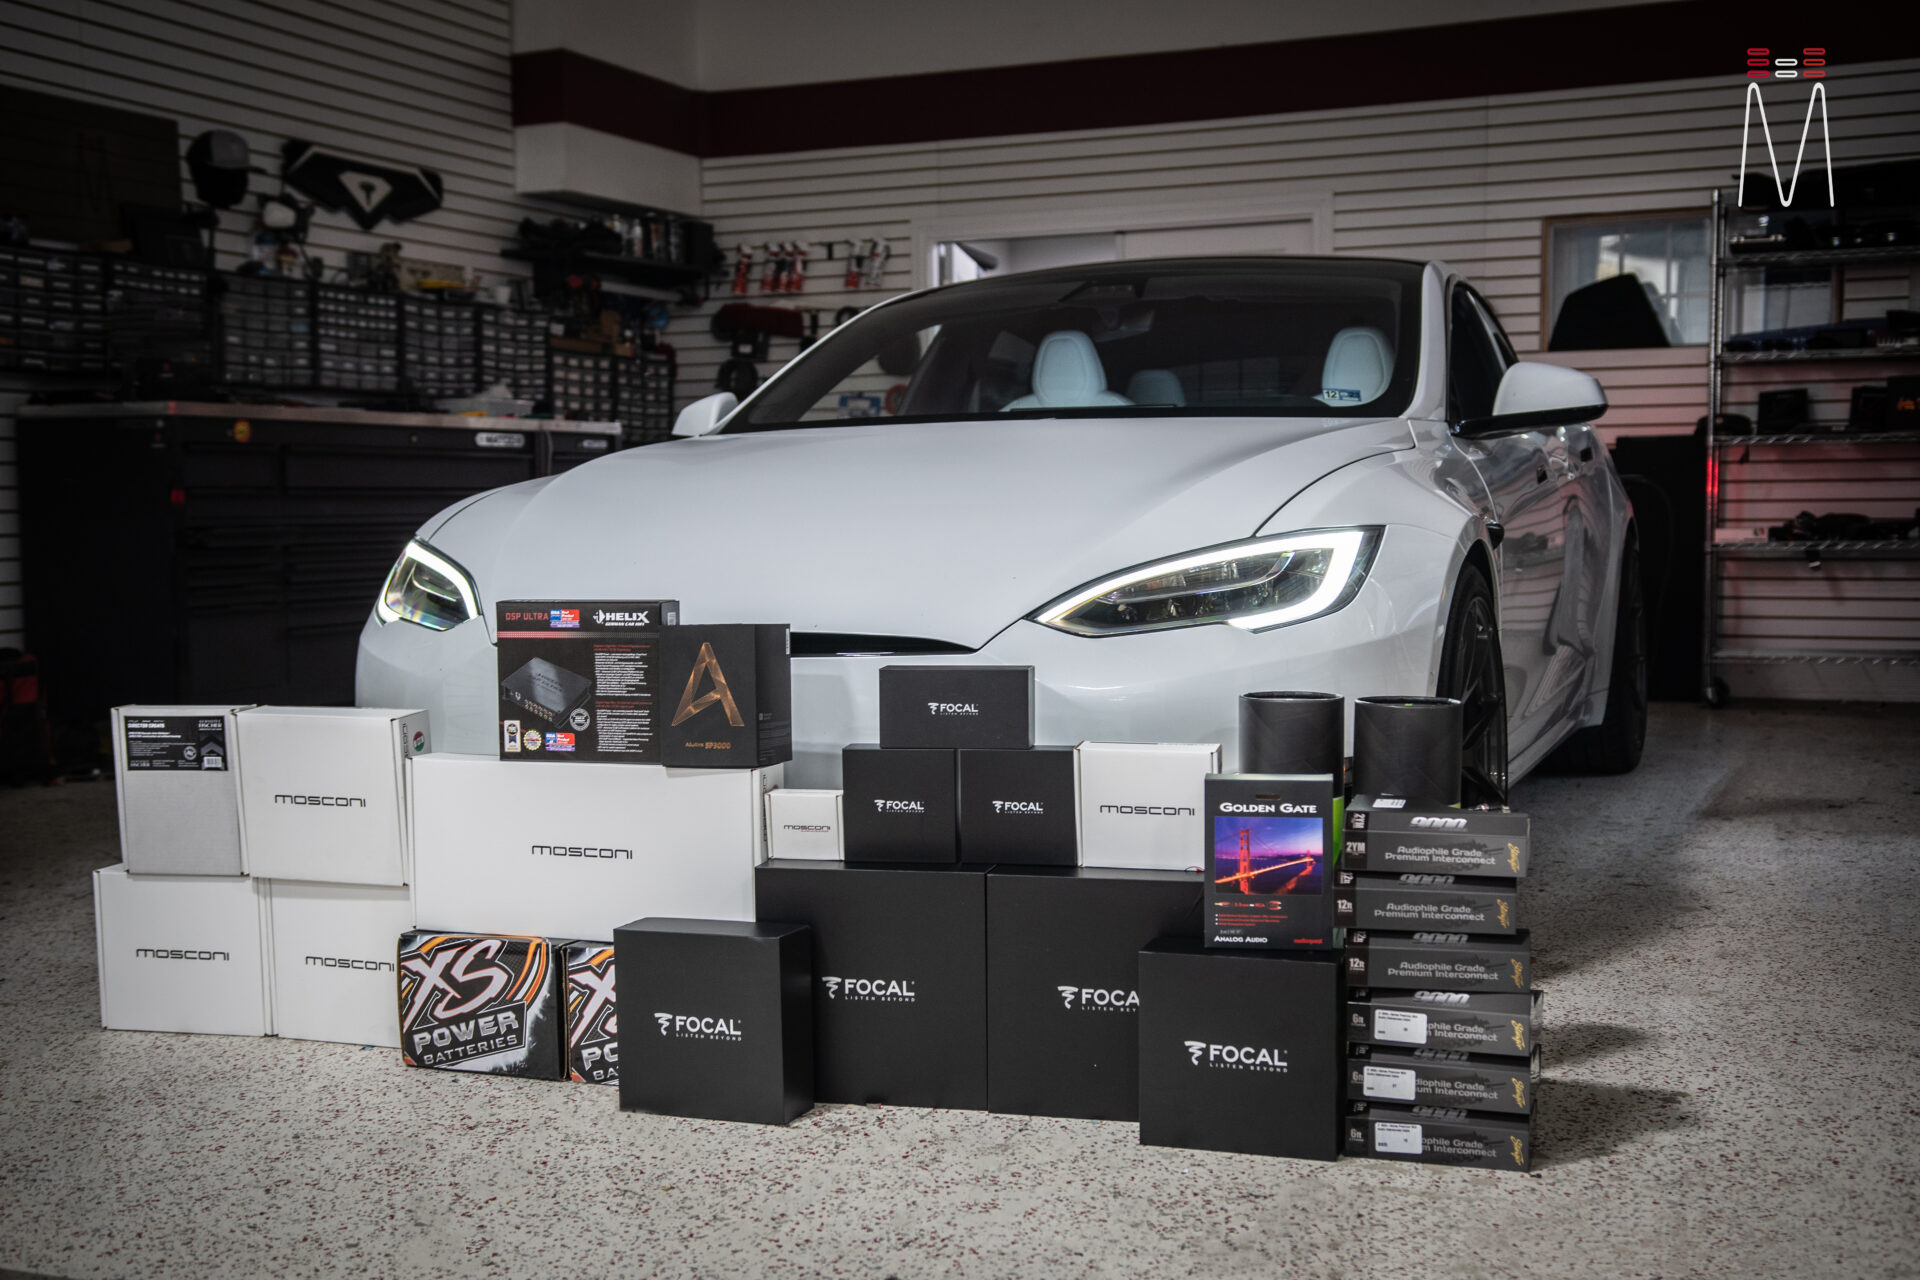
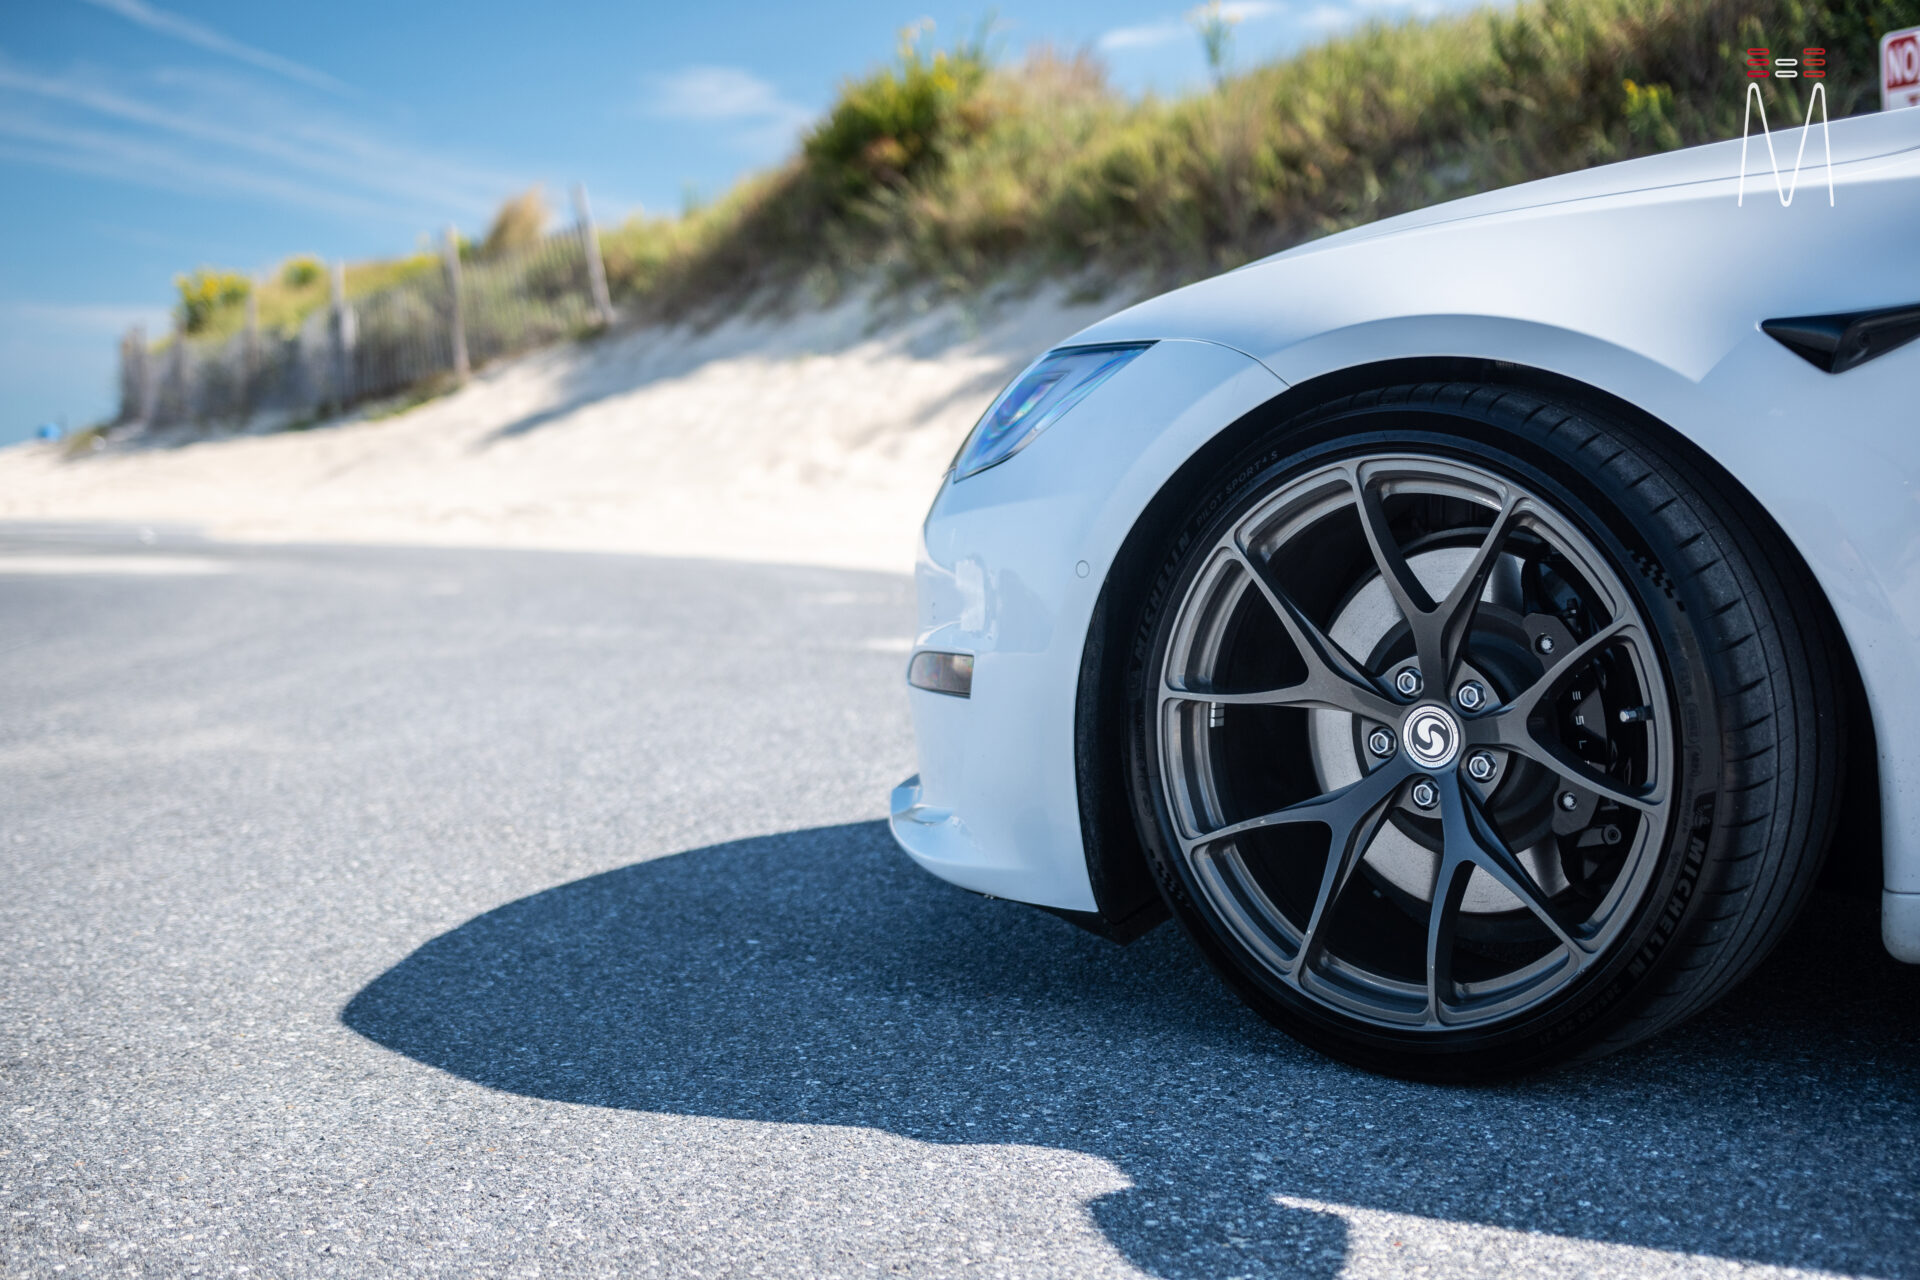
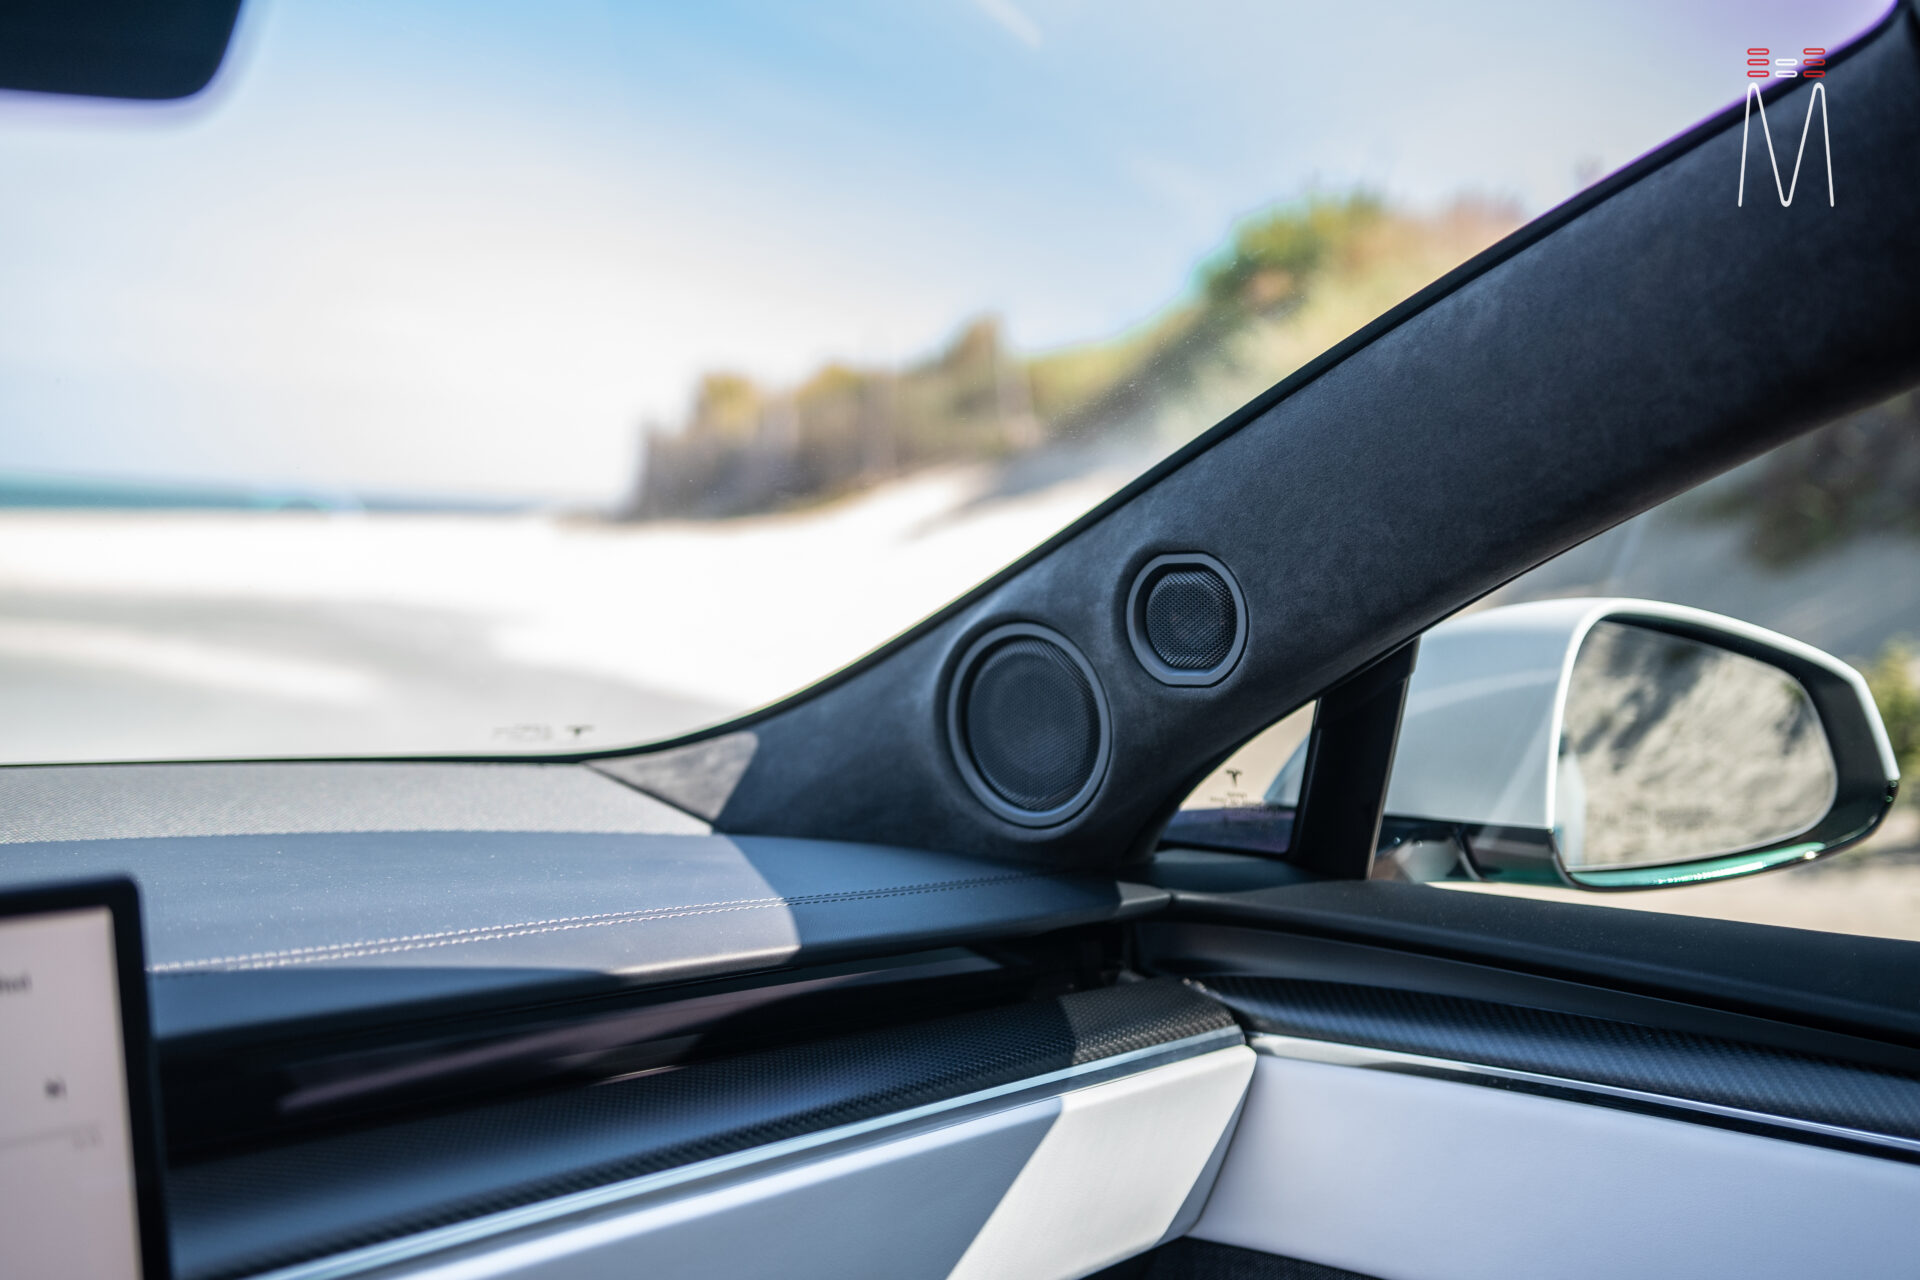
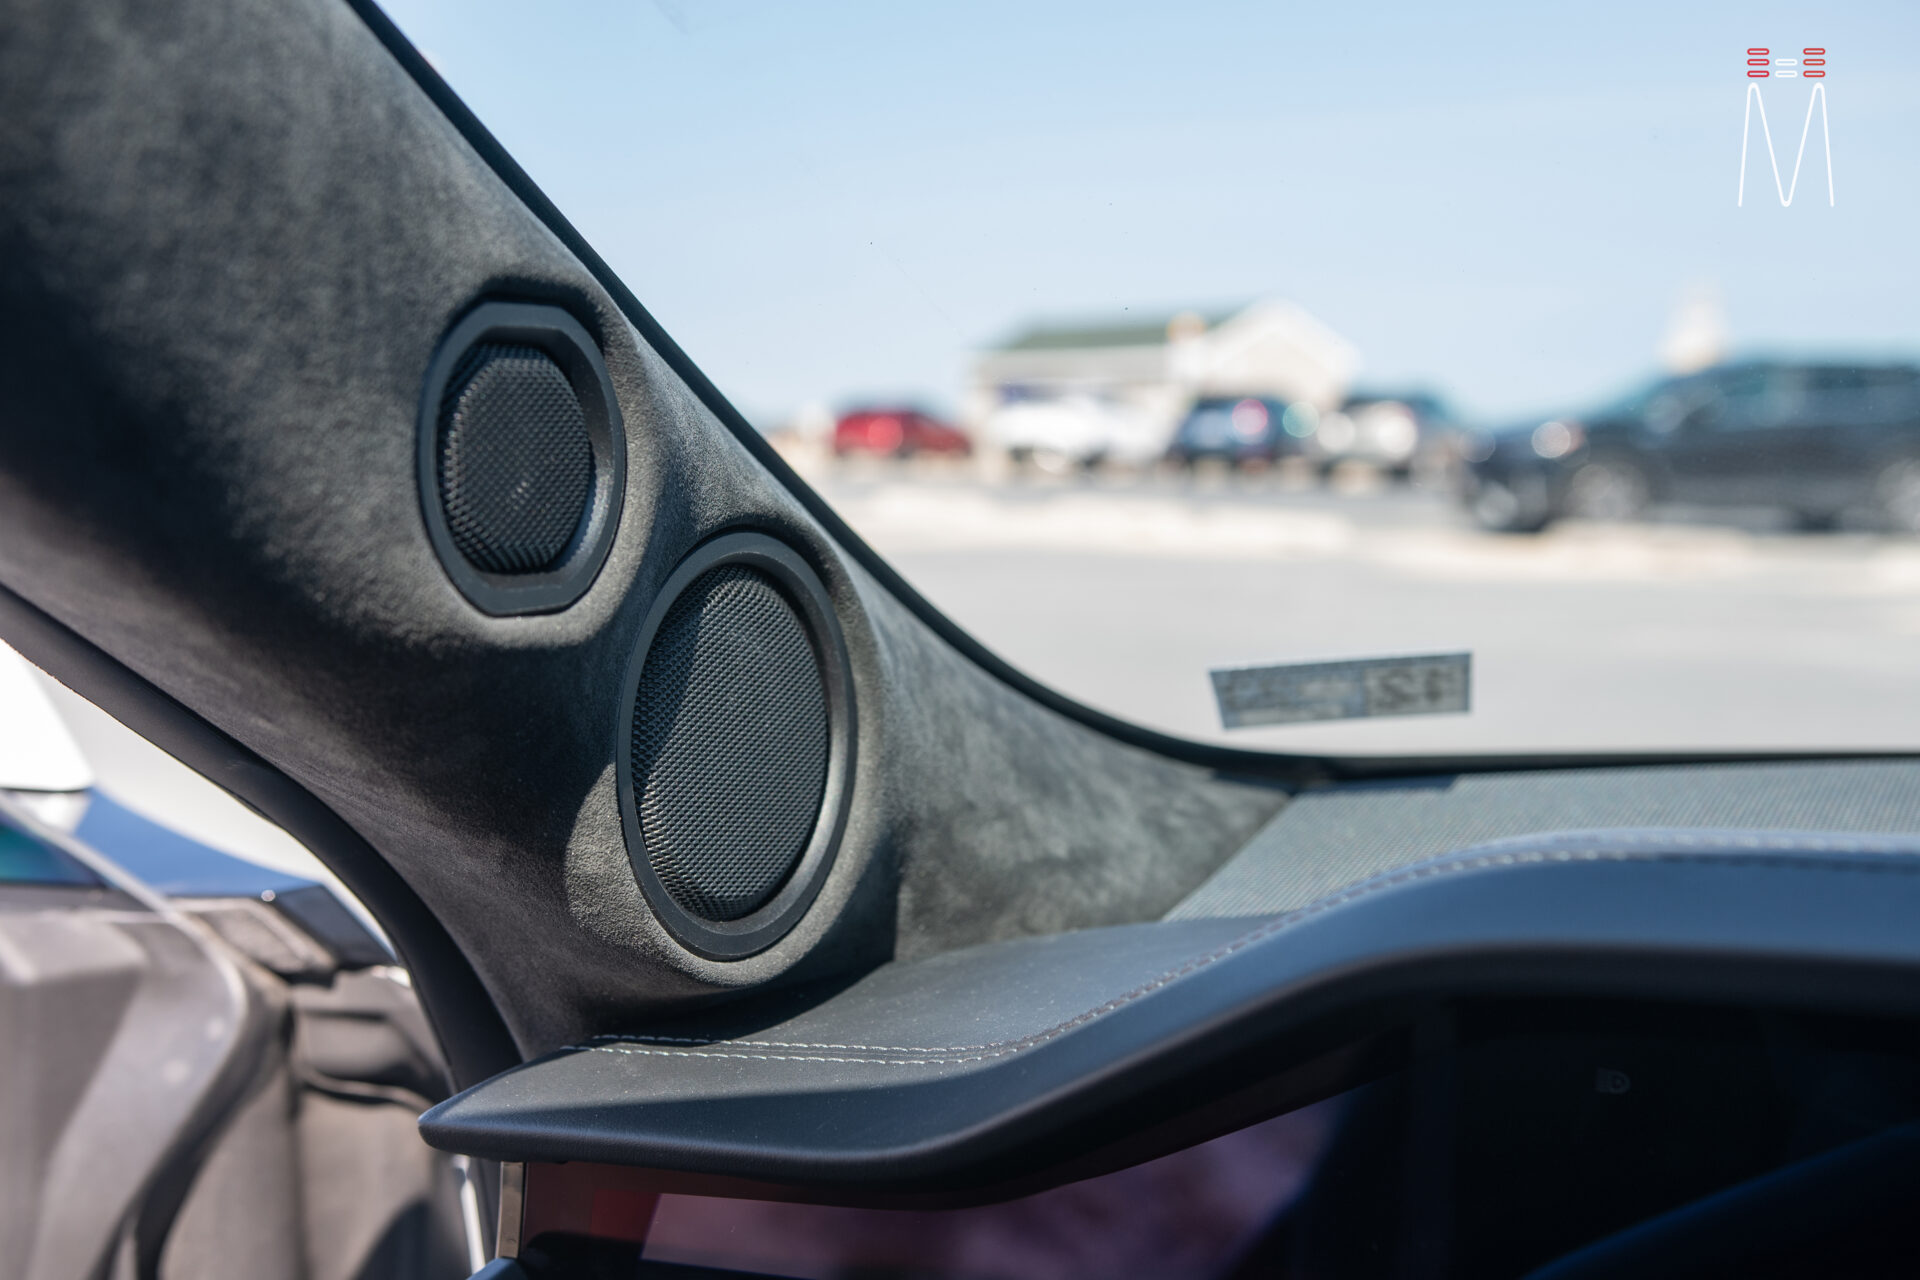
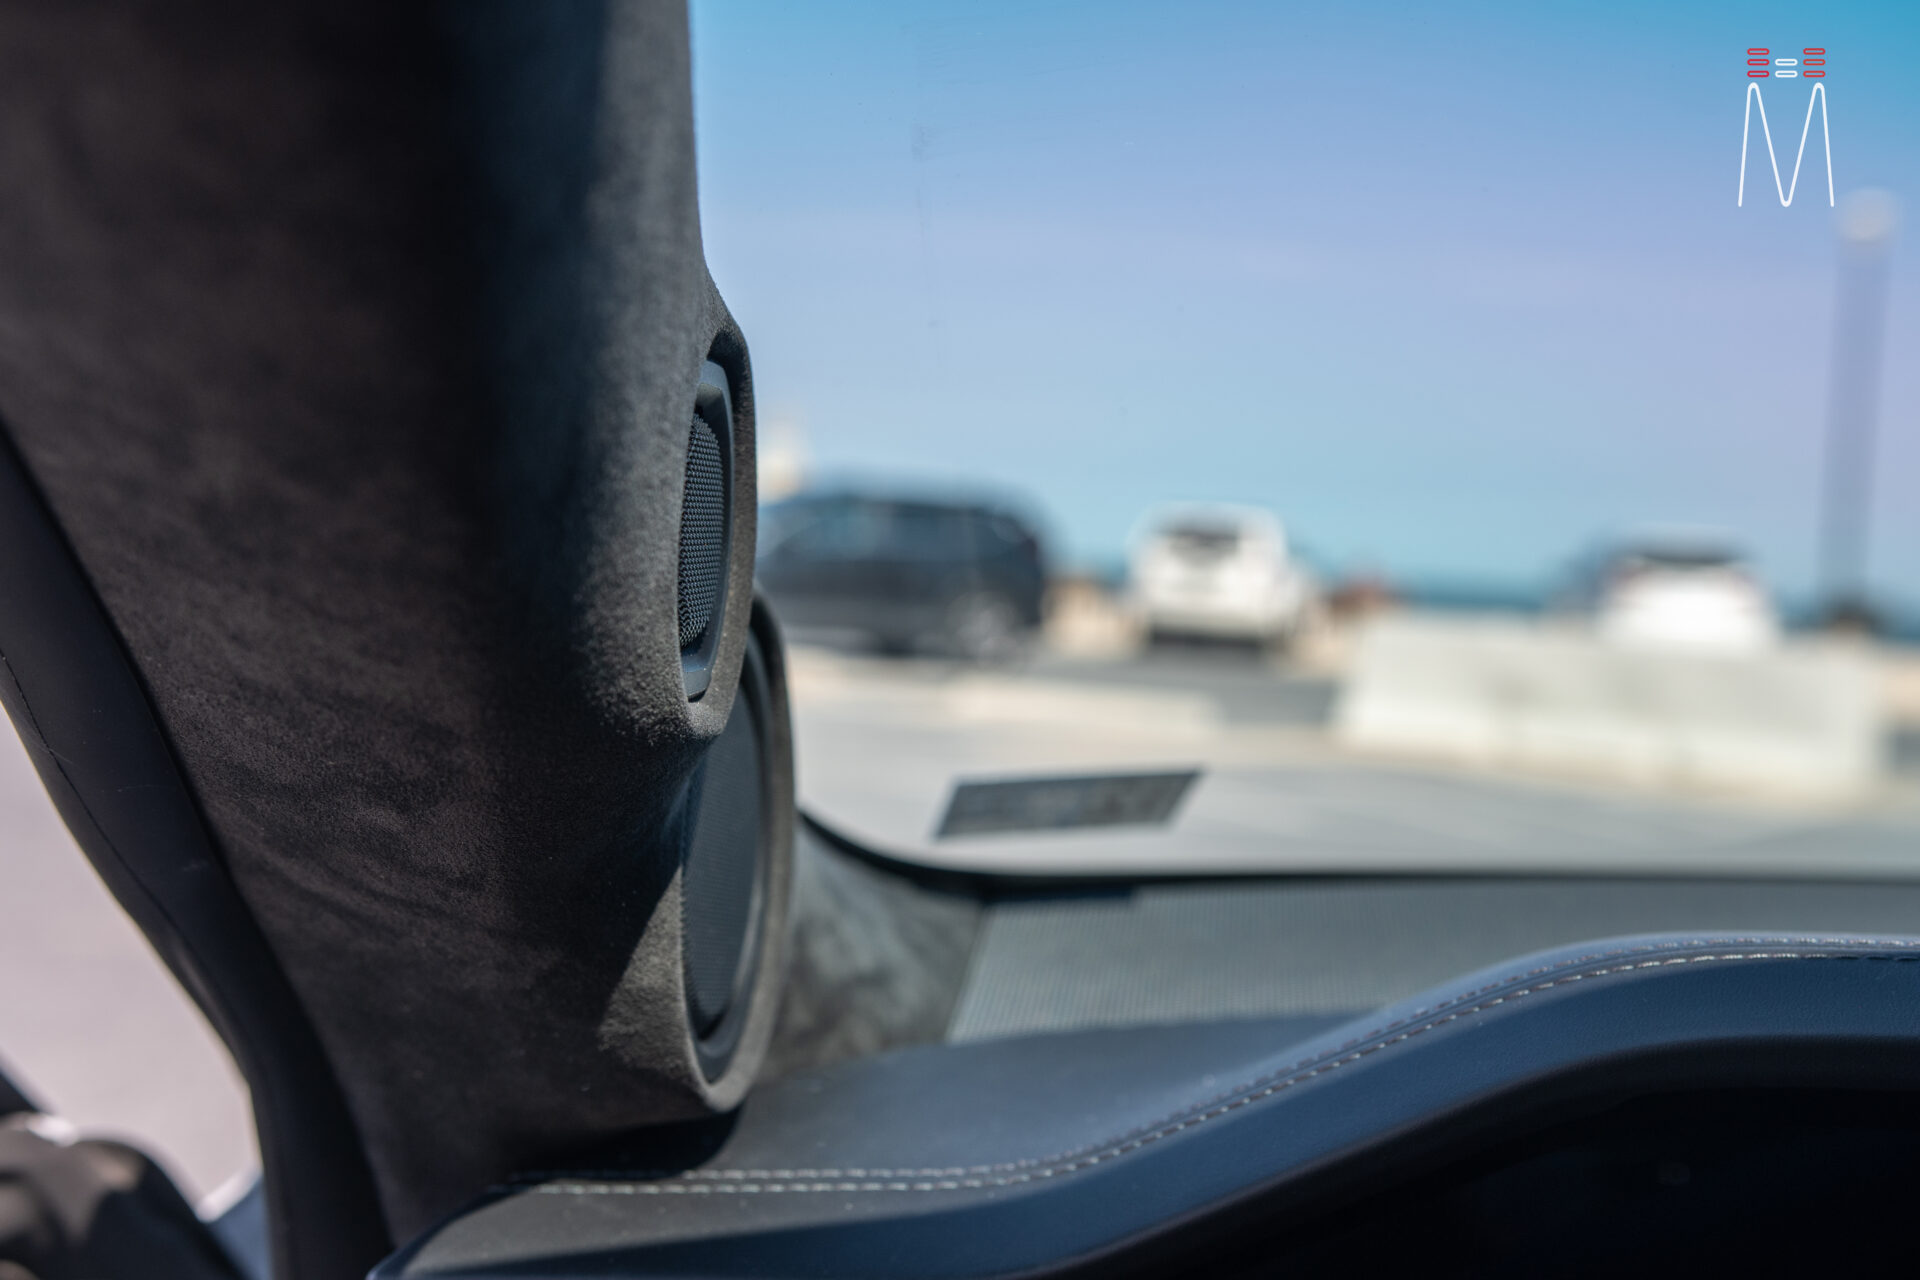
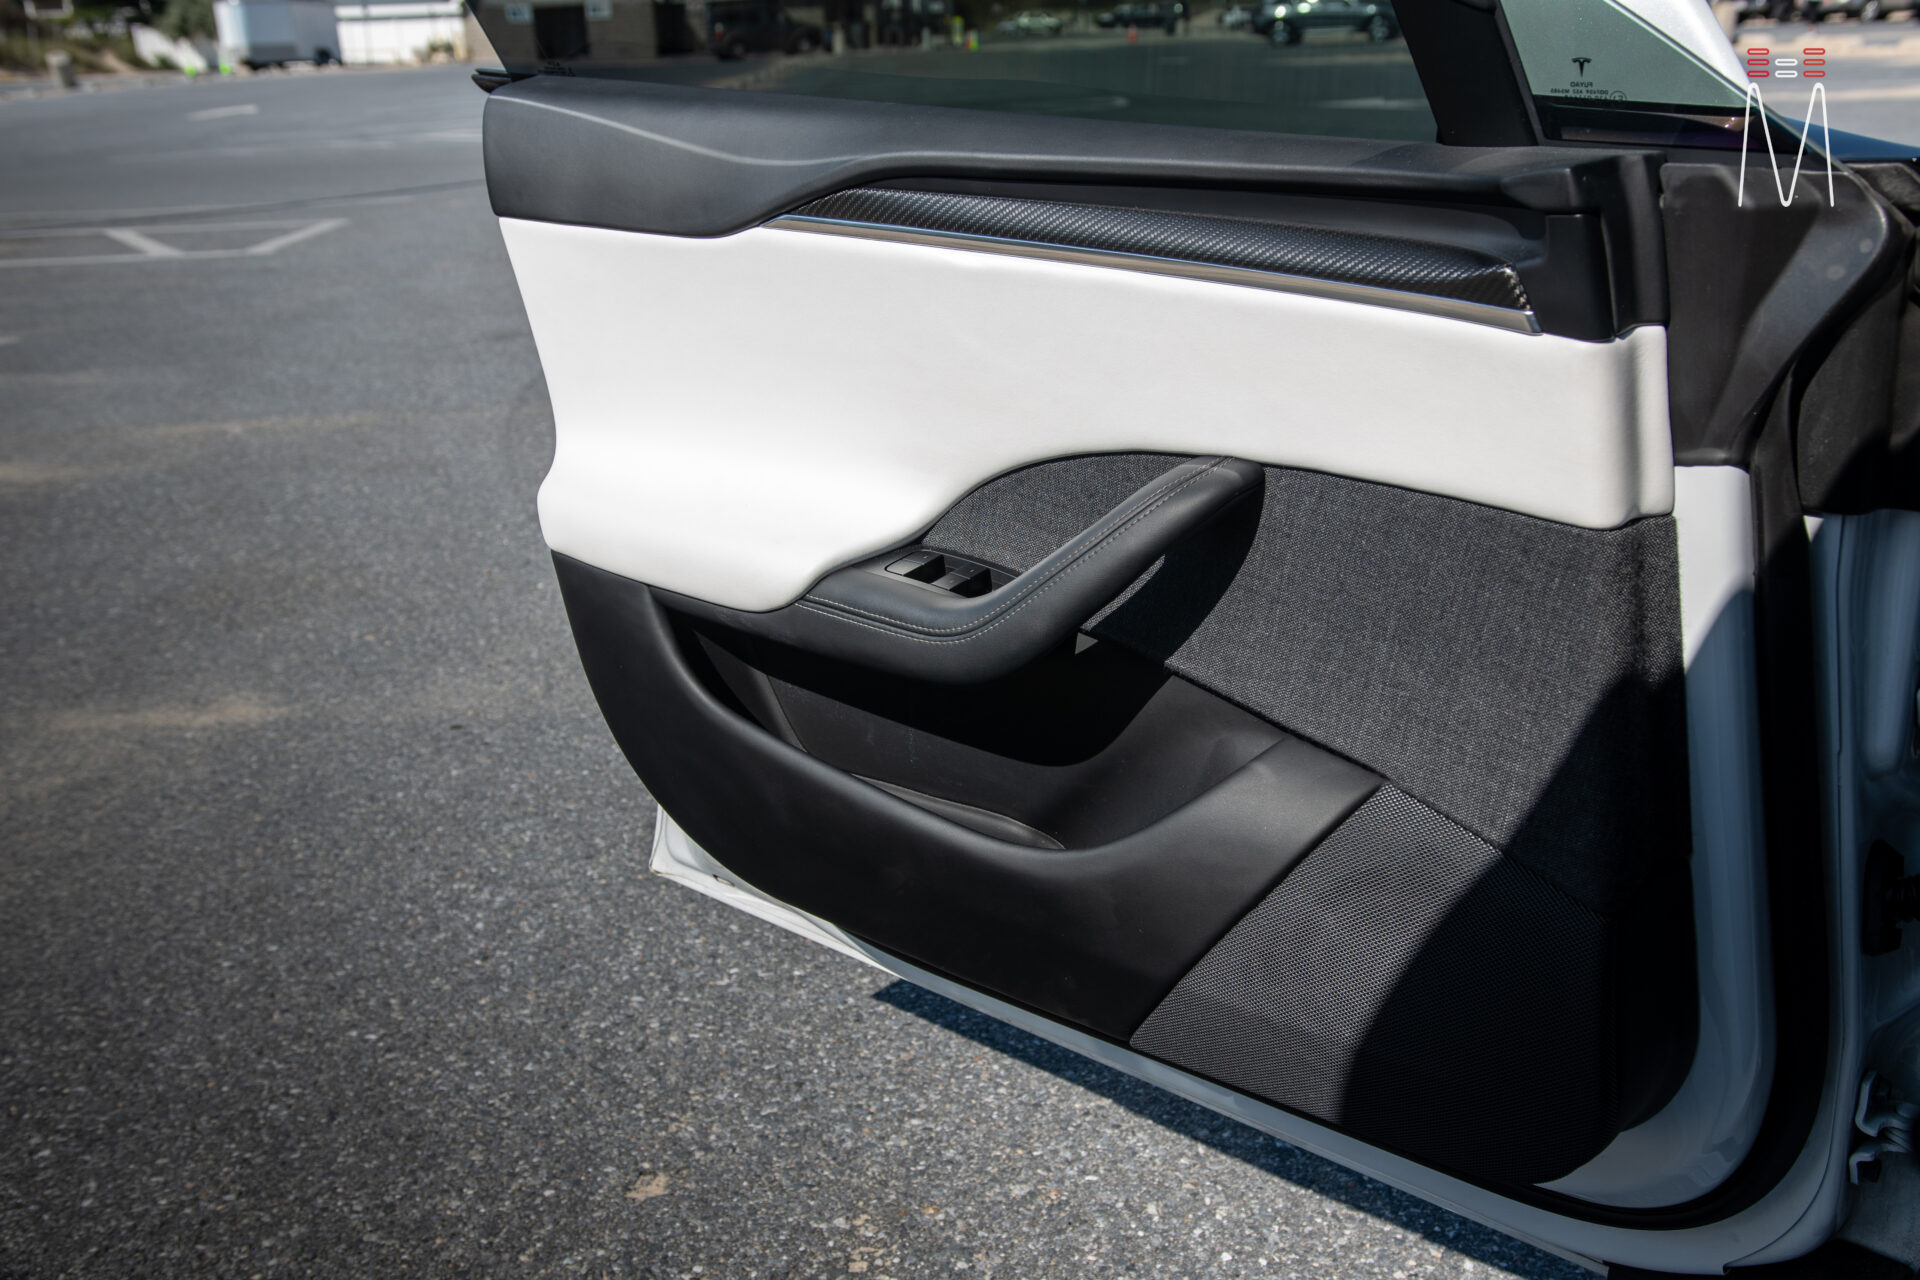
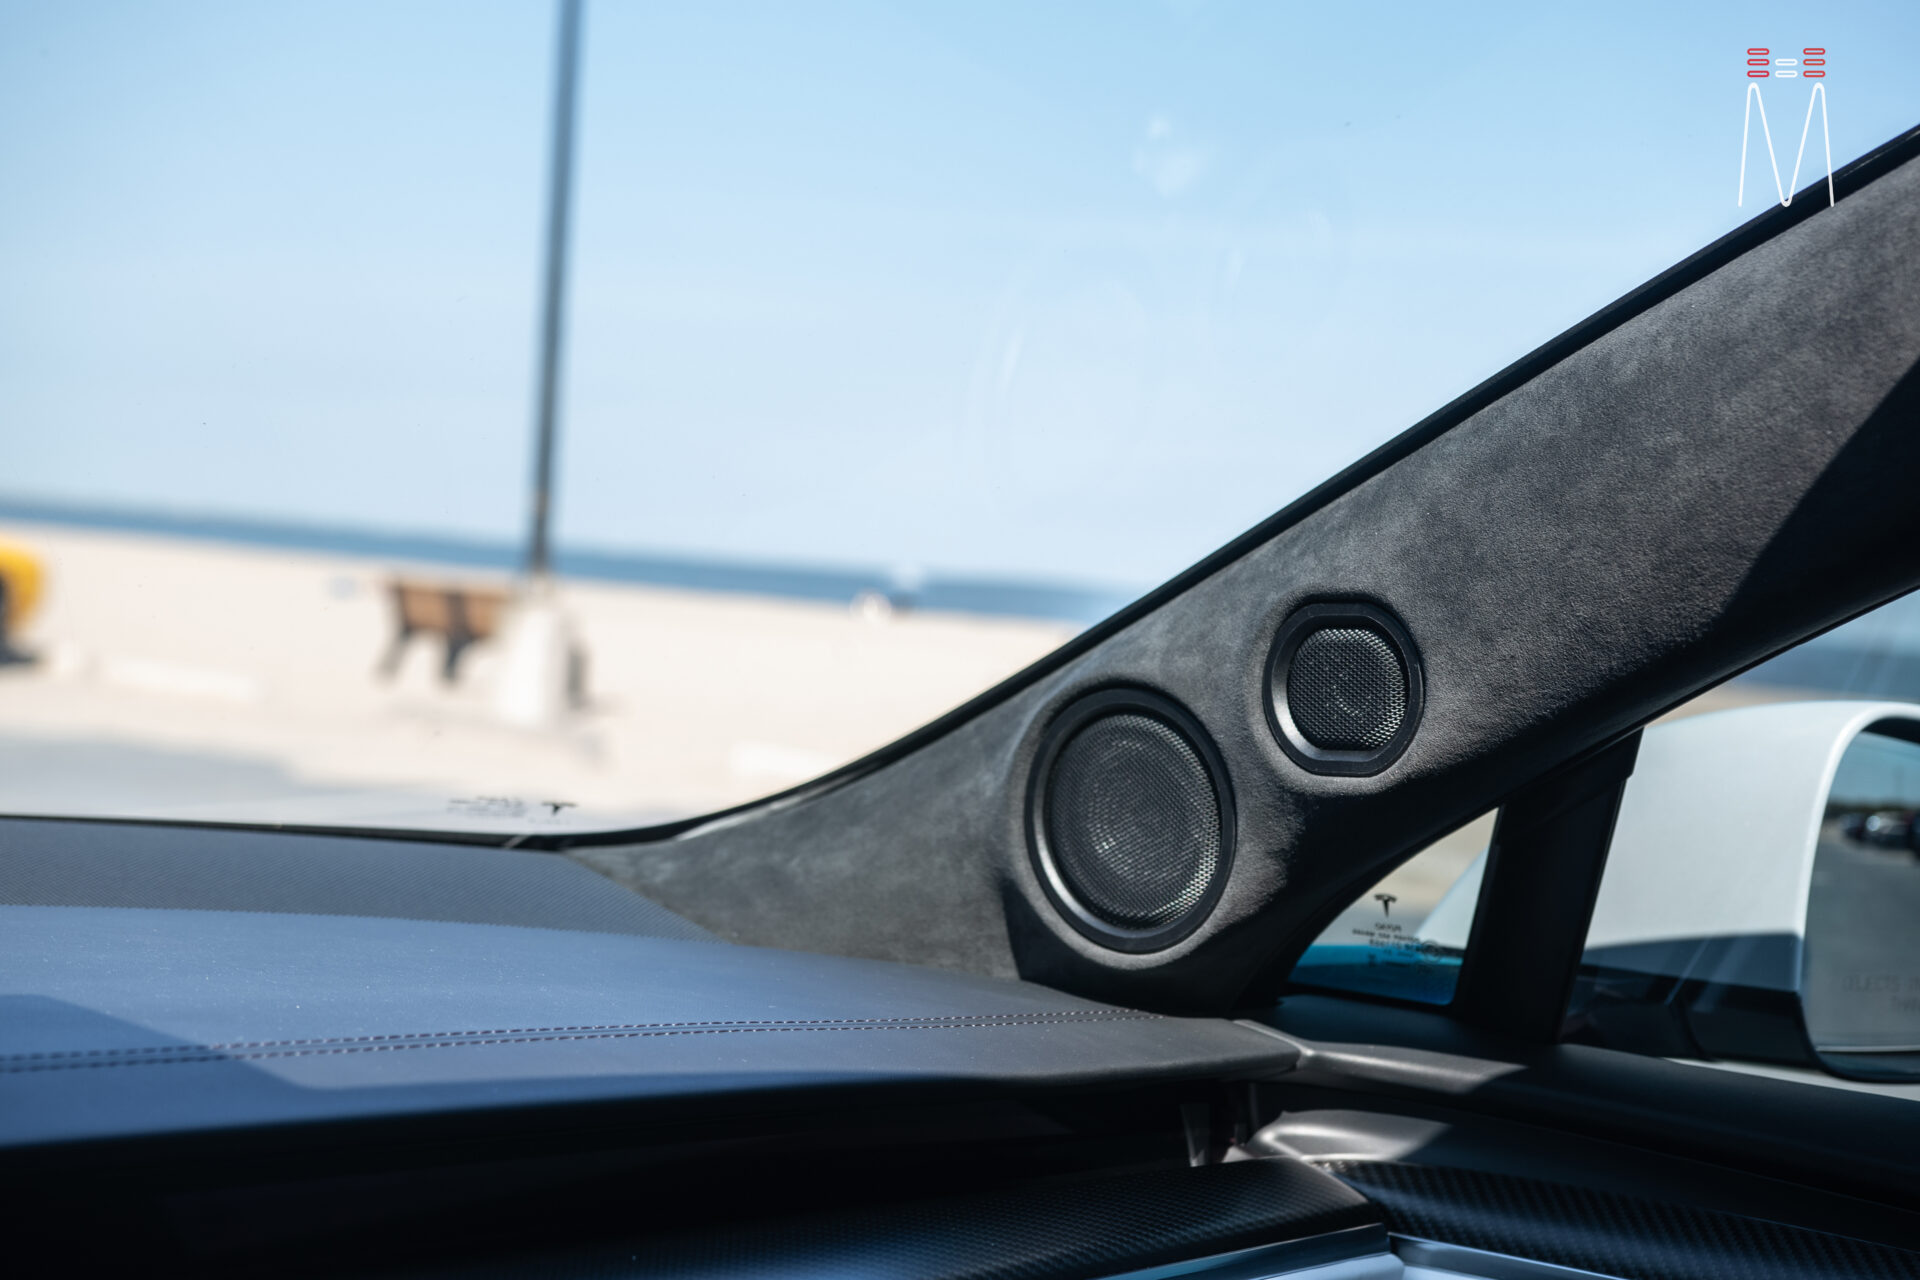
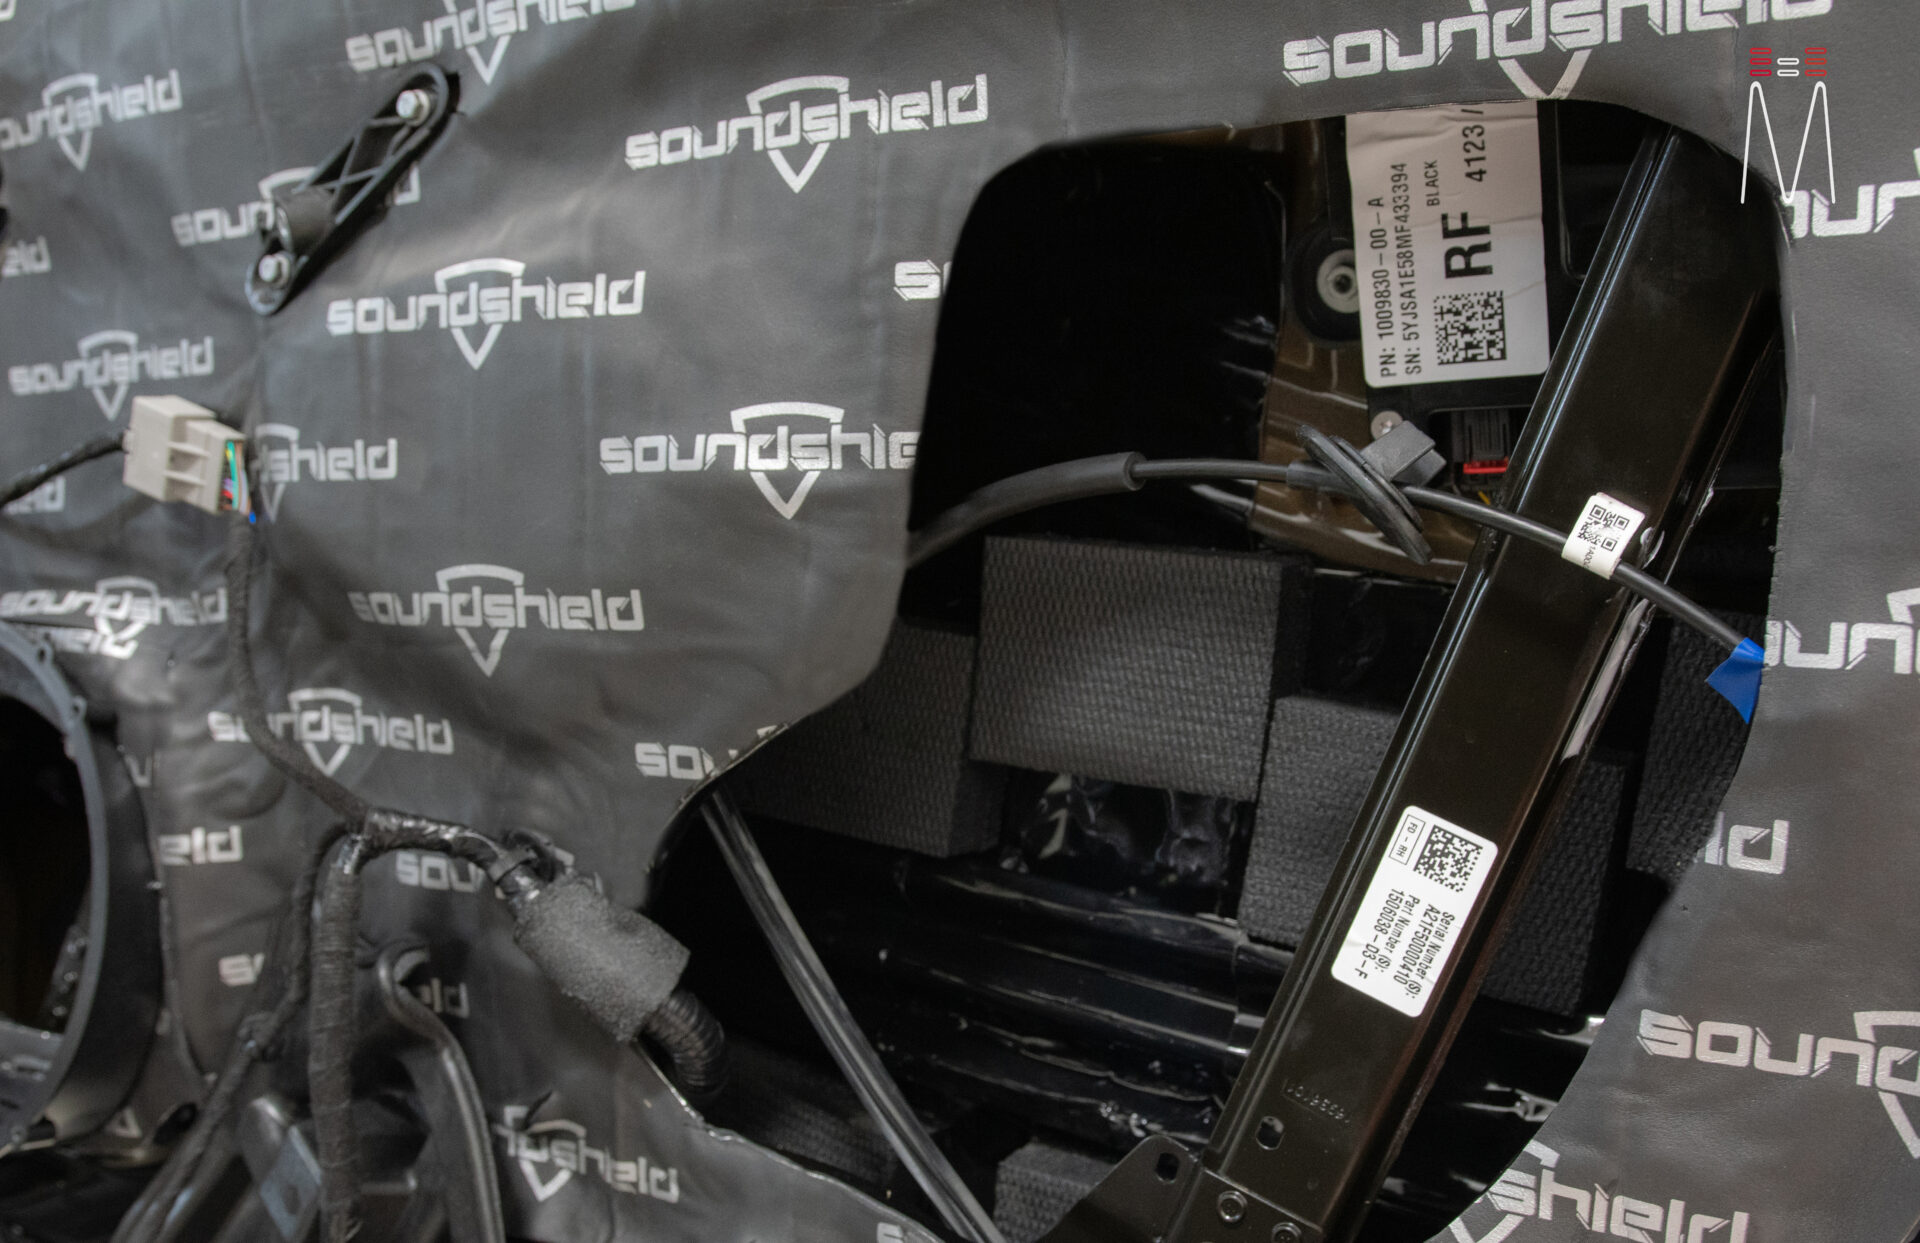
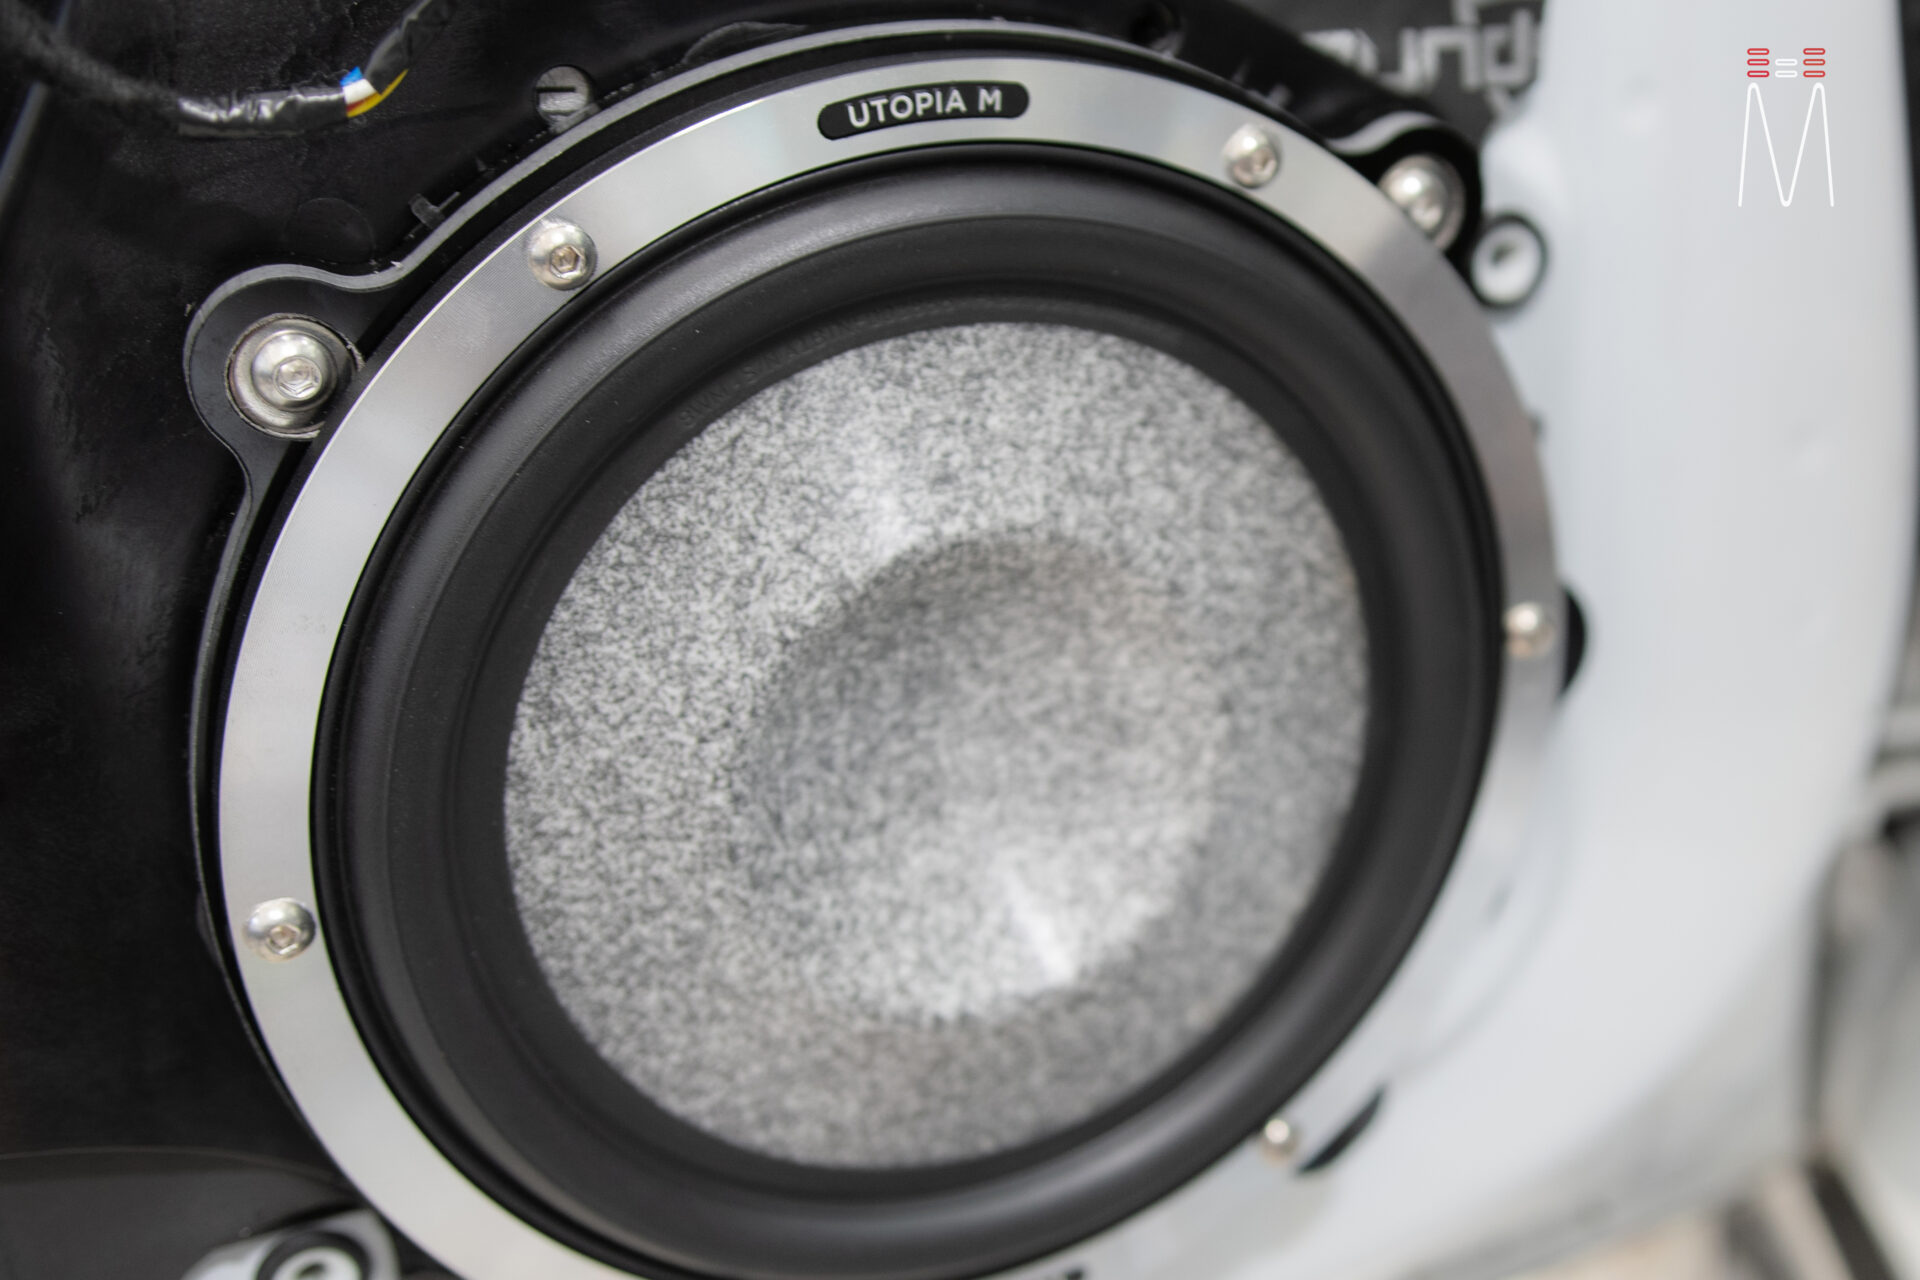
Big systems in 15.5v Tesla’s always present a challenge. This one sacrificed nothing when it came to sound quality. Given our history with Tesla, the client felt at ease to trust us with his brand new car. Without going into full detail into how we accomplished it, we will give you our standard build log write up.For the front stage we utilized the Focal Utopia 8″ midbass woofers, 3 -1/2″ midrange, and TBM tweeters. The front doors were fully sound treated with Hushmat, Soundshield and finished off with Blackhole Tiles. Custom speaker housings were fabricated to adapt our 8″ woofer into the factory location and set at the same angle. The backs of the door panels were also fully treated in Soundshield acoustic foam treatment. The OEM A-Pillars were modified to accept our tweeter and midrange speakers. Alcantara suede was sourced to refinish the pillar for an OEM finish.
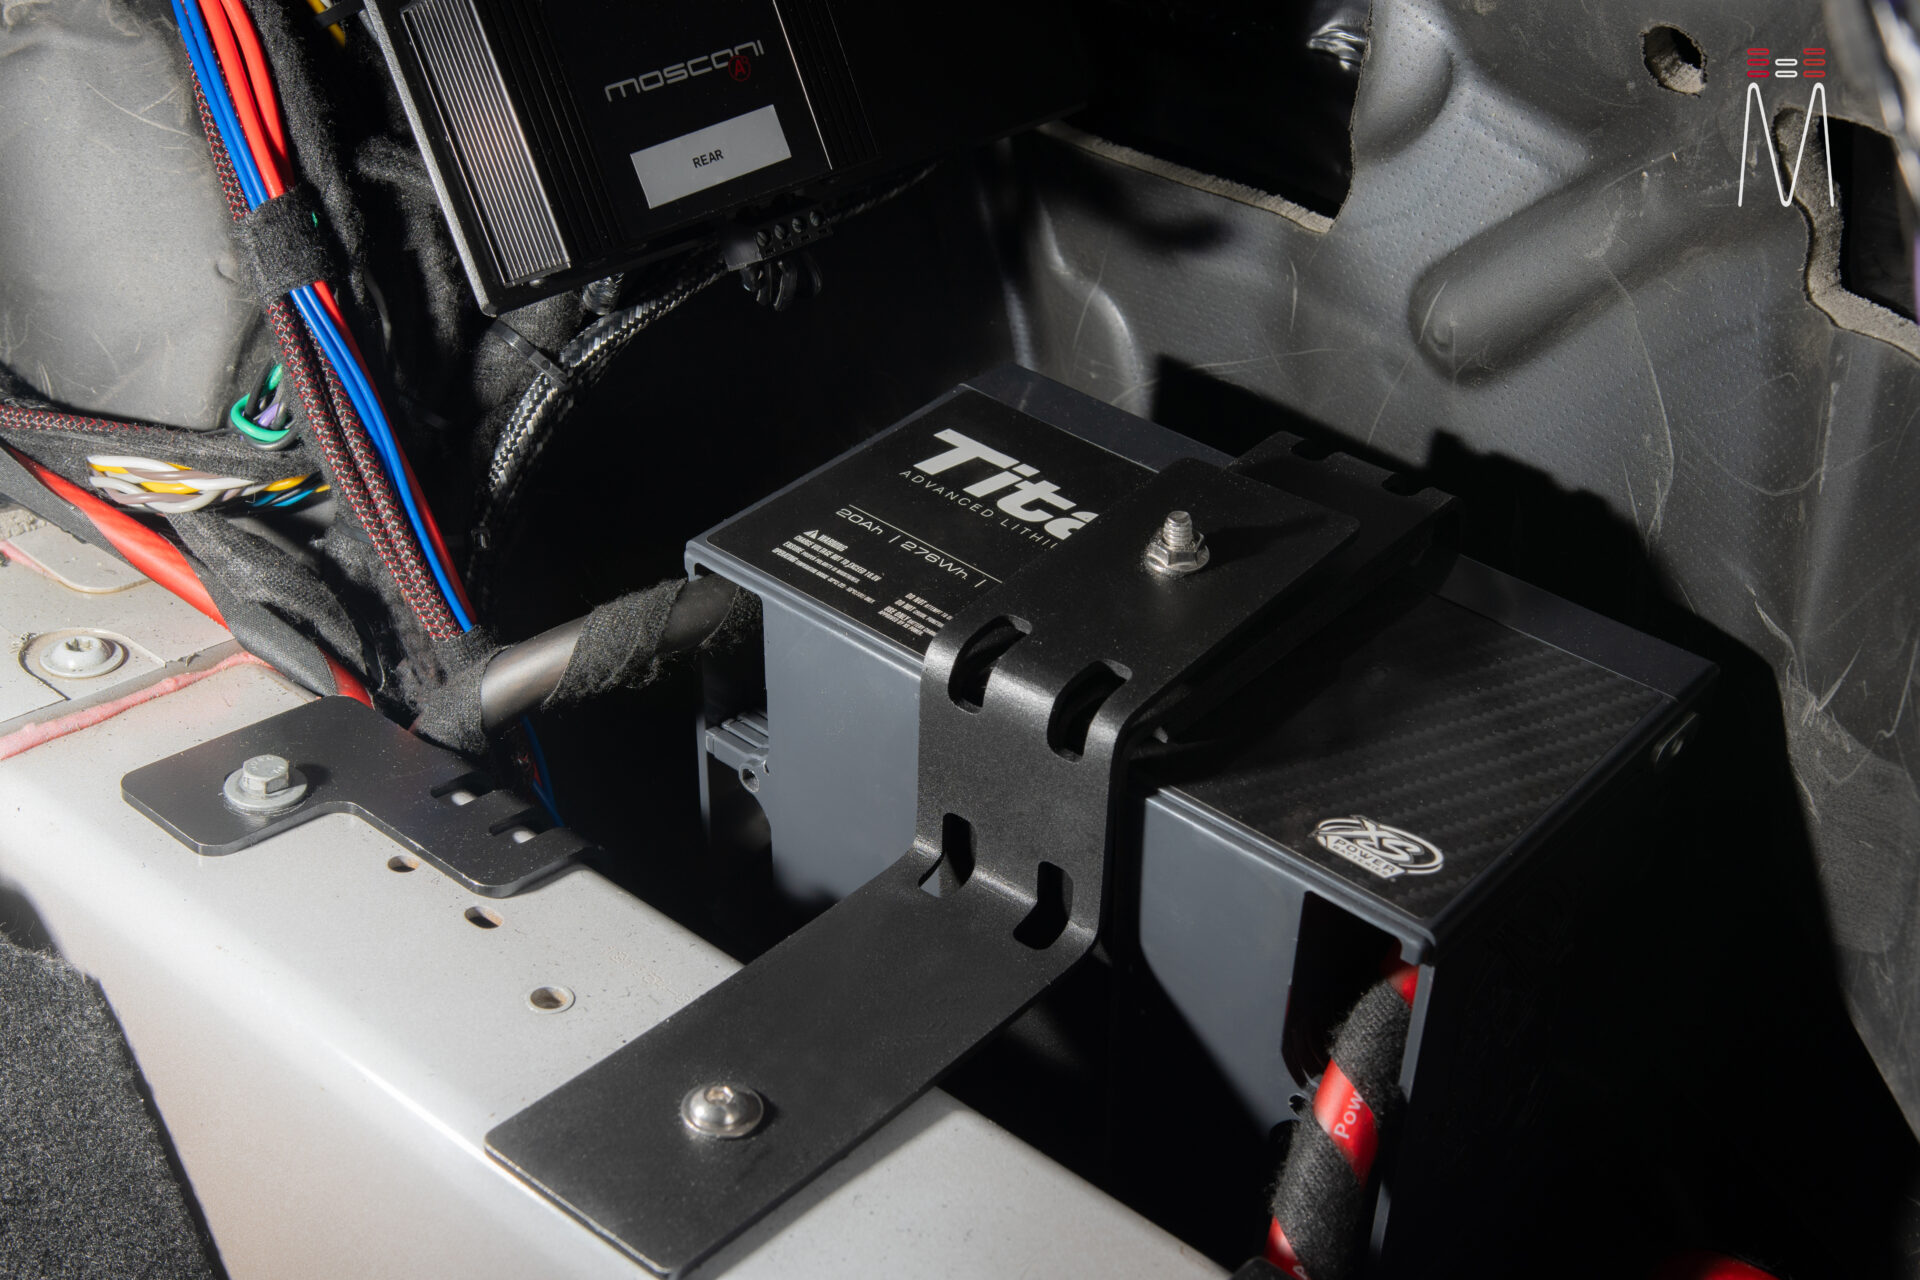
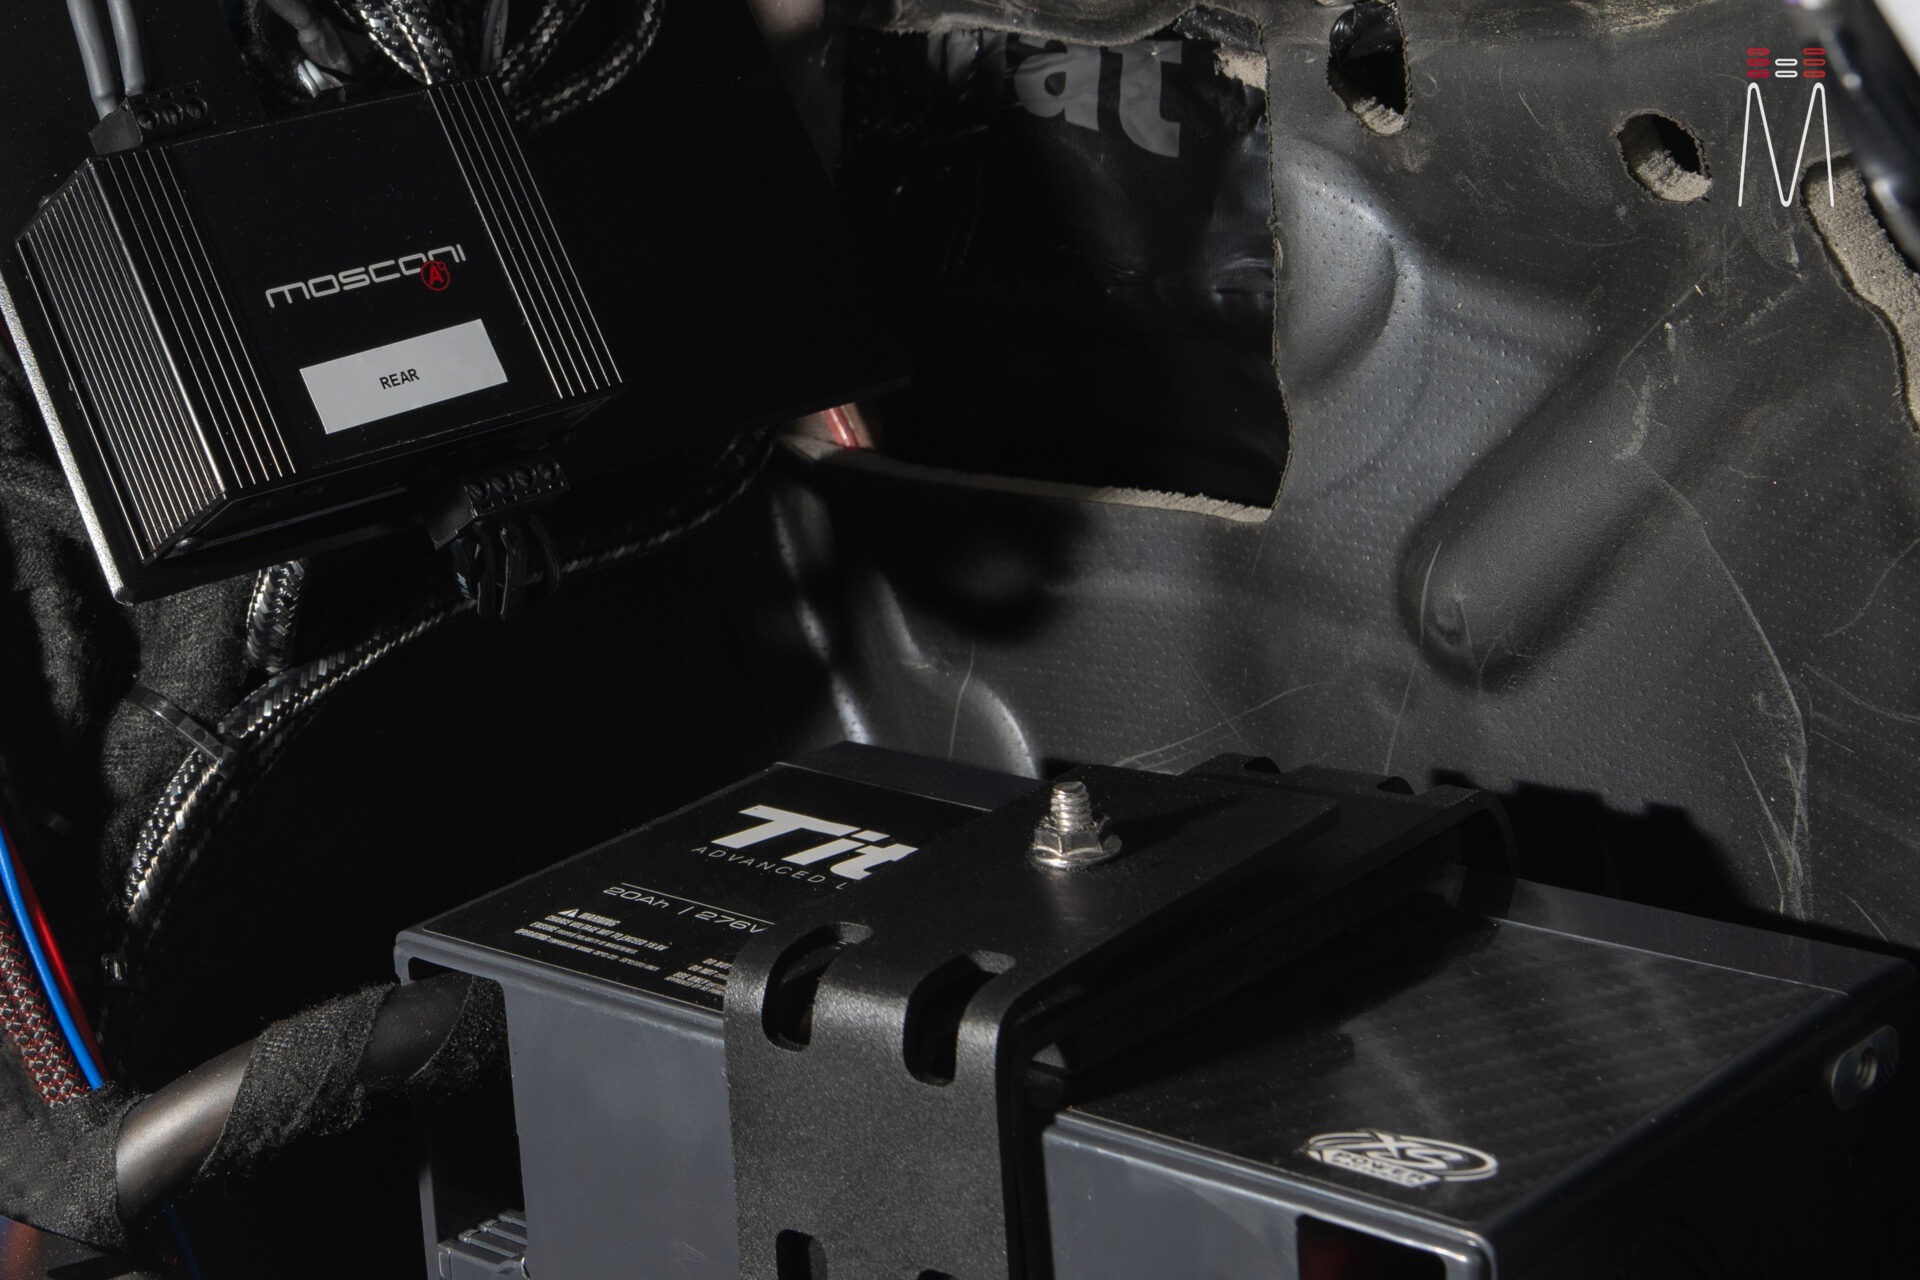
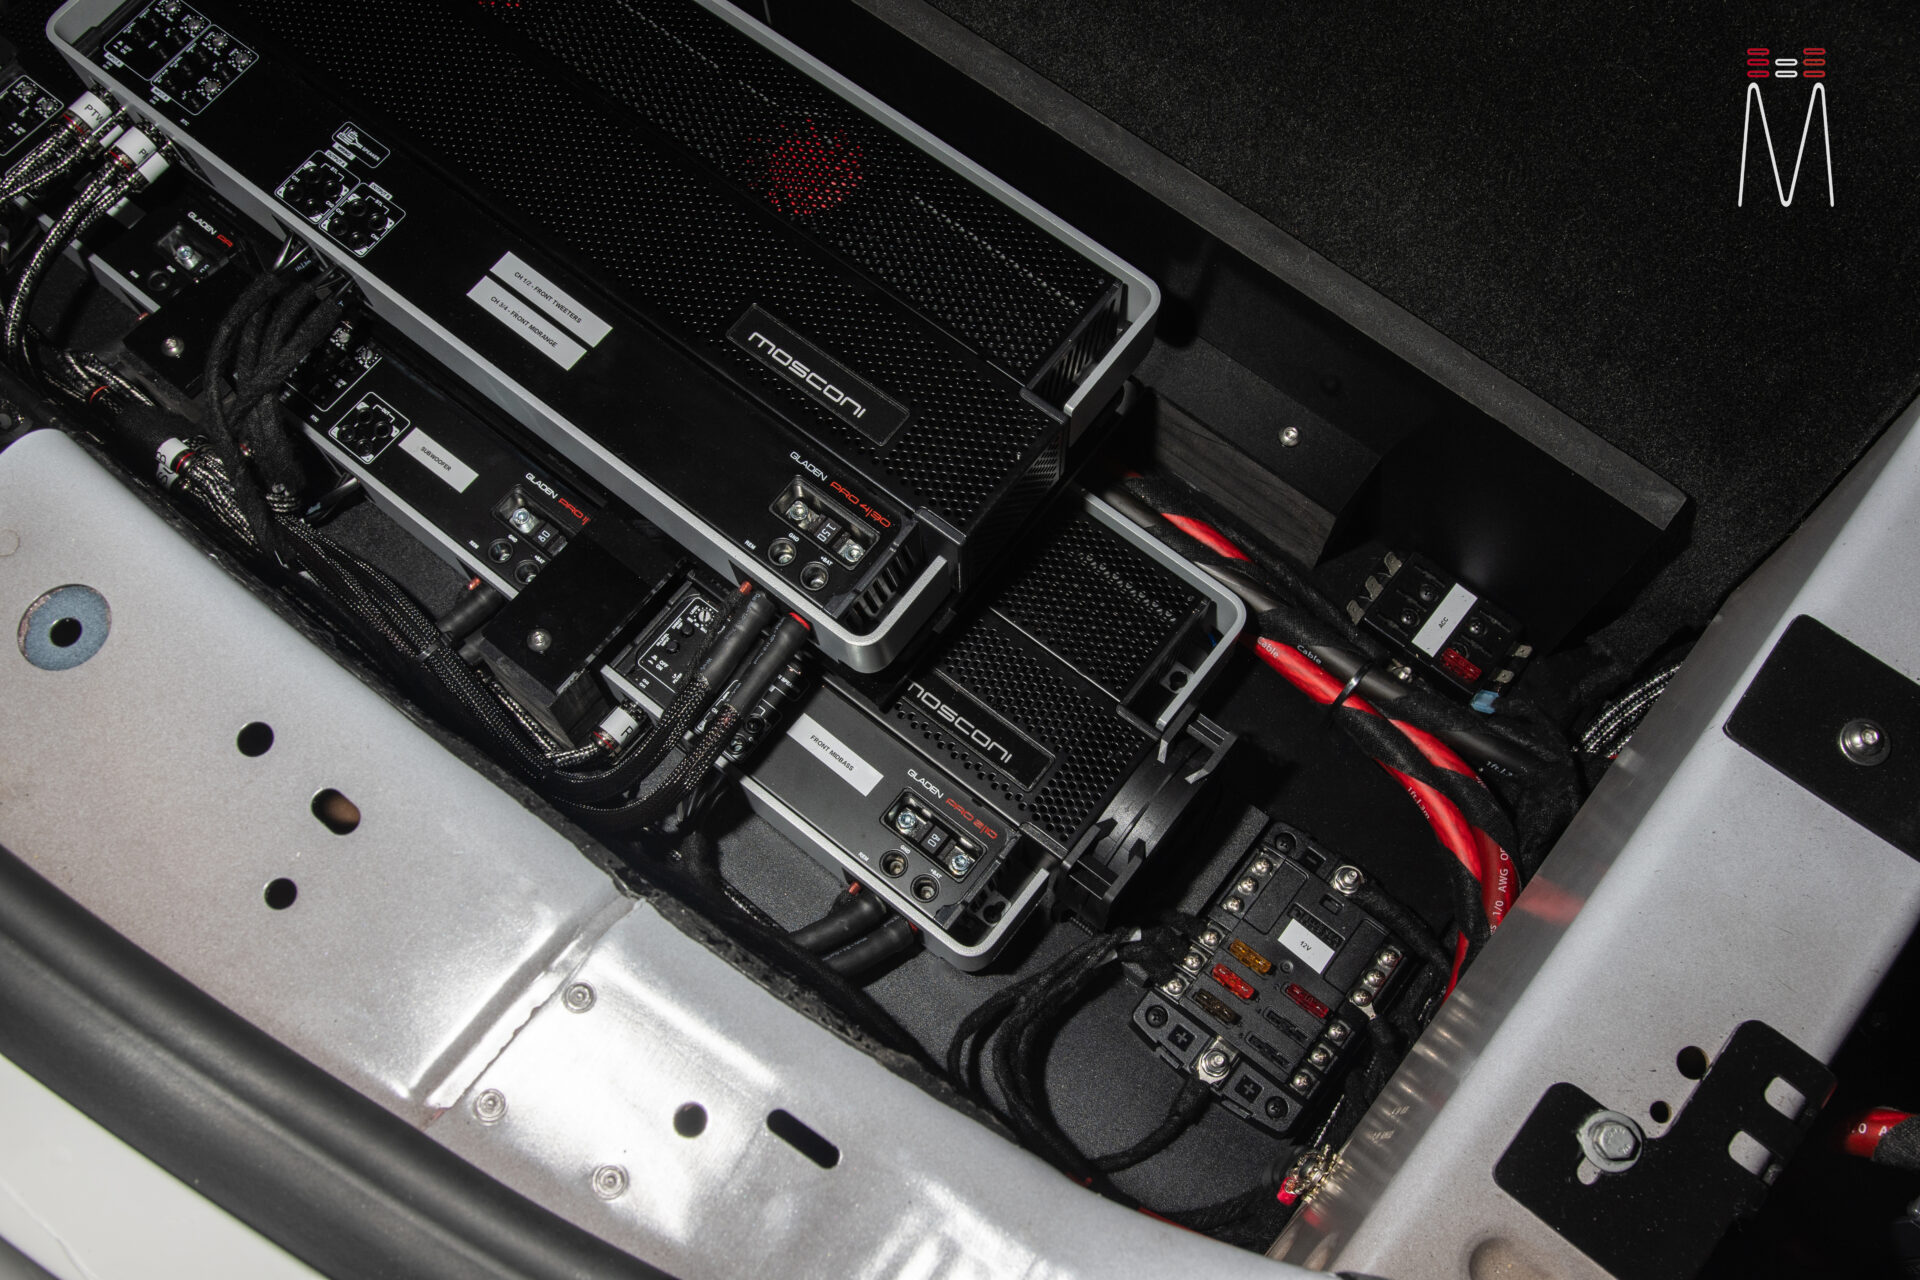
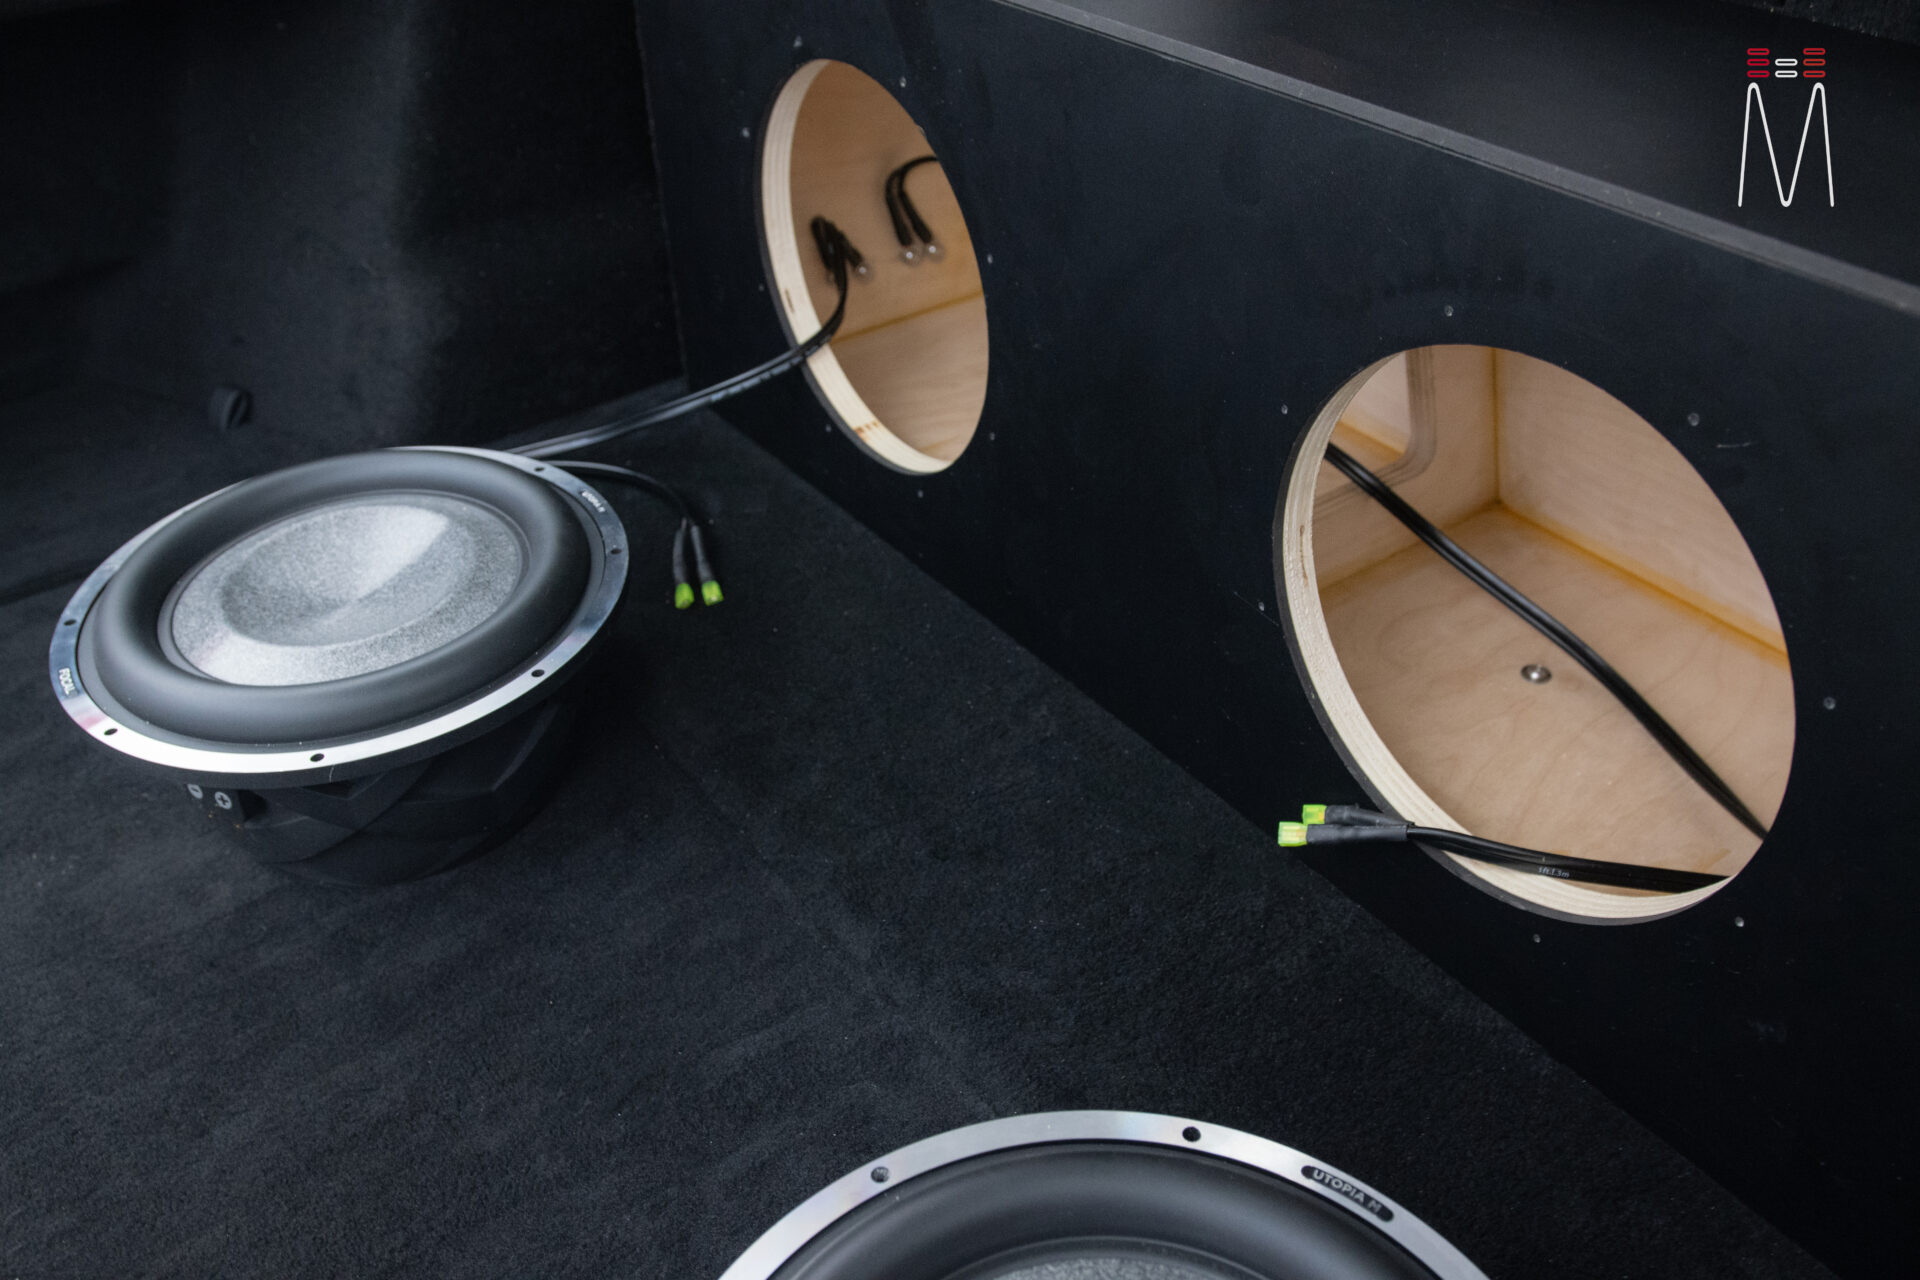
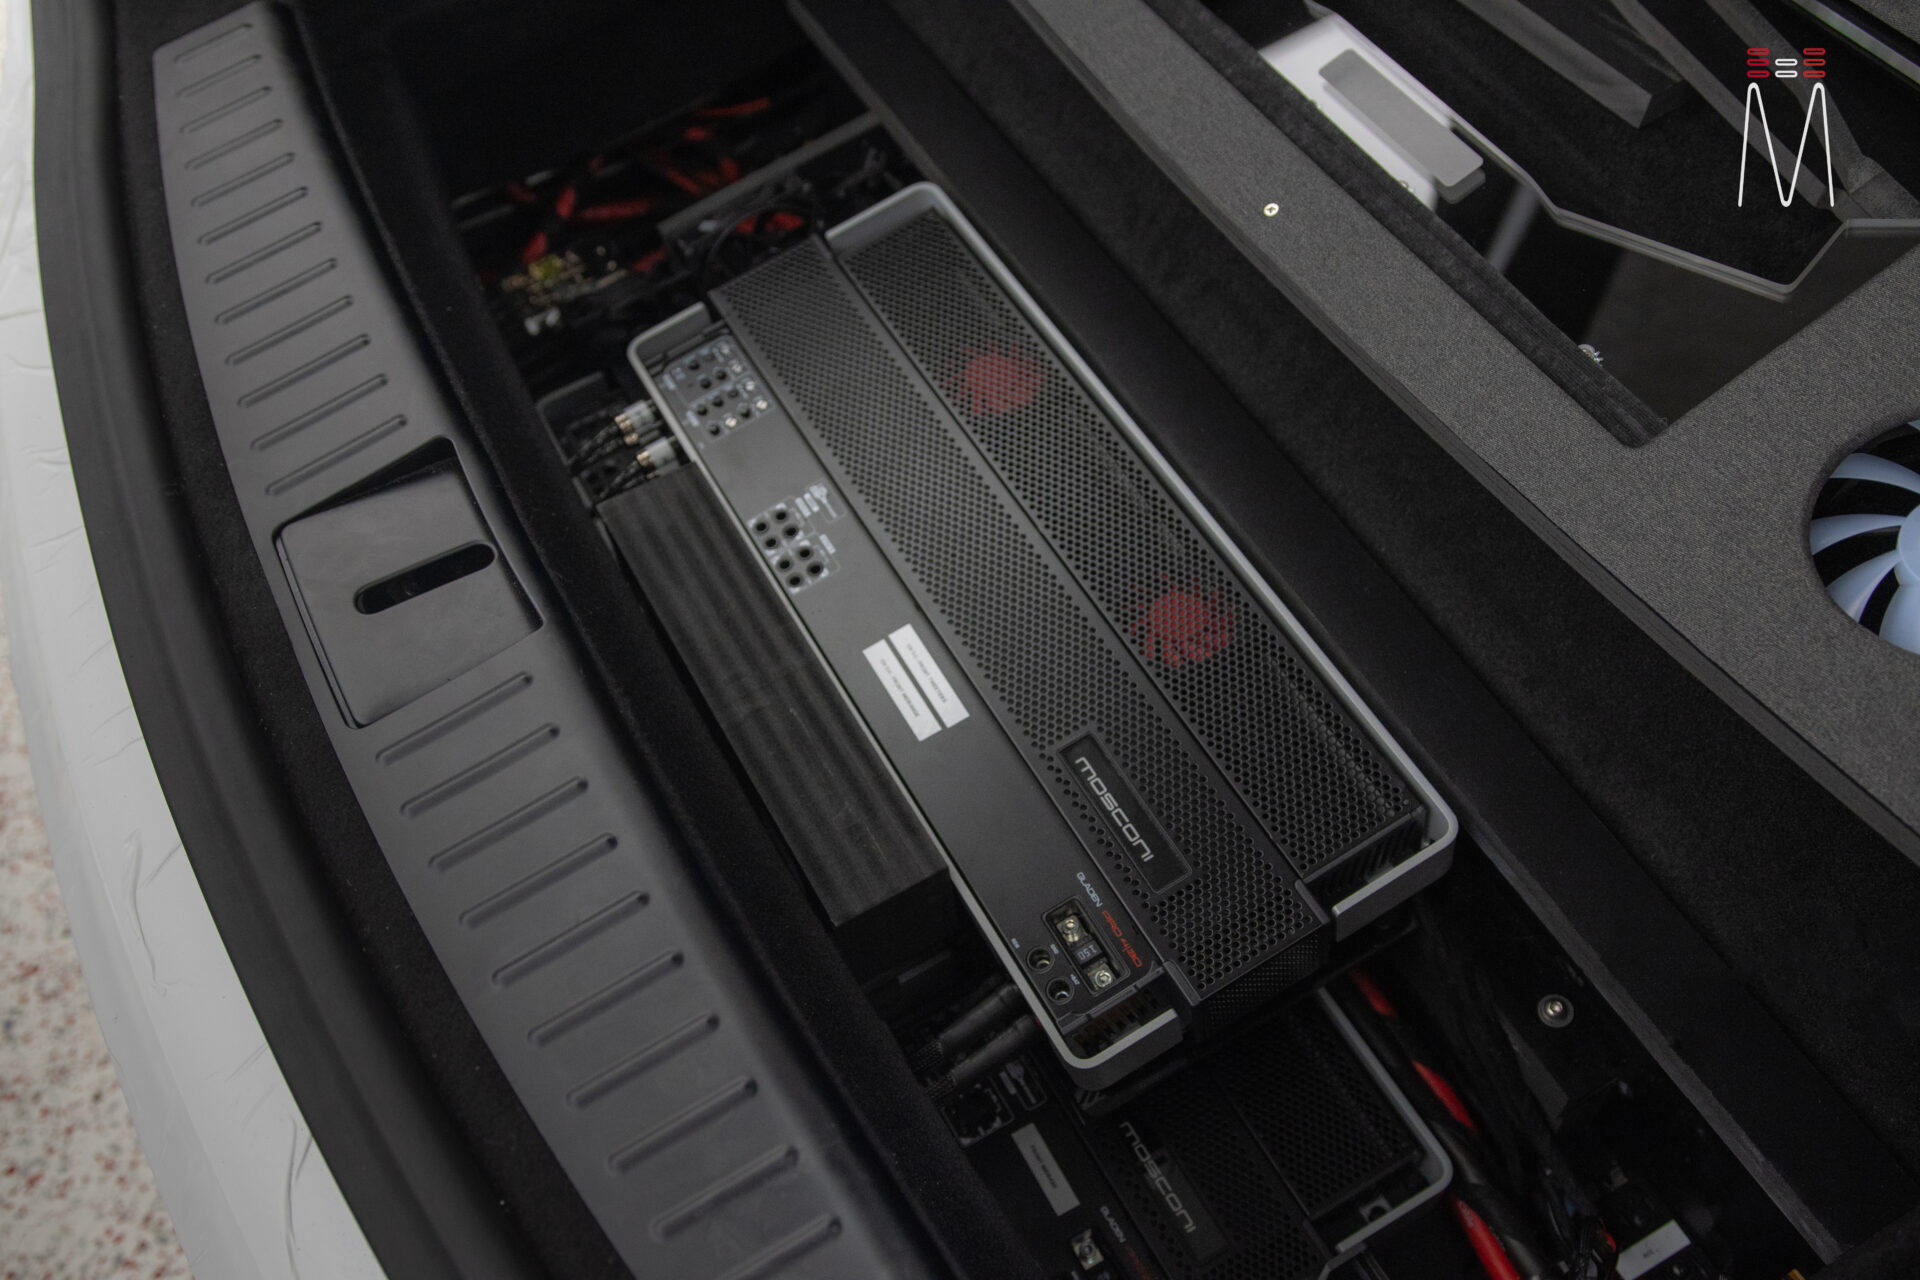
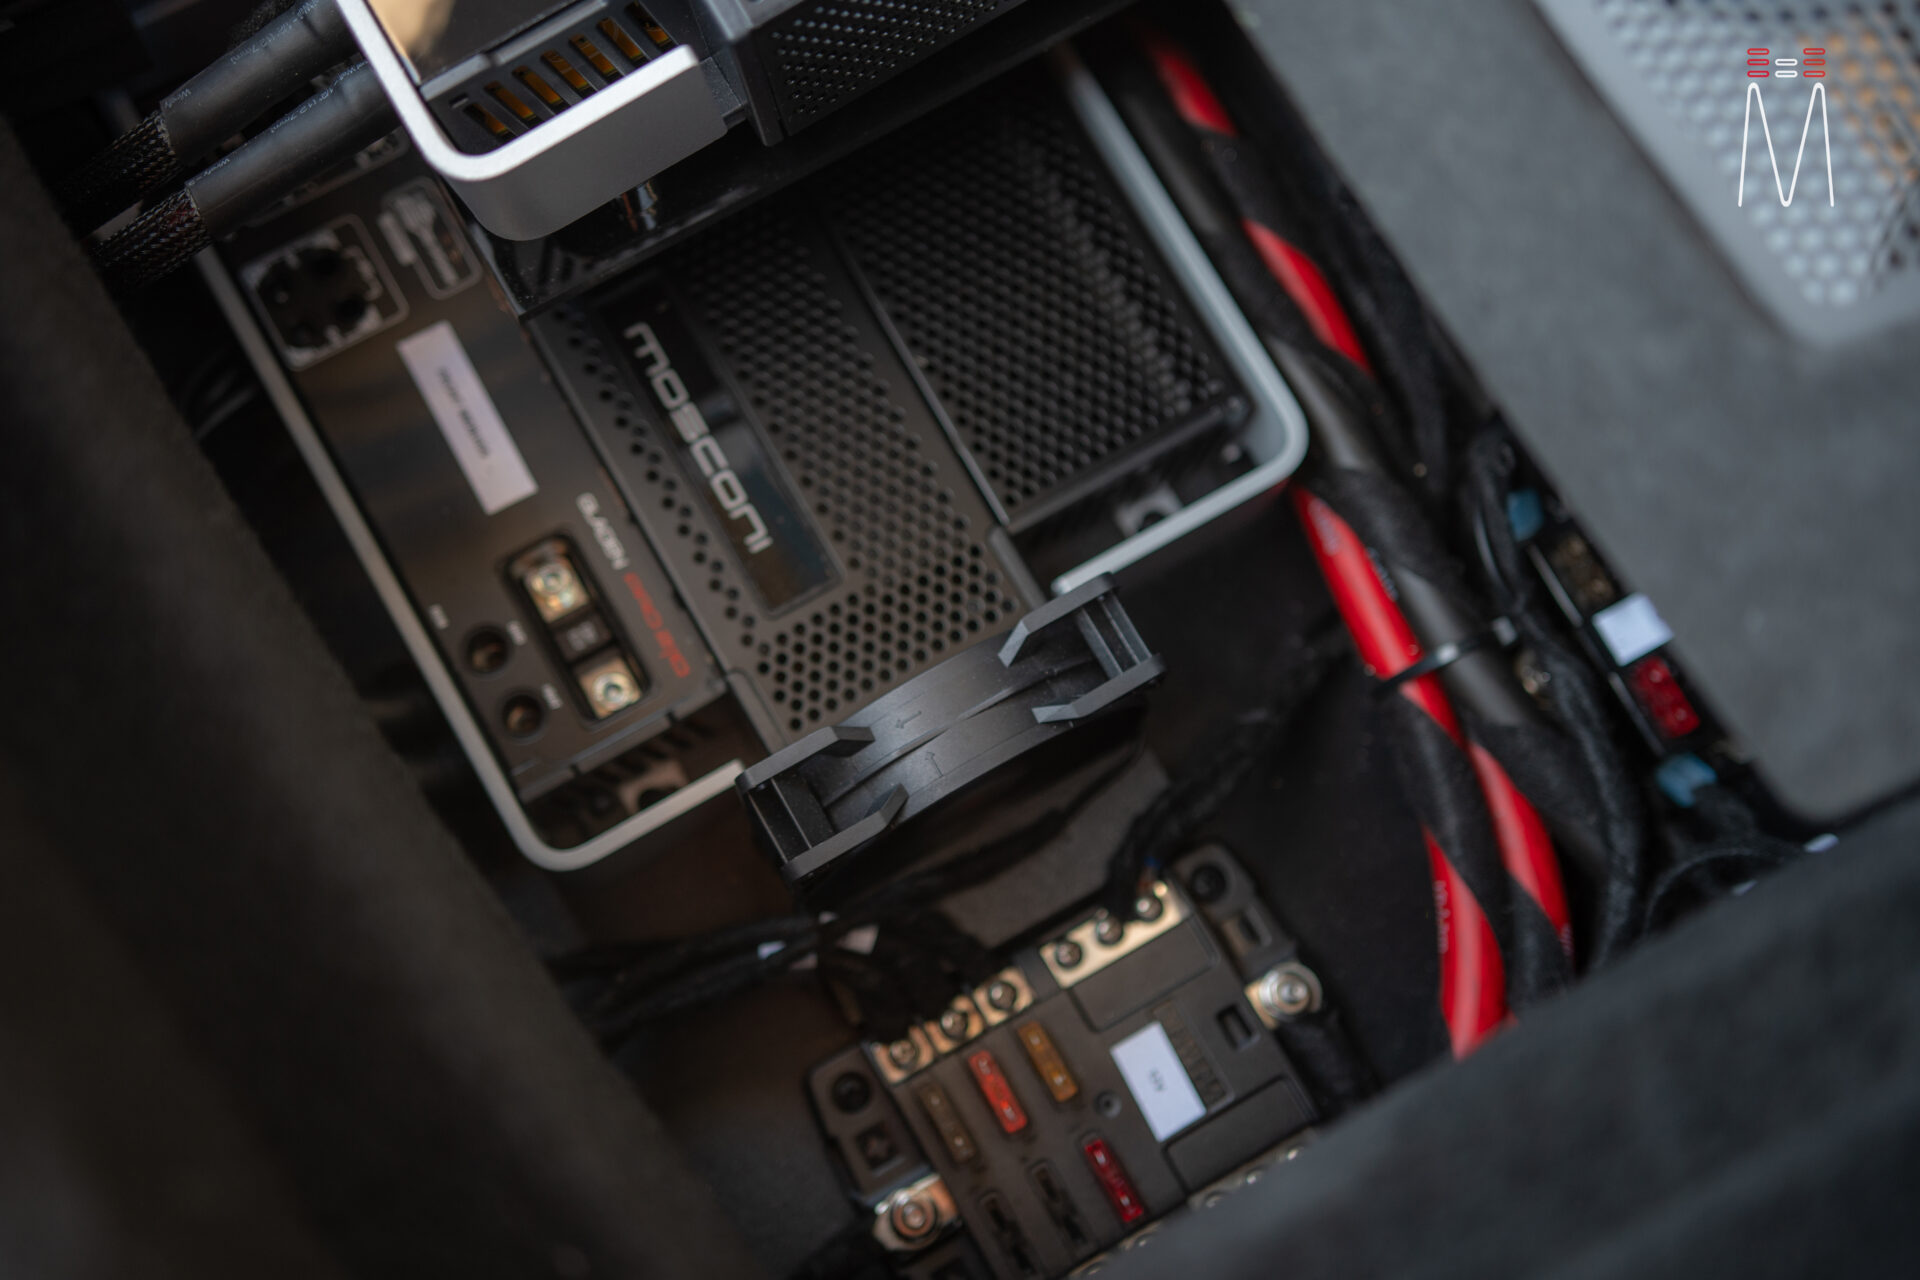
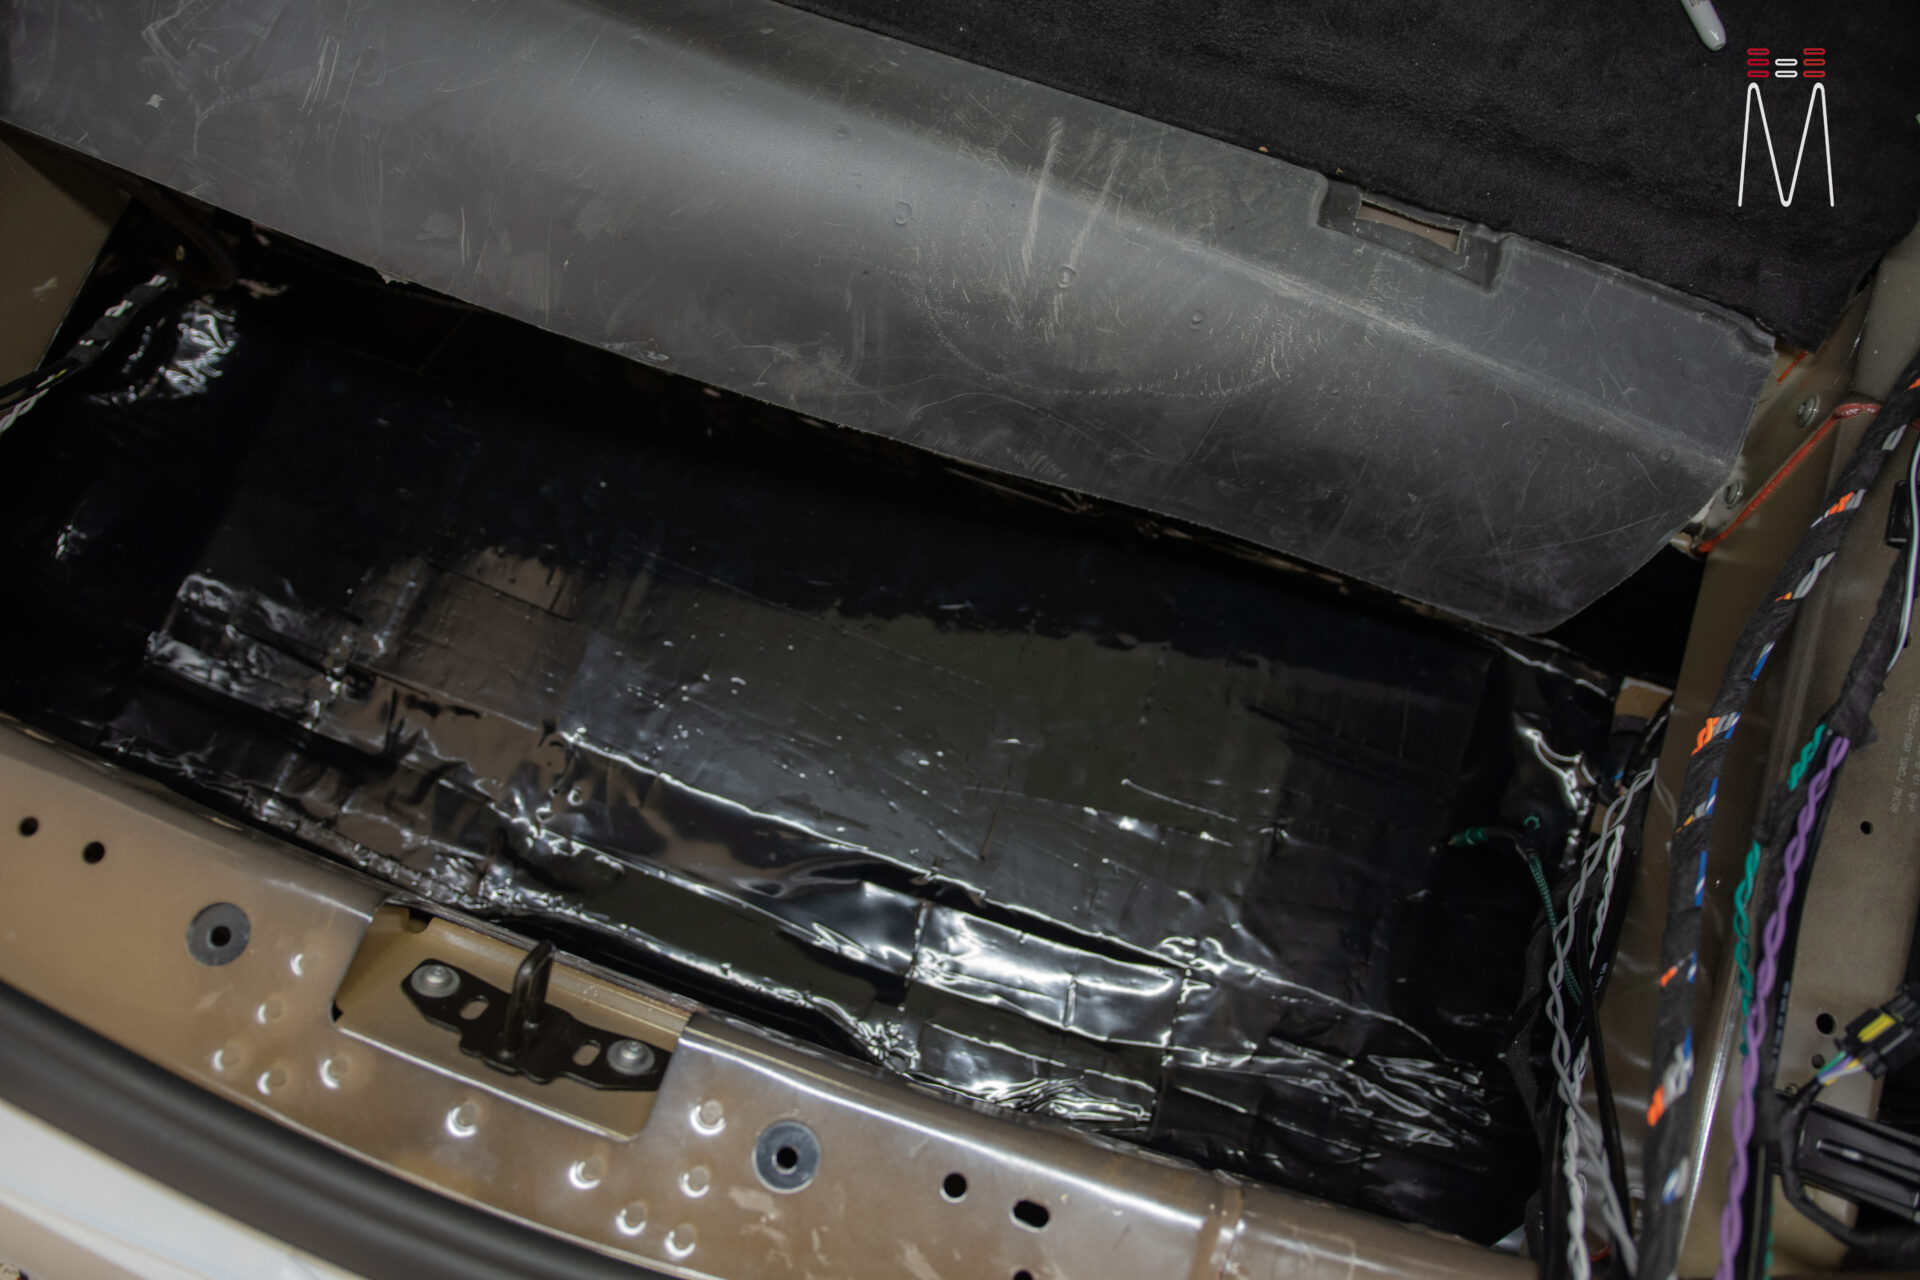
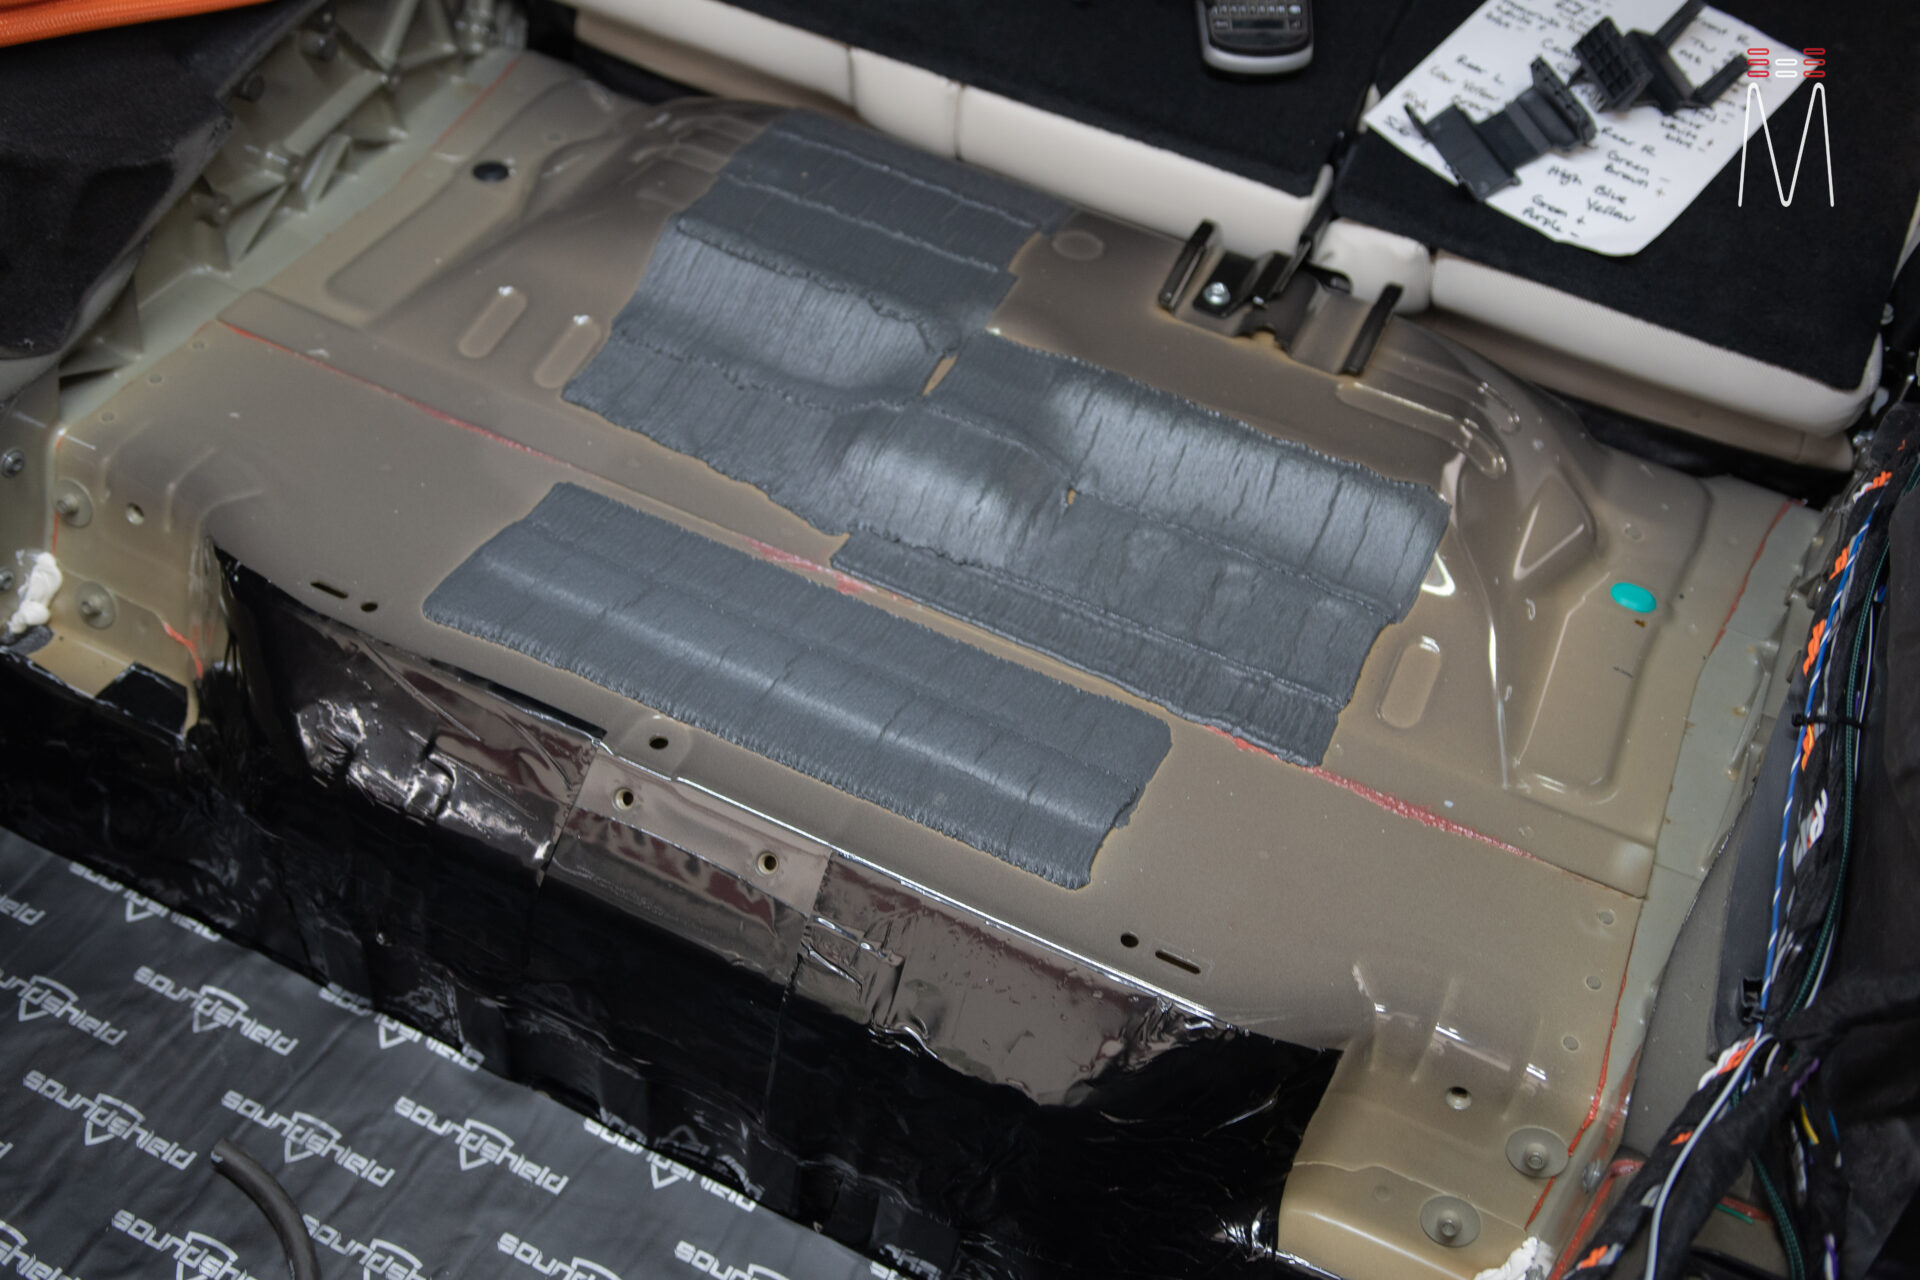
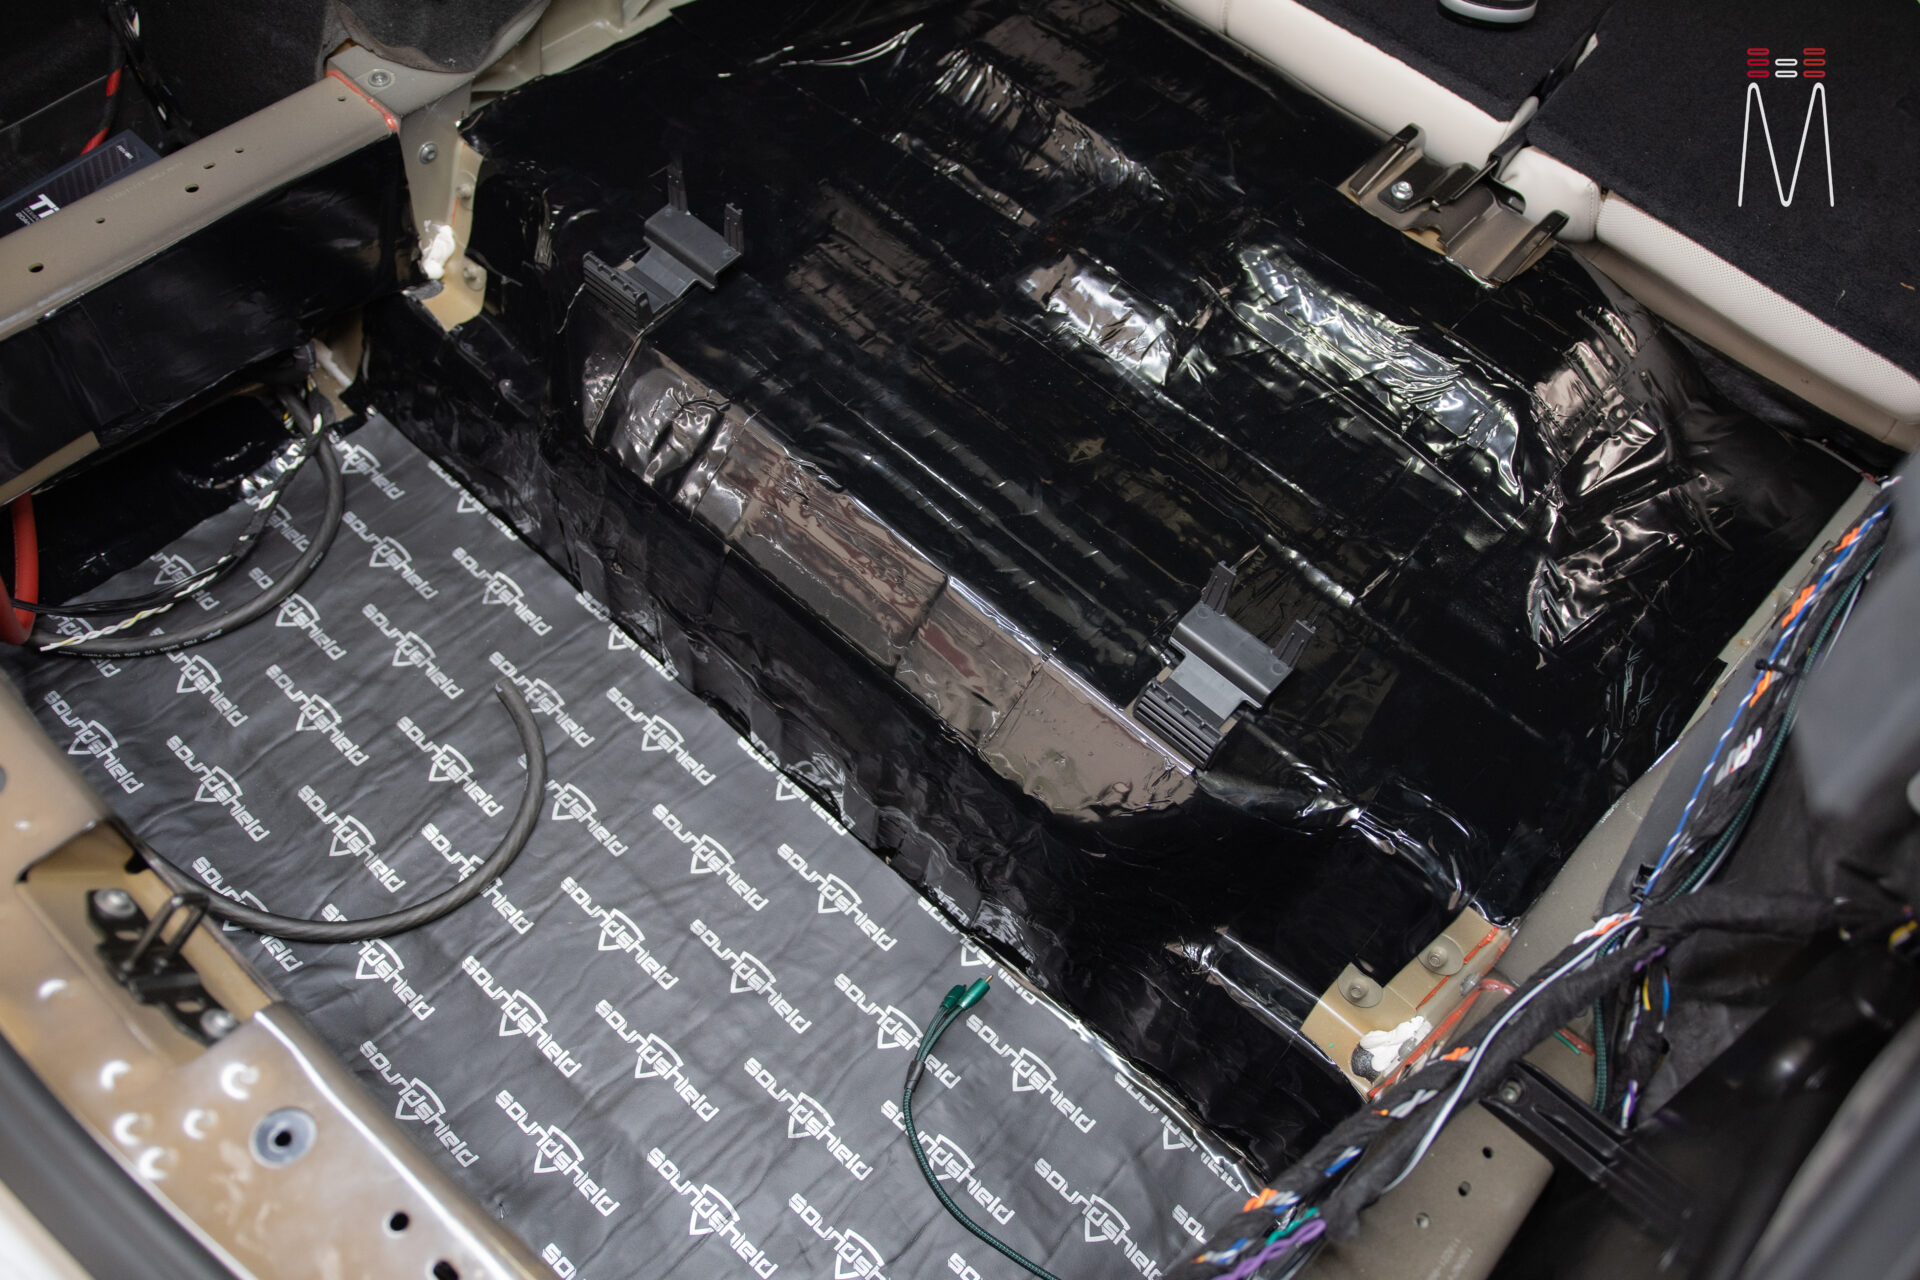
The rear speakers were left OEM, while fully treating the doors with Soundshield acoustic foam. Lastly, the interior was removed and the floor was treated with Soundshield. For amplifiers, we chose Mosconi Pro. We used a Mosconi Pro 4/30 (Class A) to power the front midrange and tweeter, Mosconi Pro 2/10 to the front 8” midbass, Mosconi Atamo2 to power the rears and two Mosconi Pro 1/10’s to power the dual Utopia 10” M subwoofers.
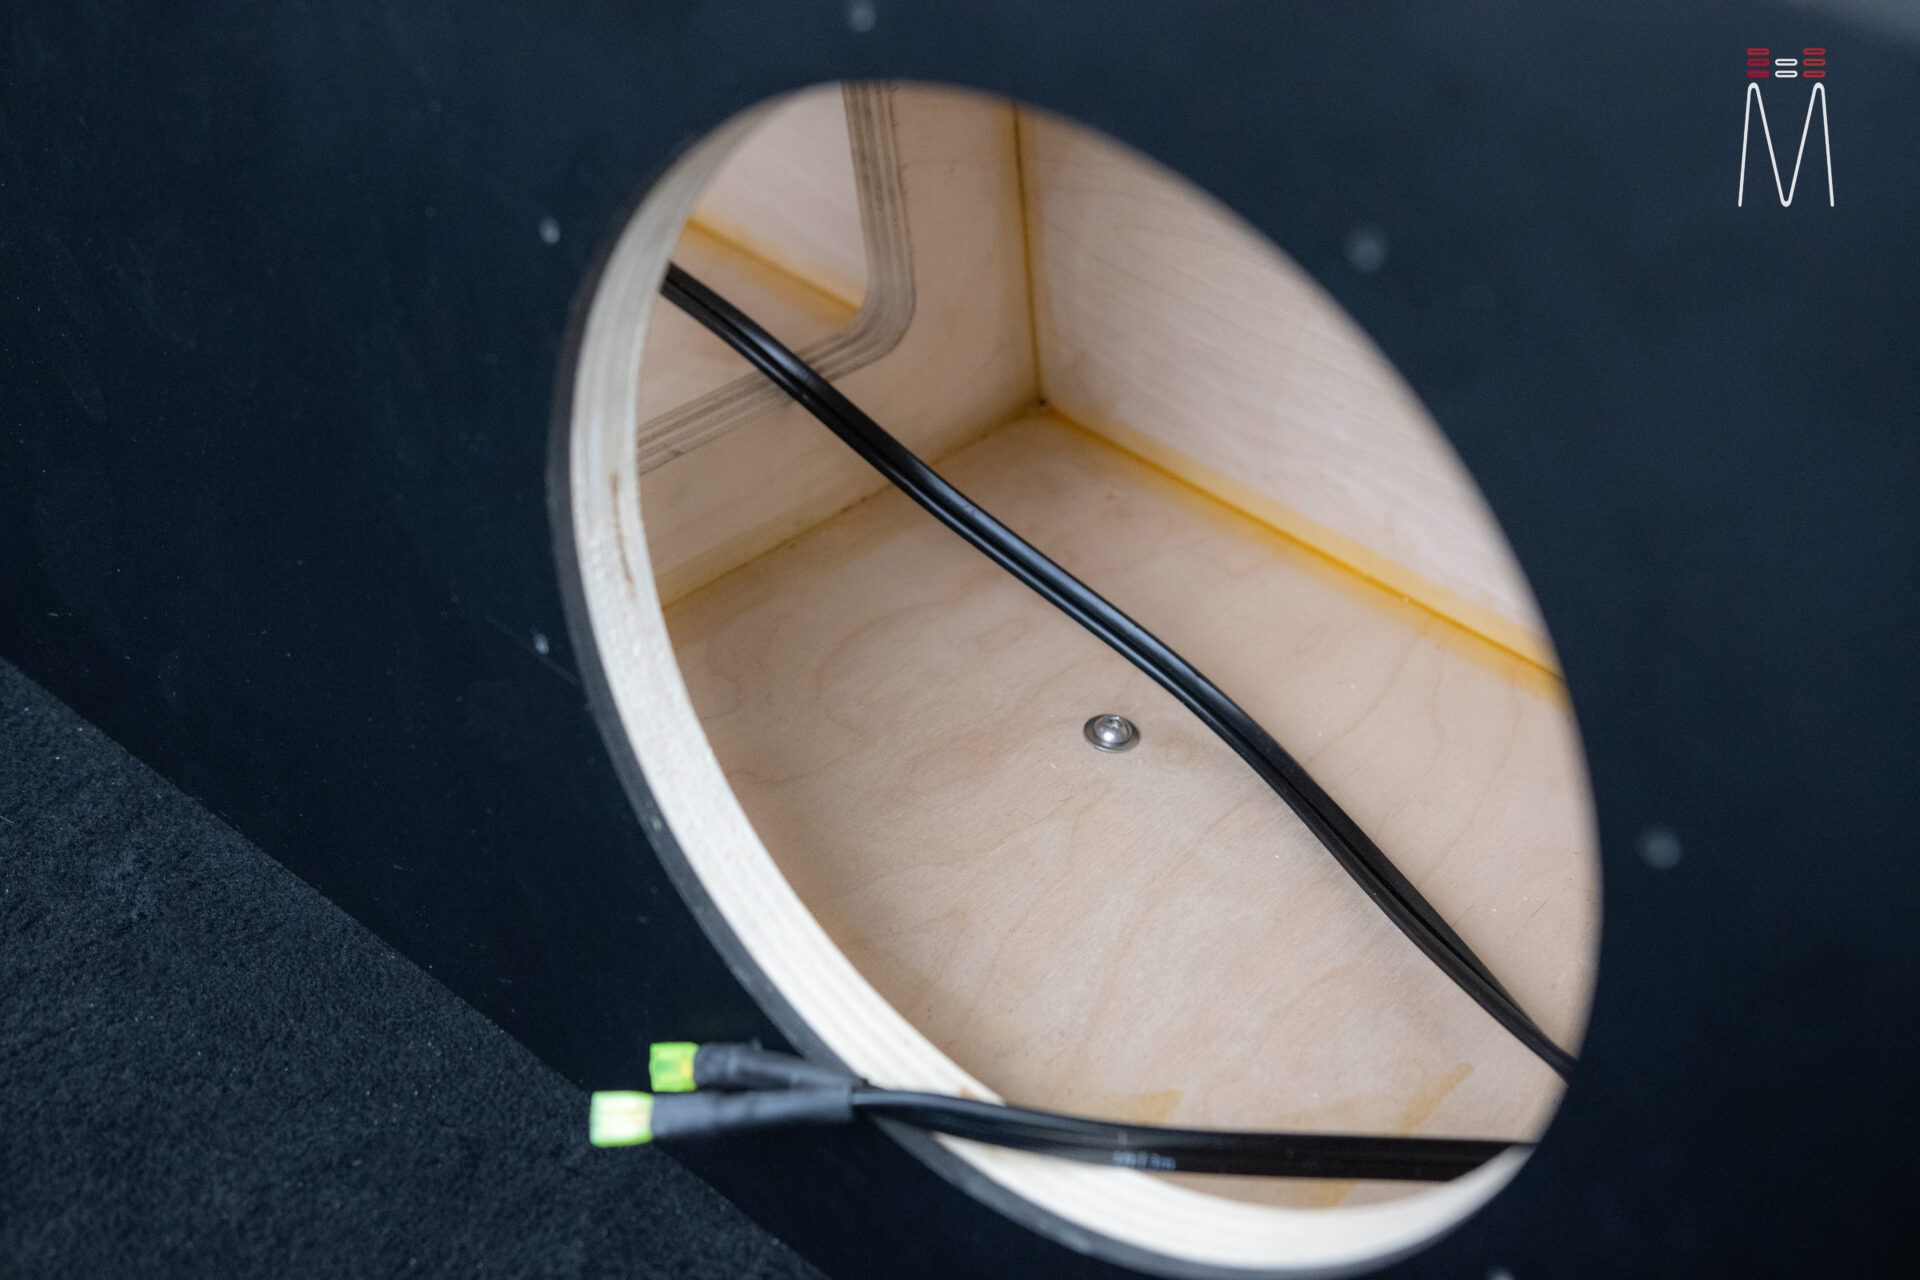
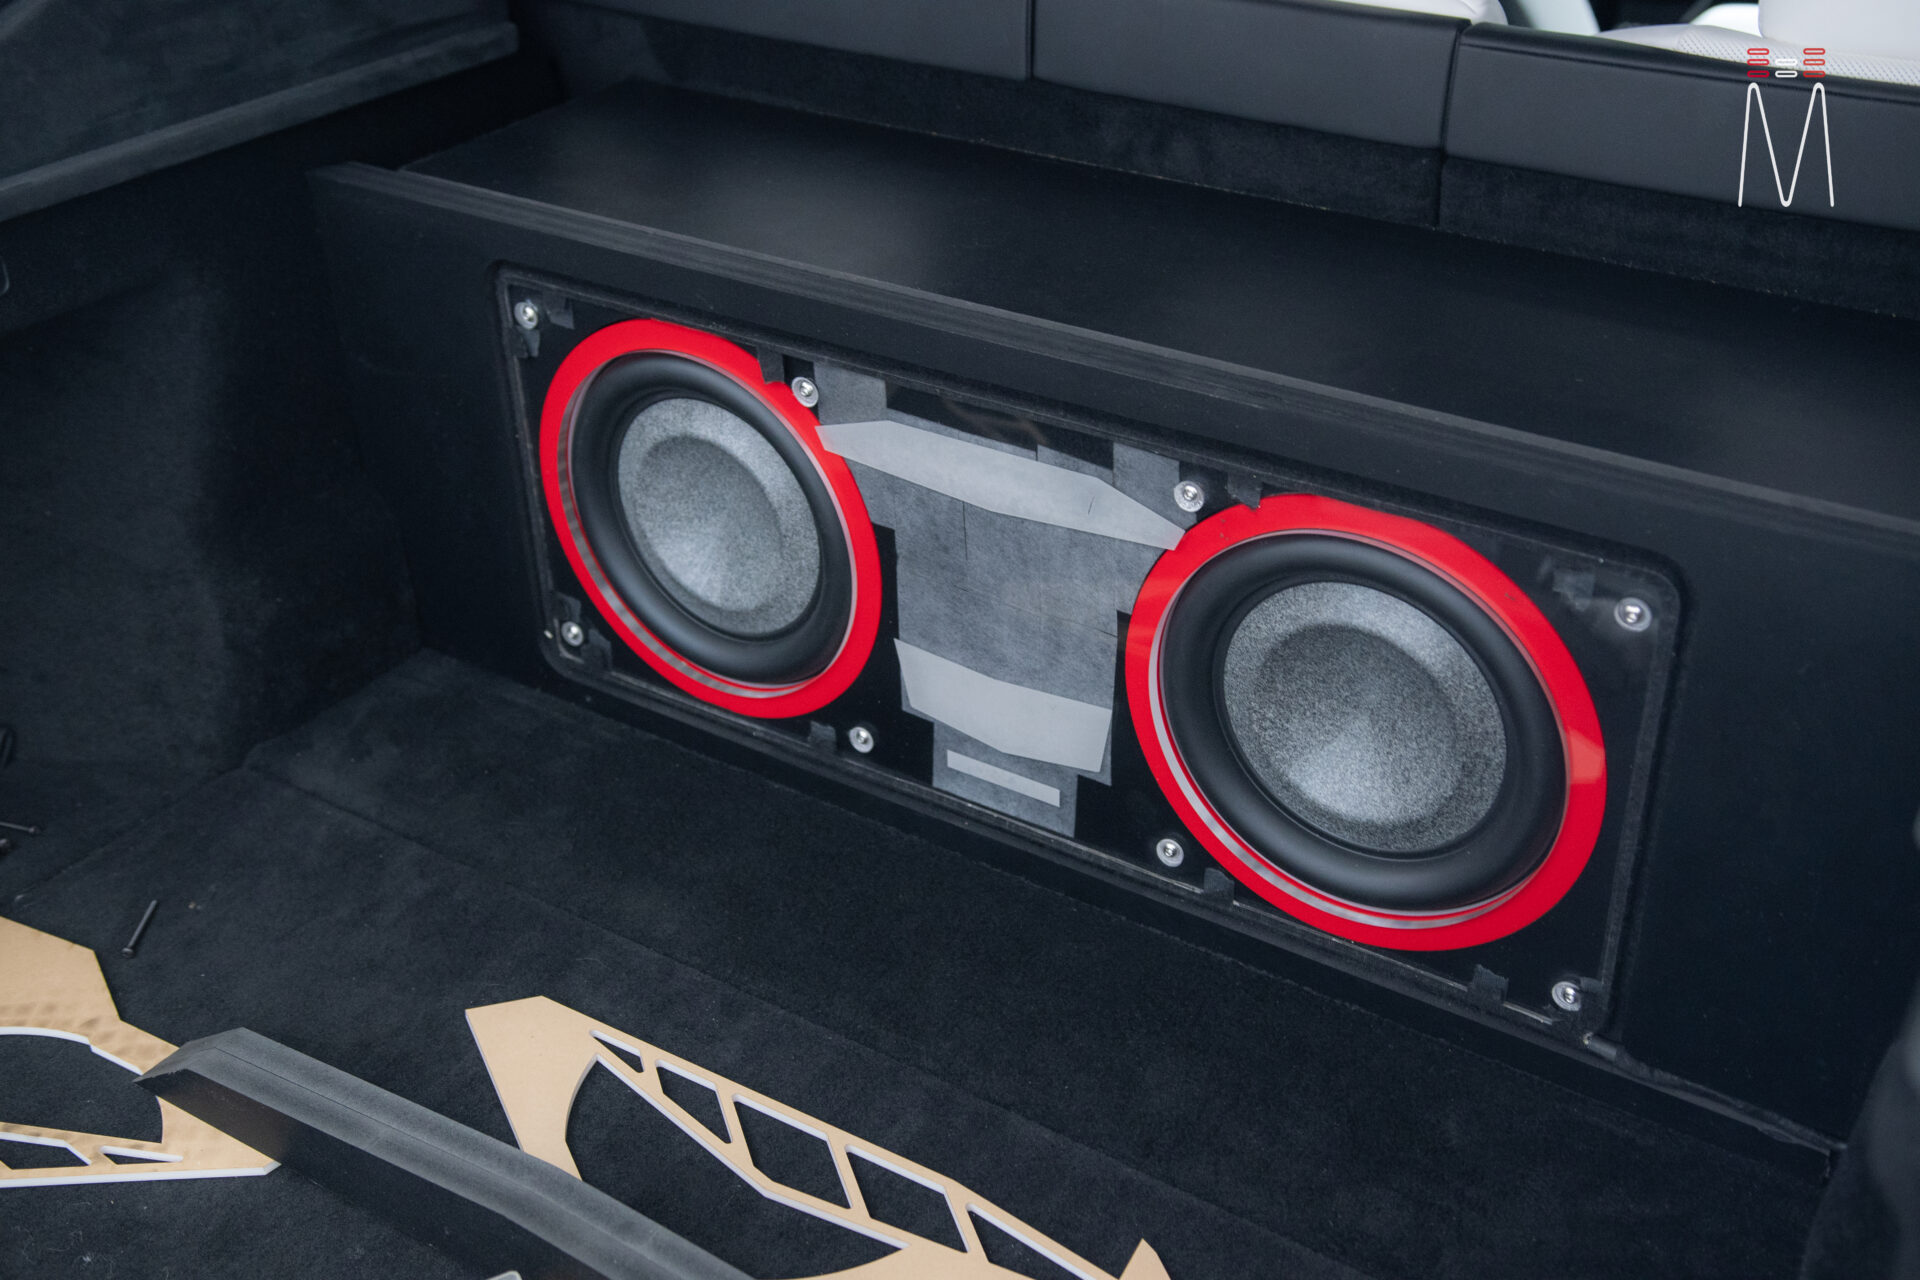
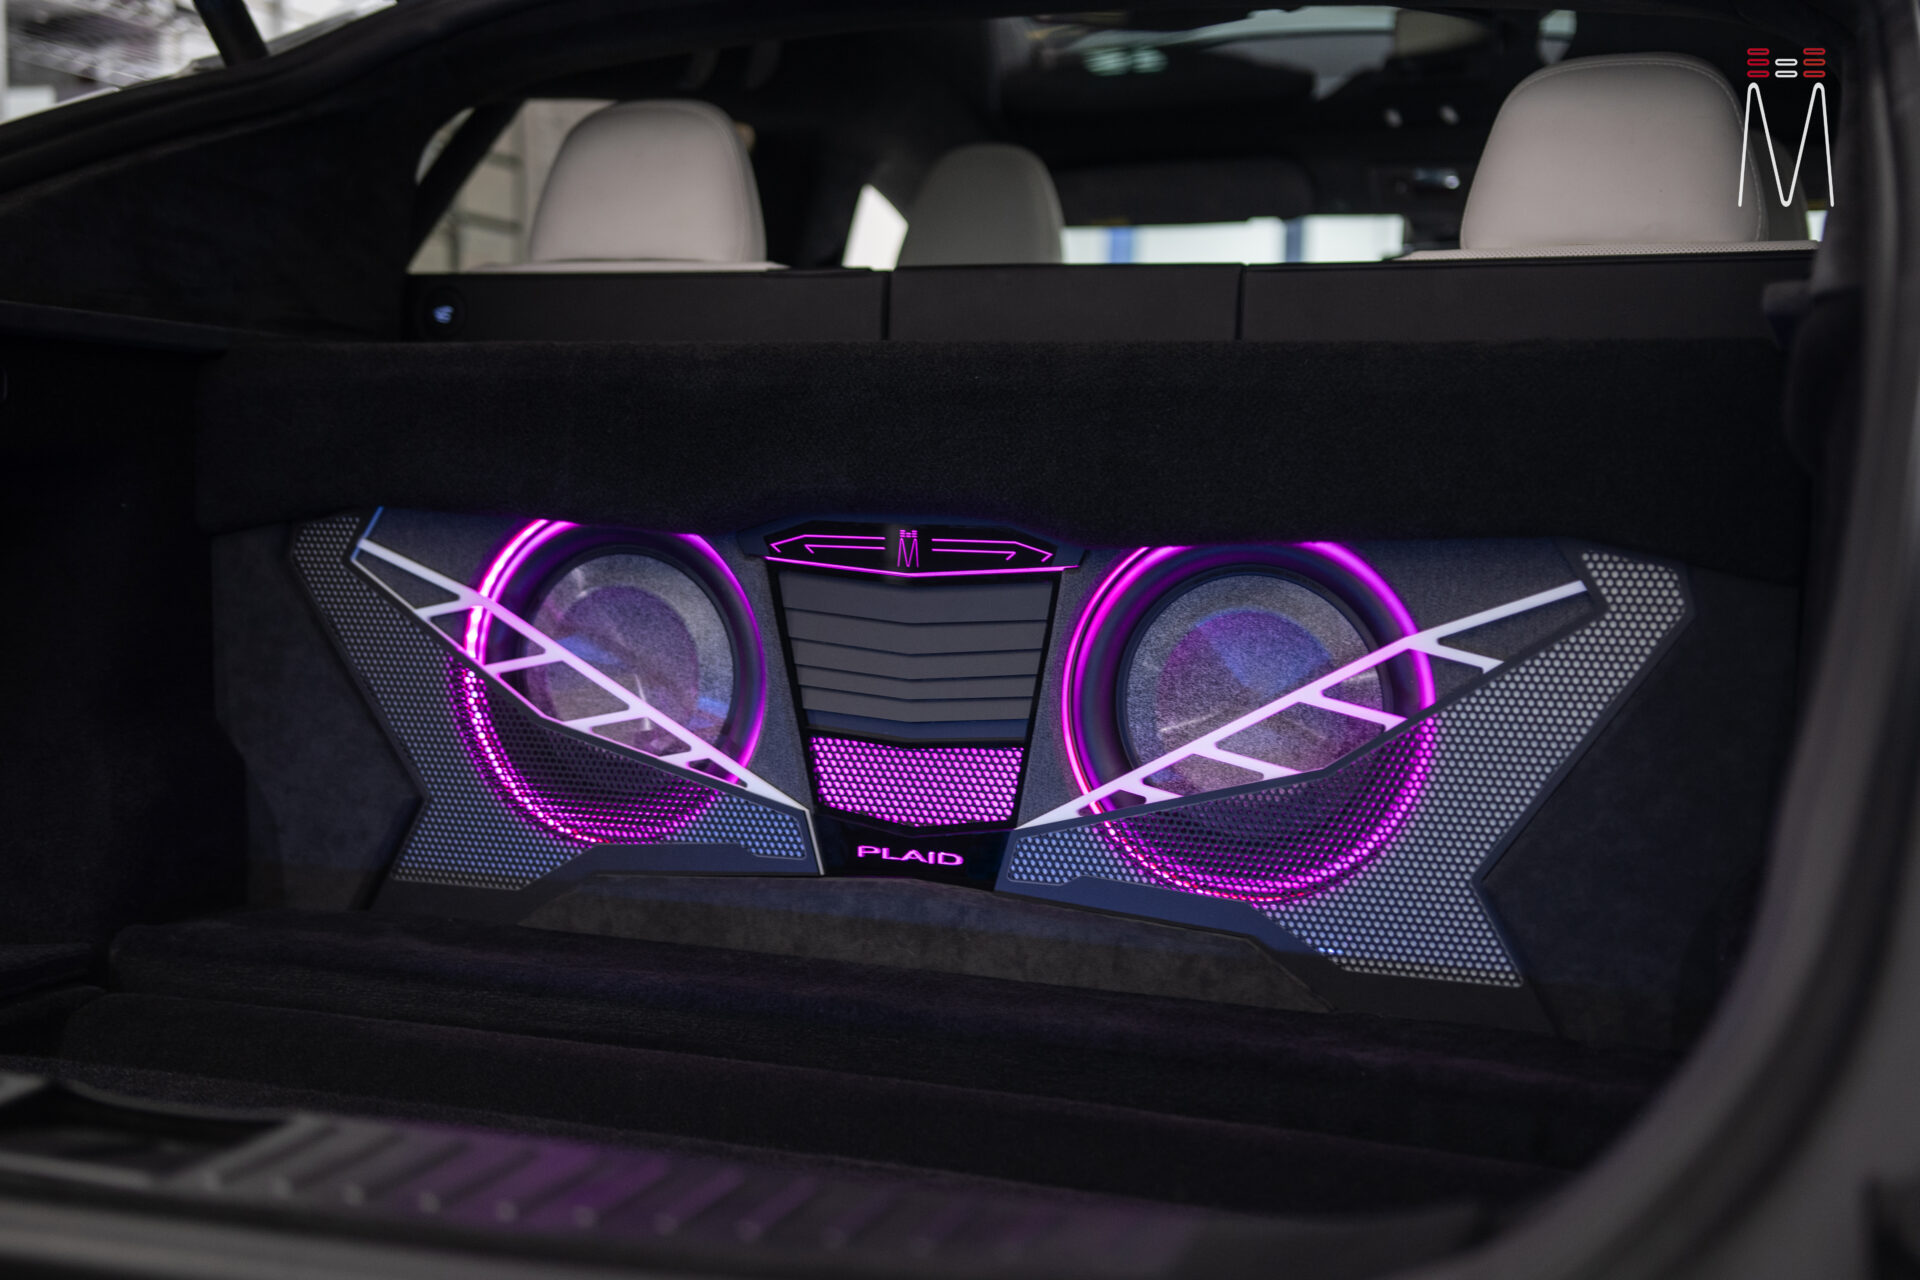
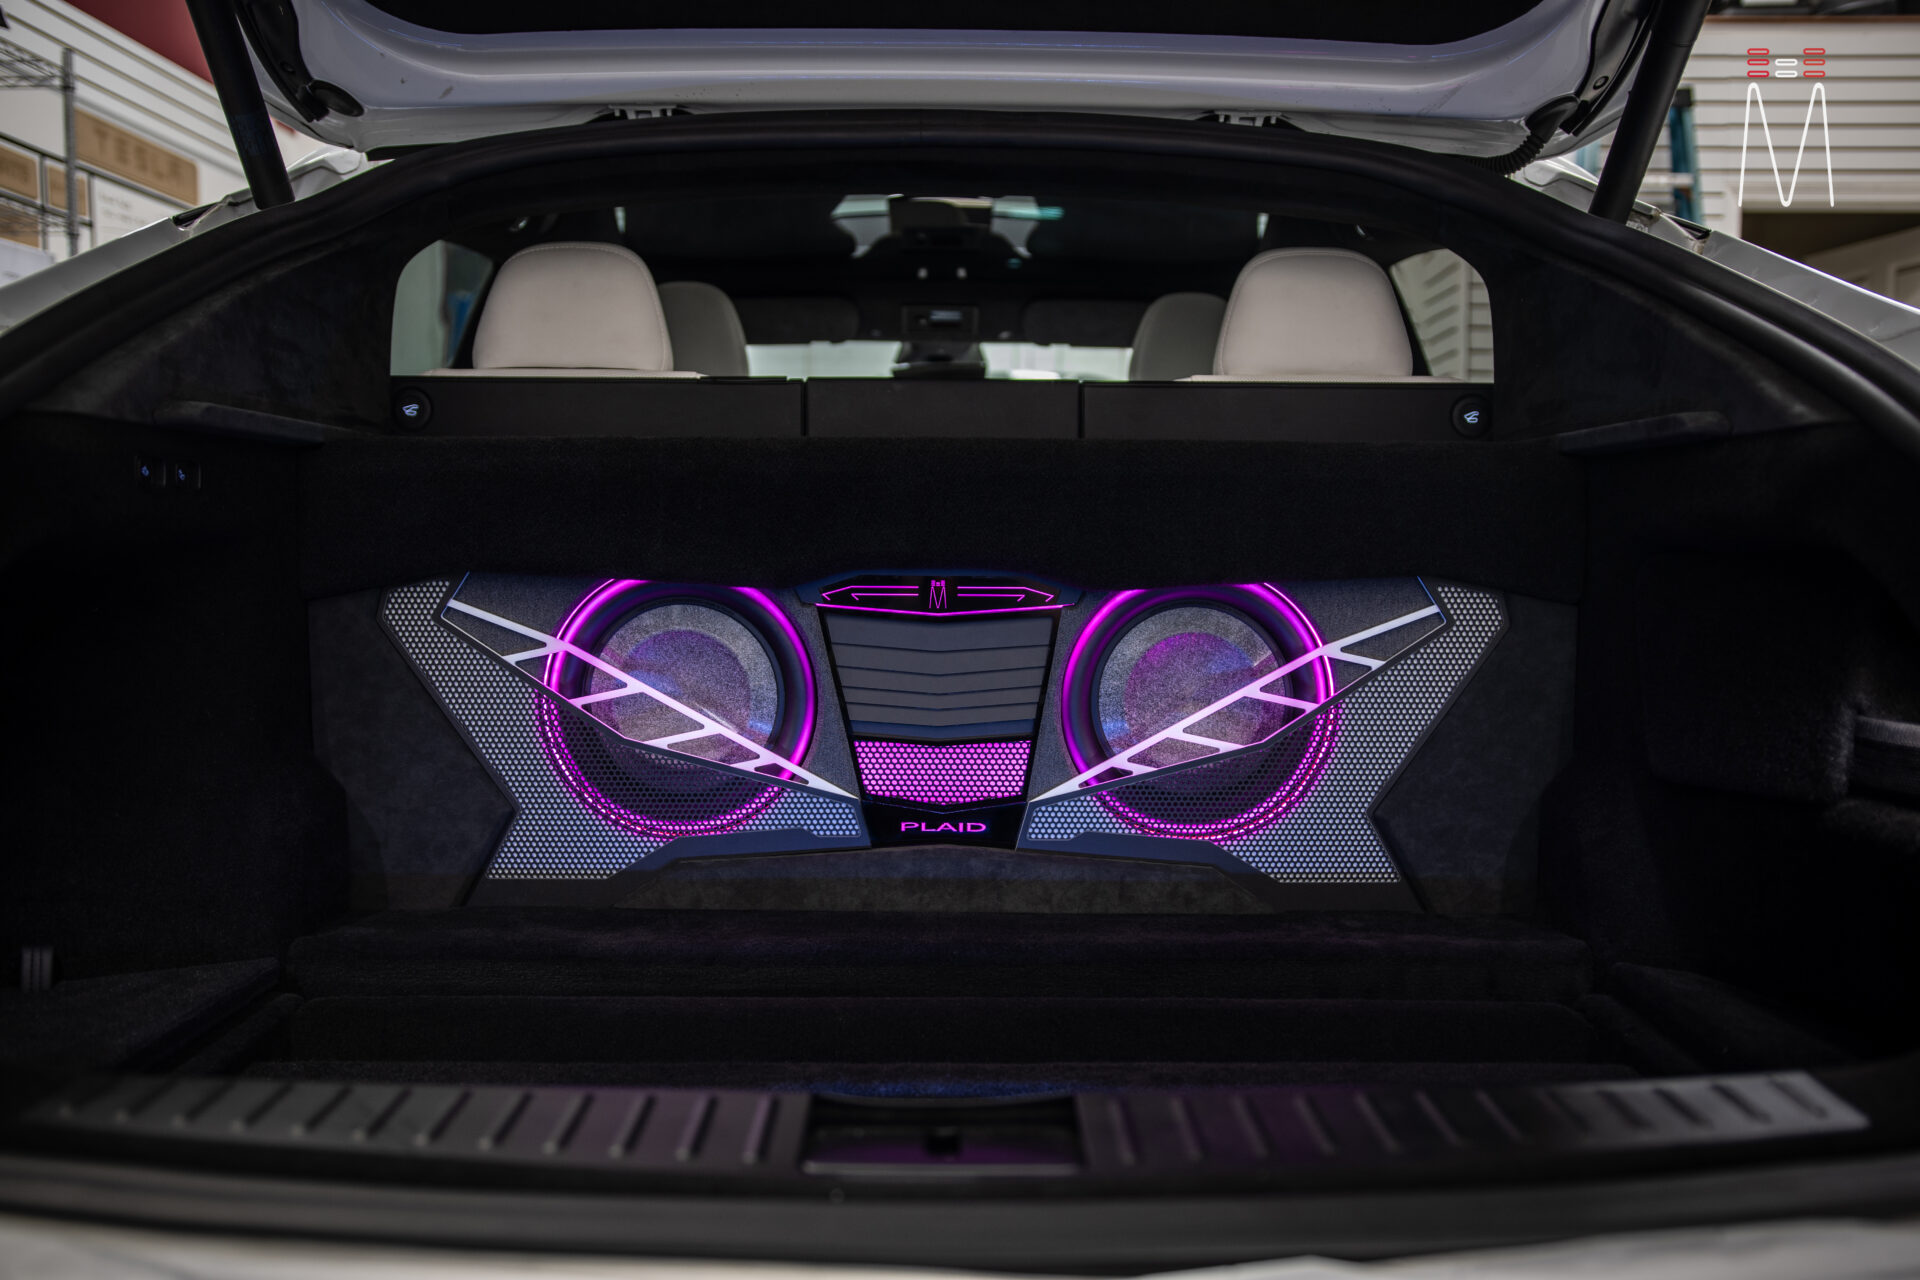
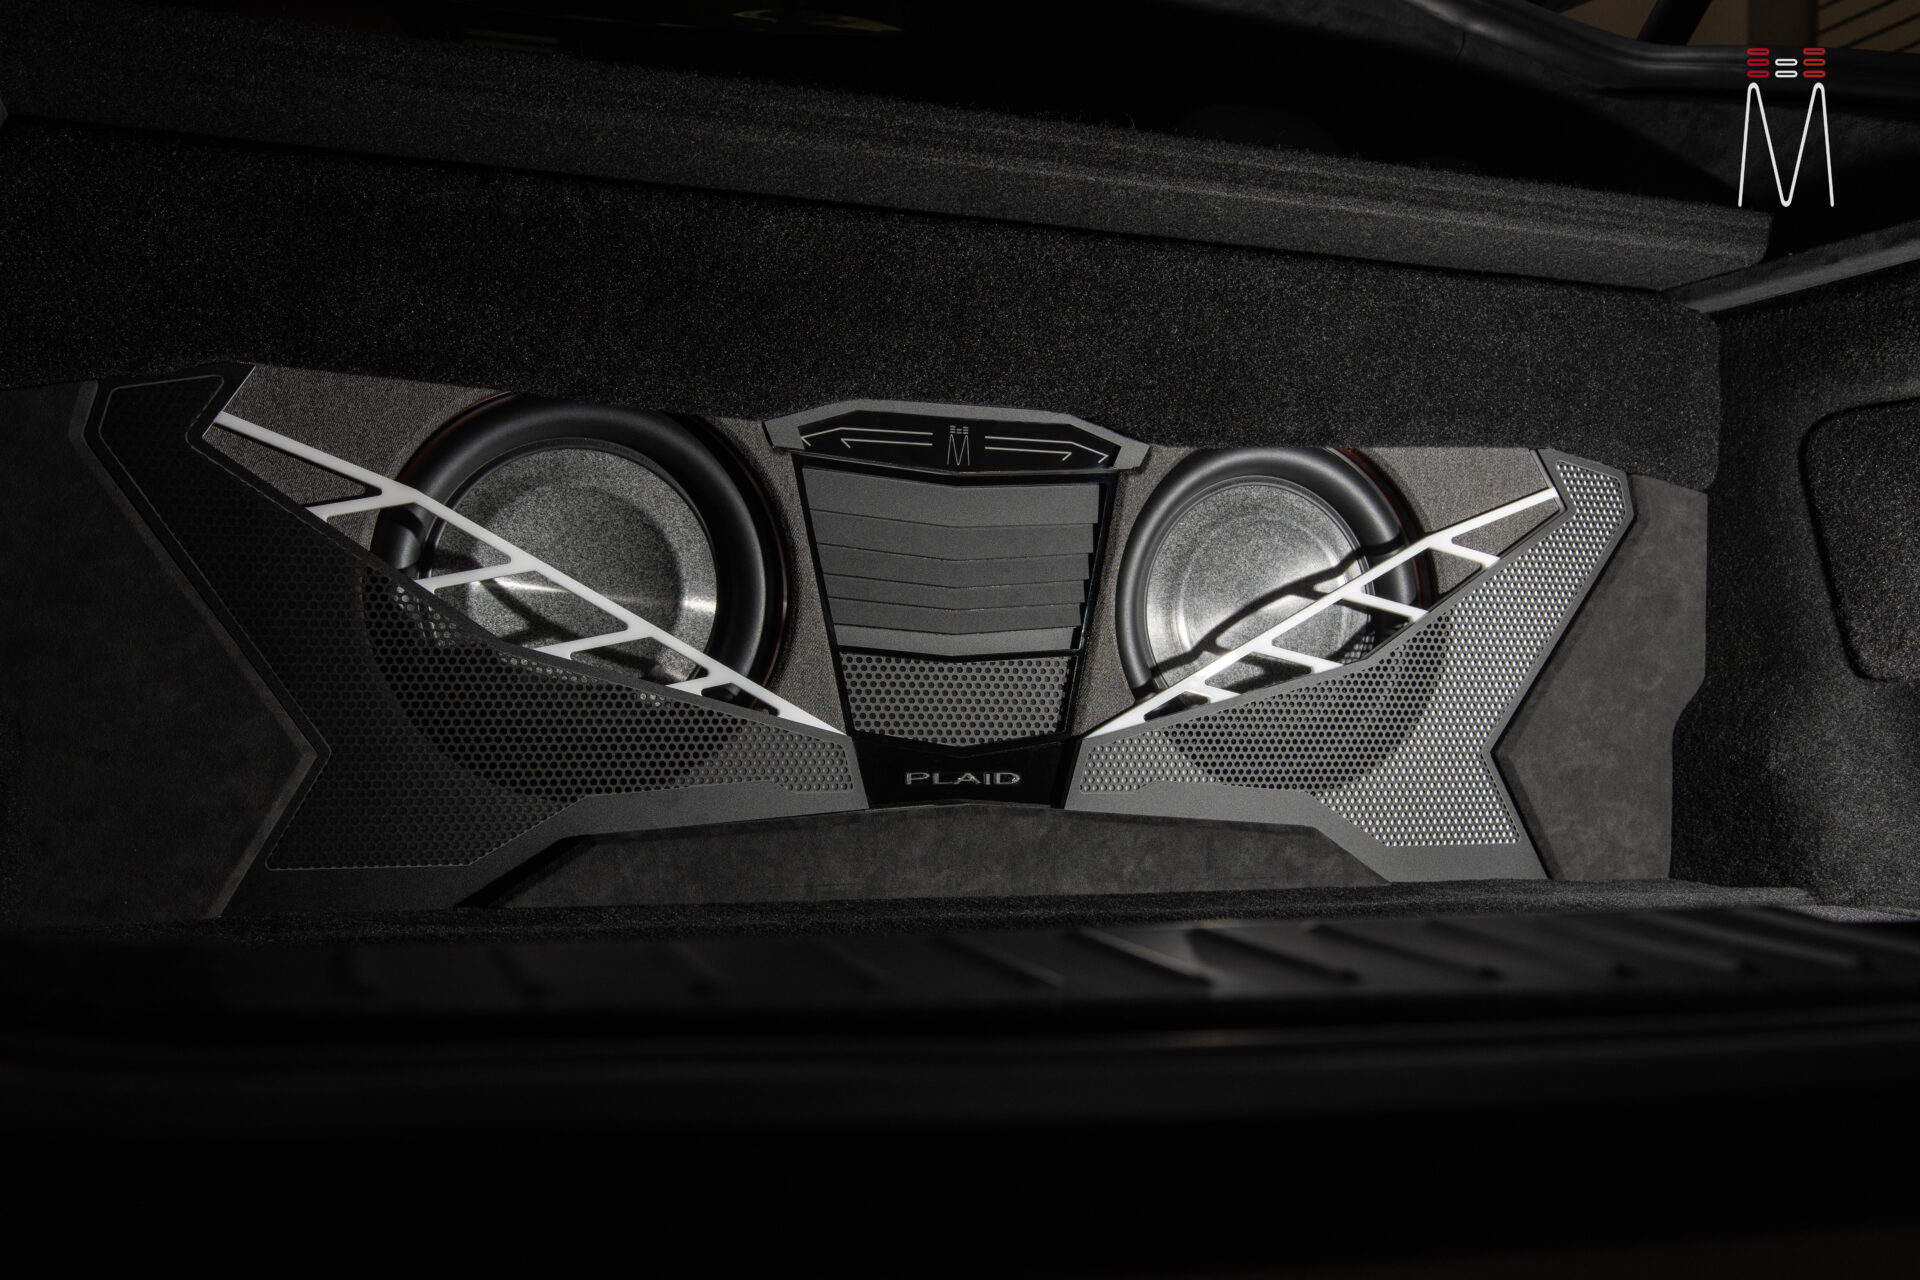
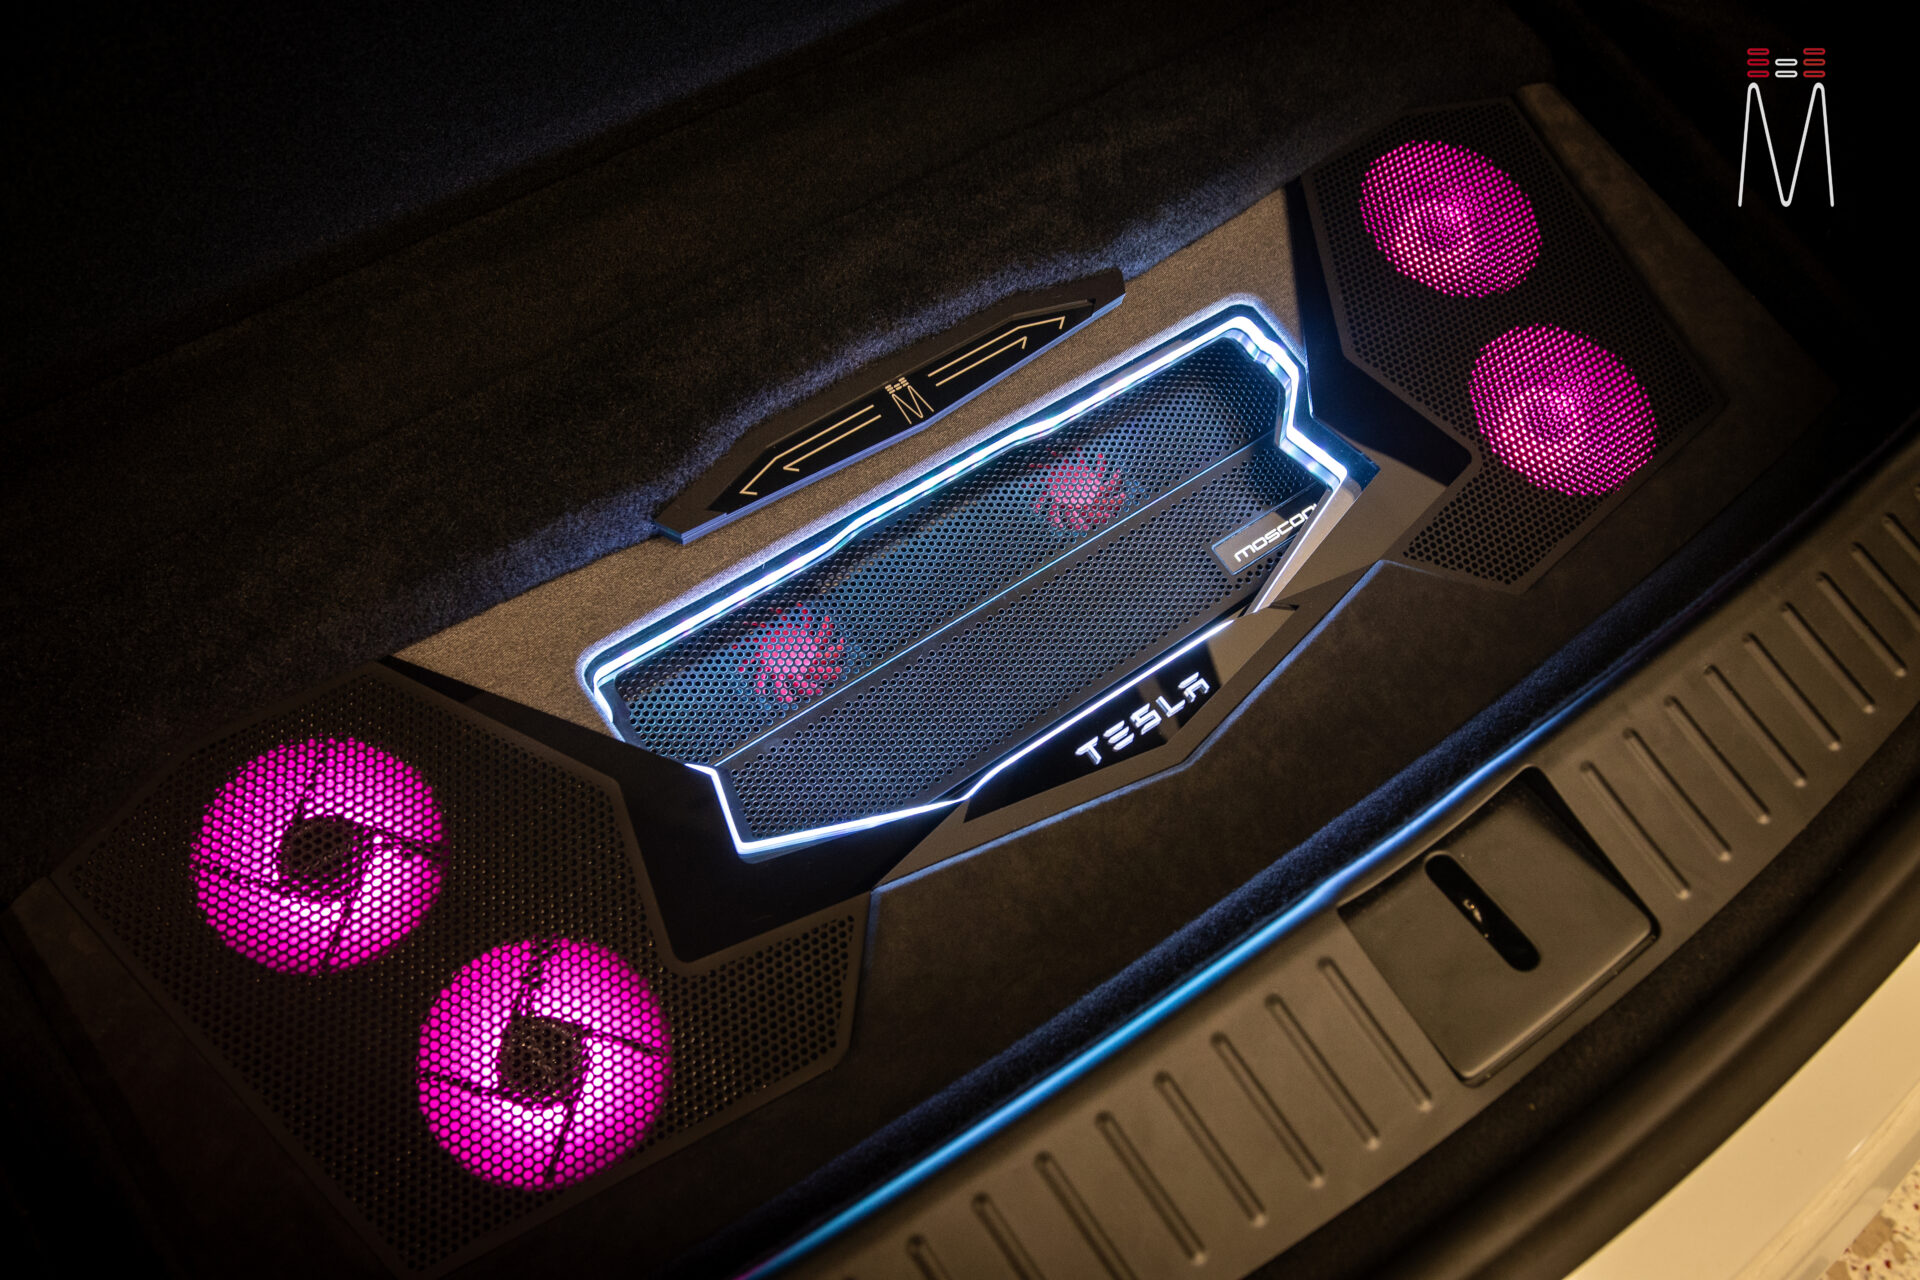
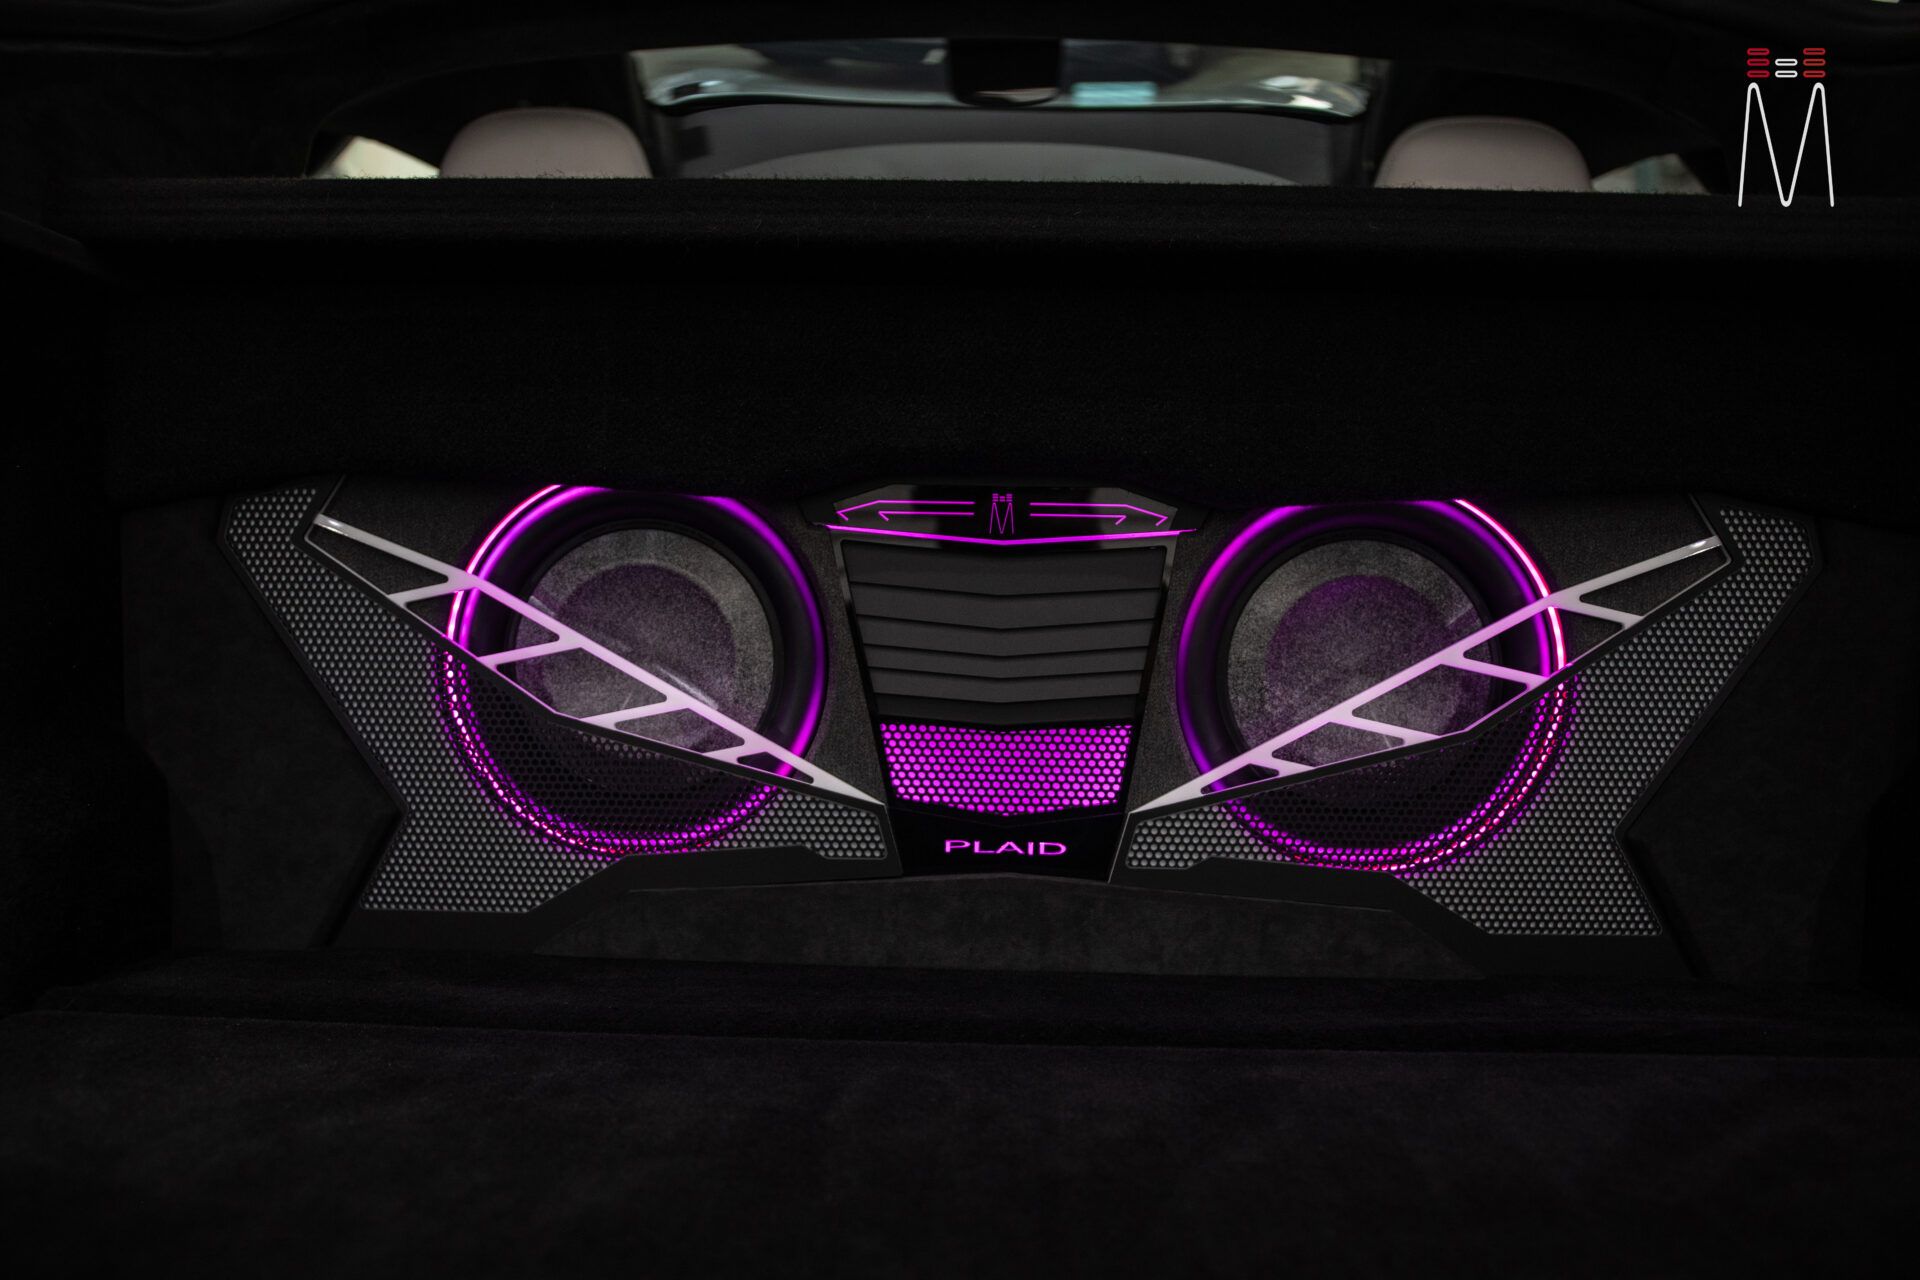
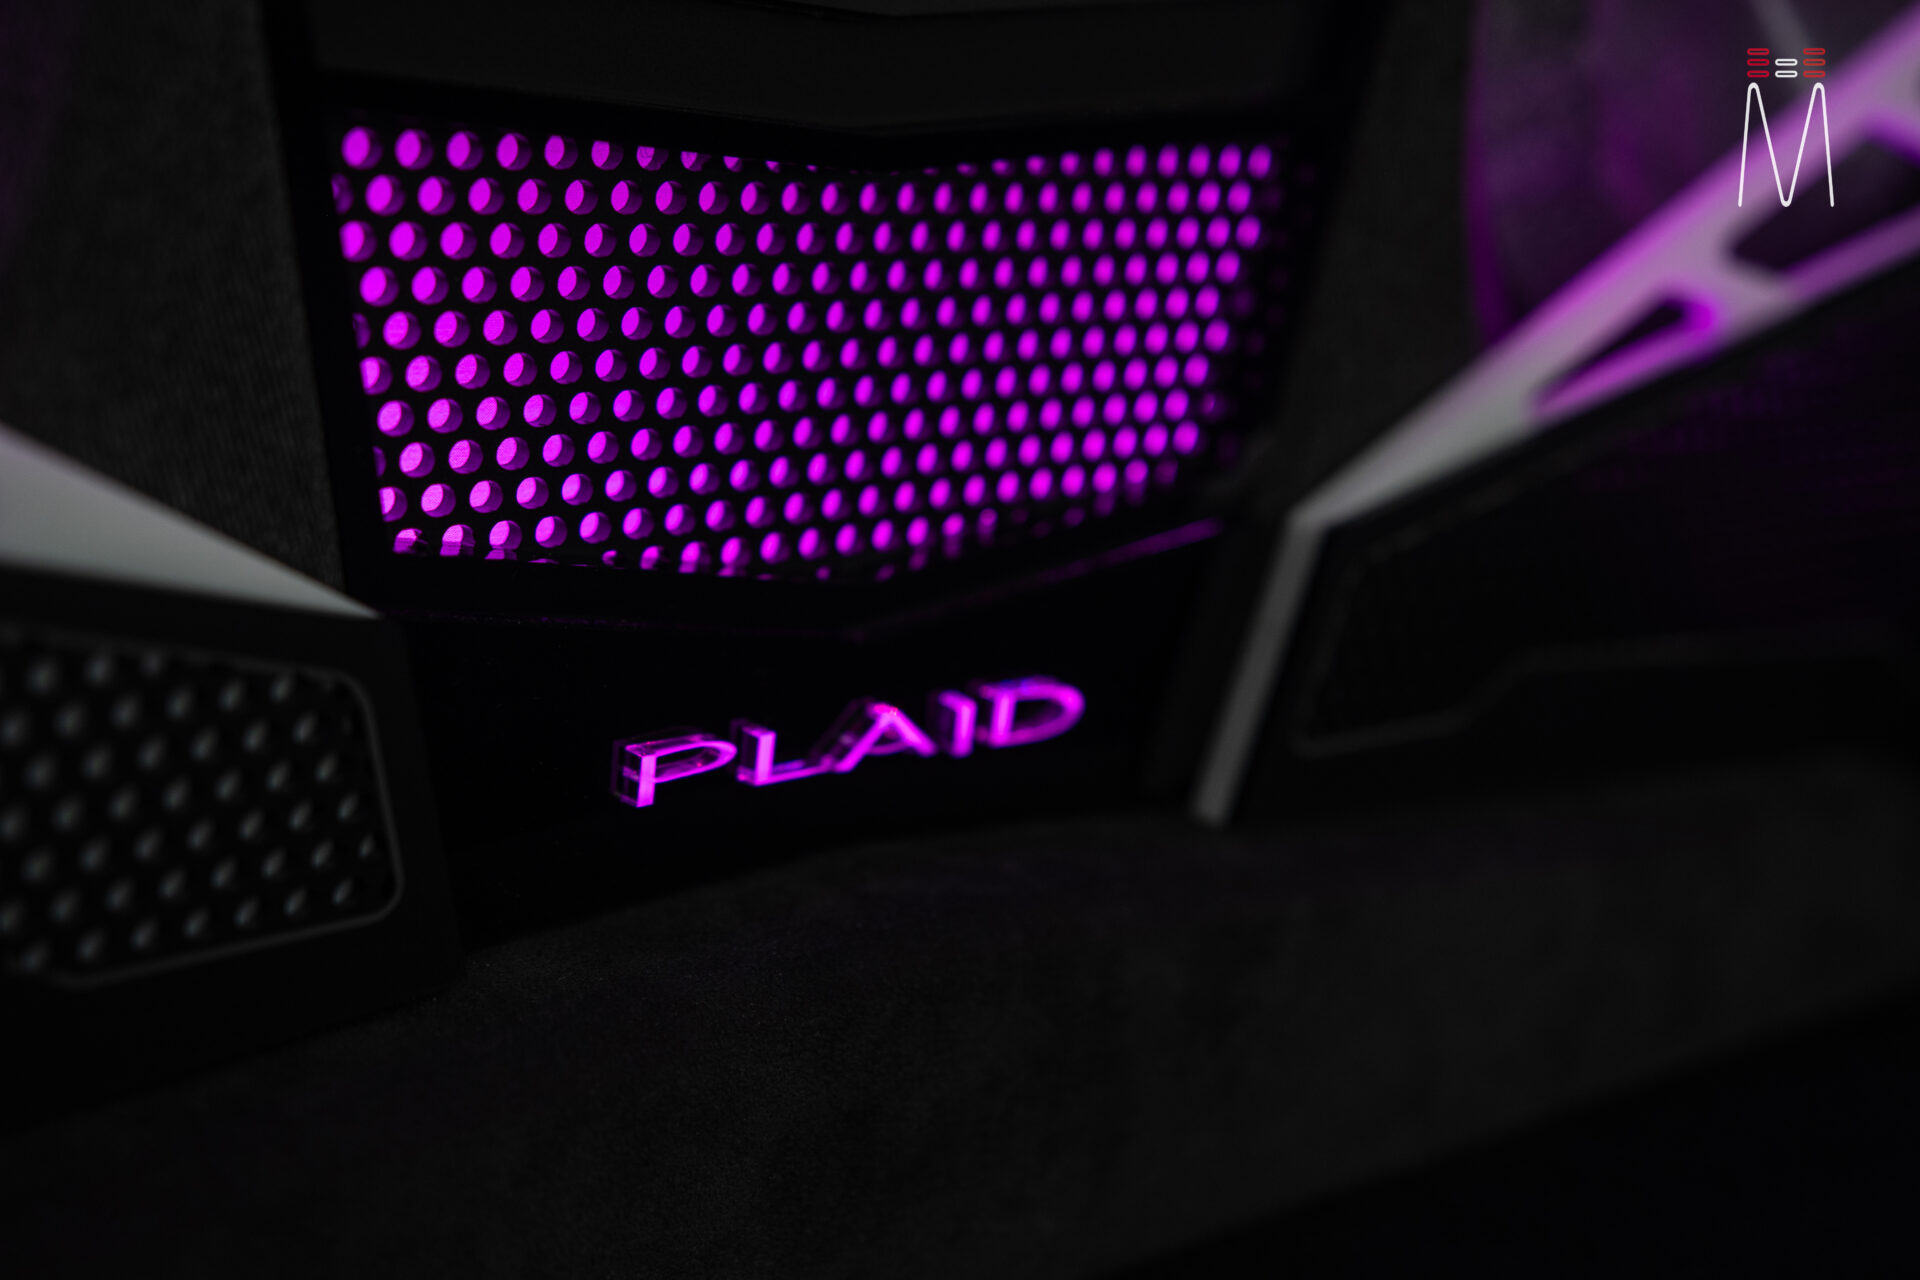
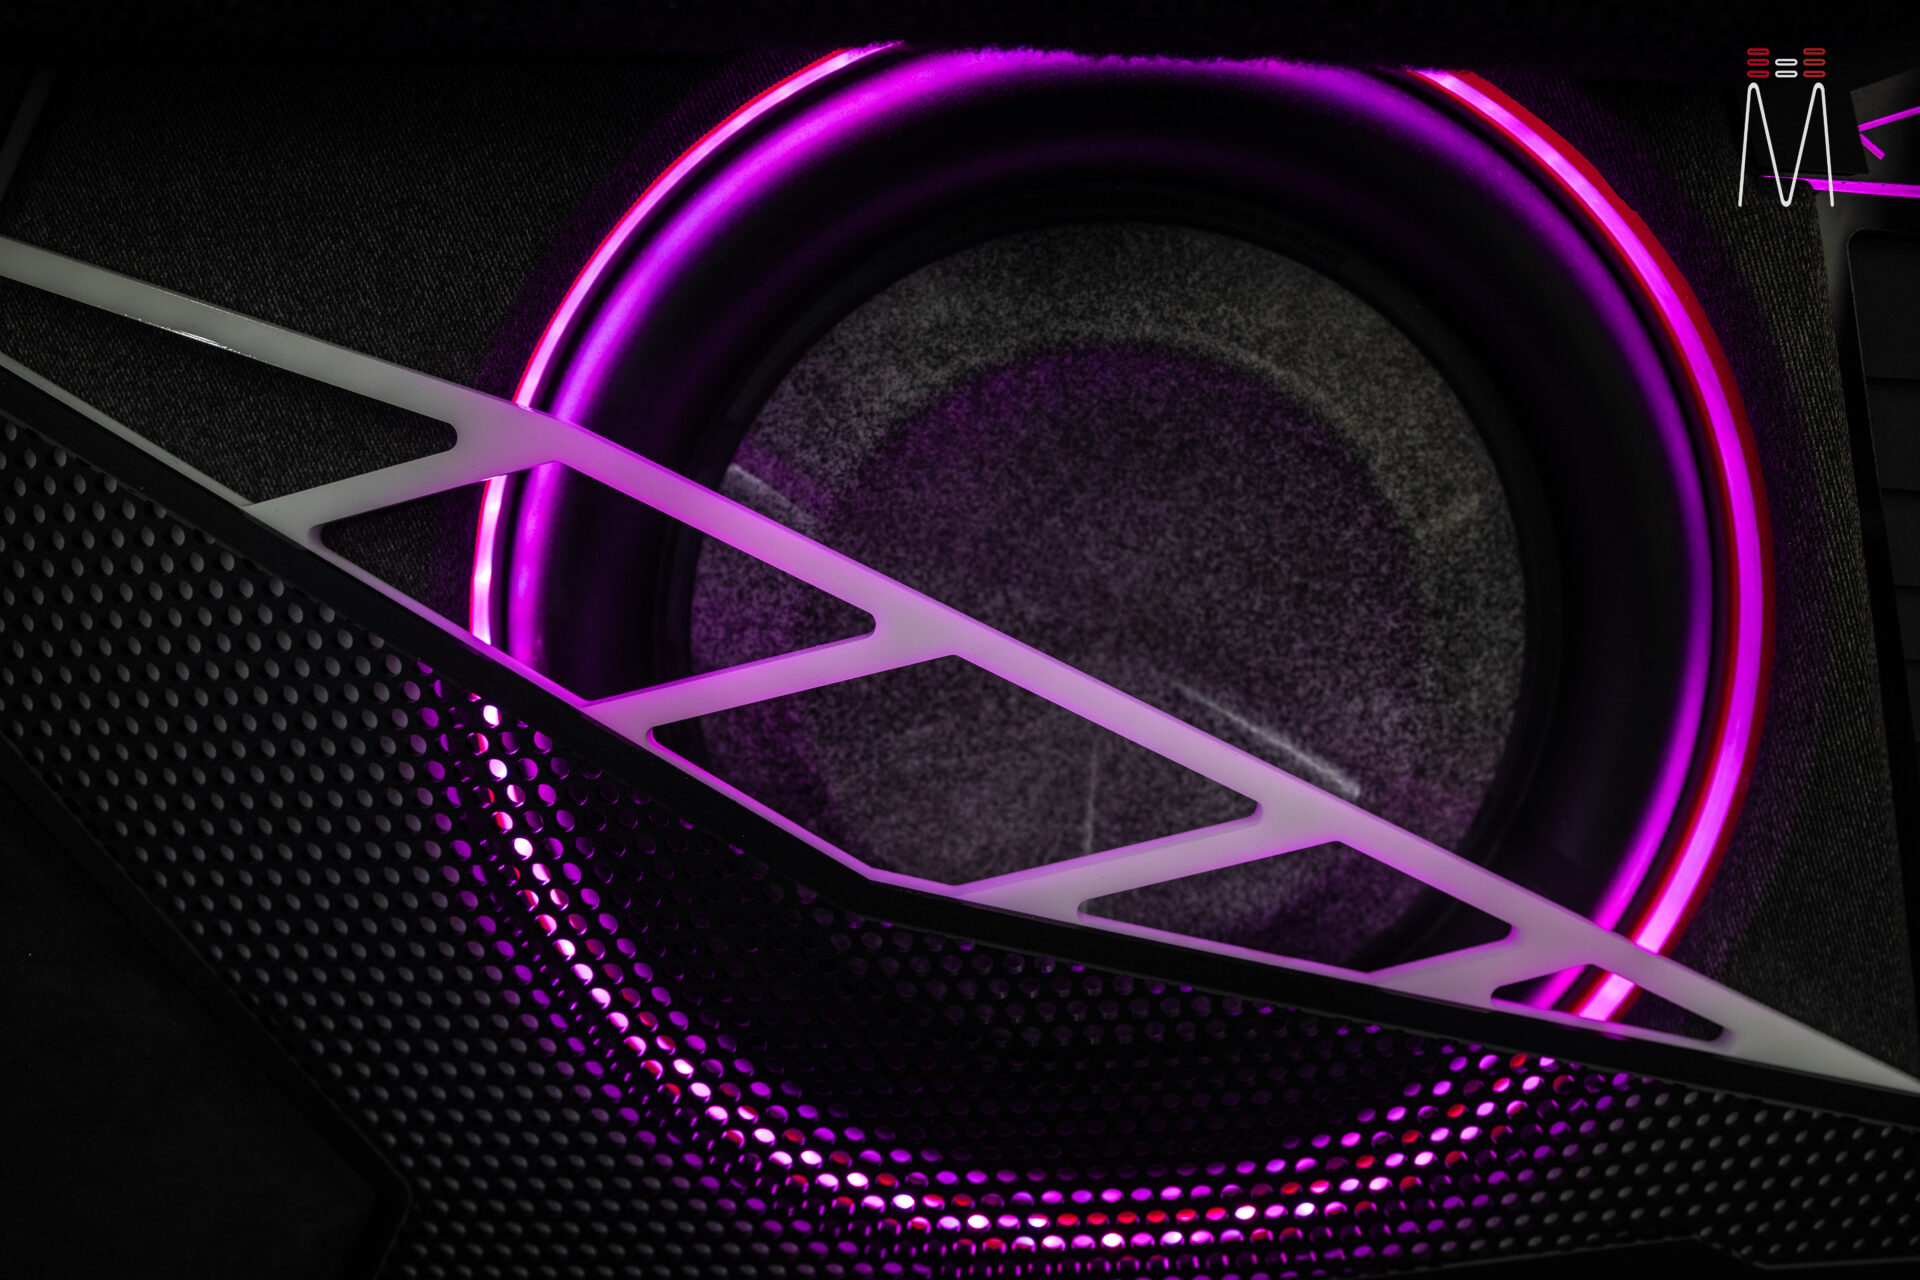
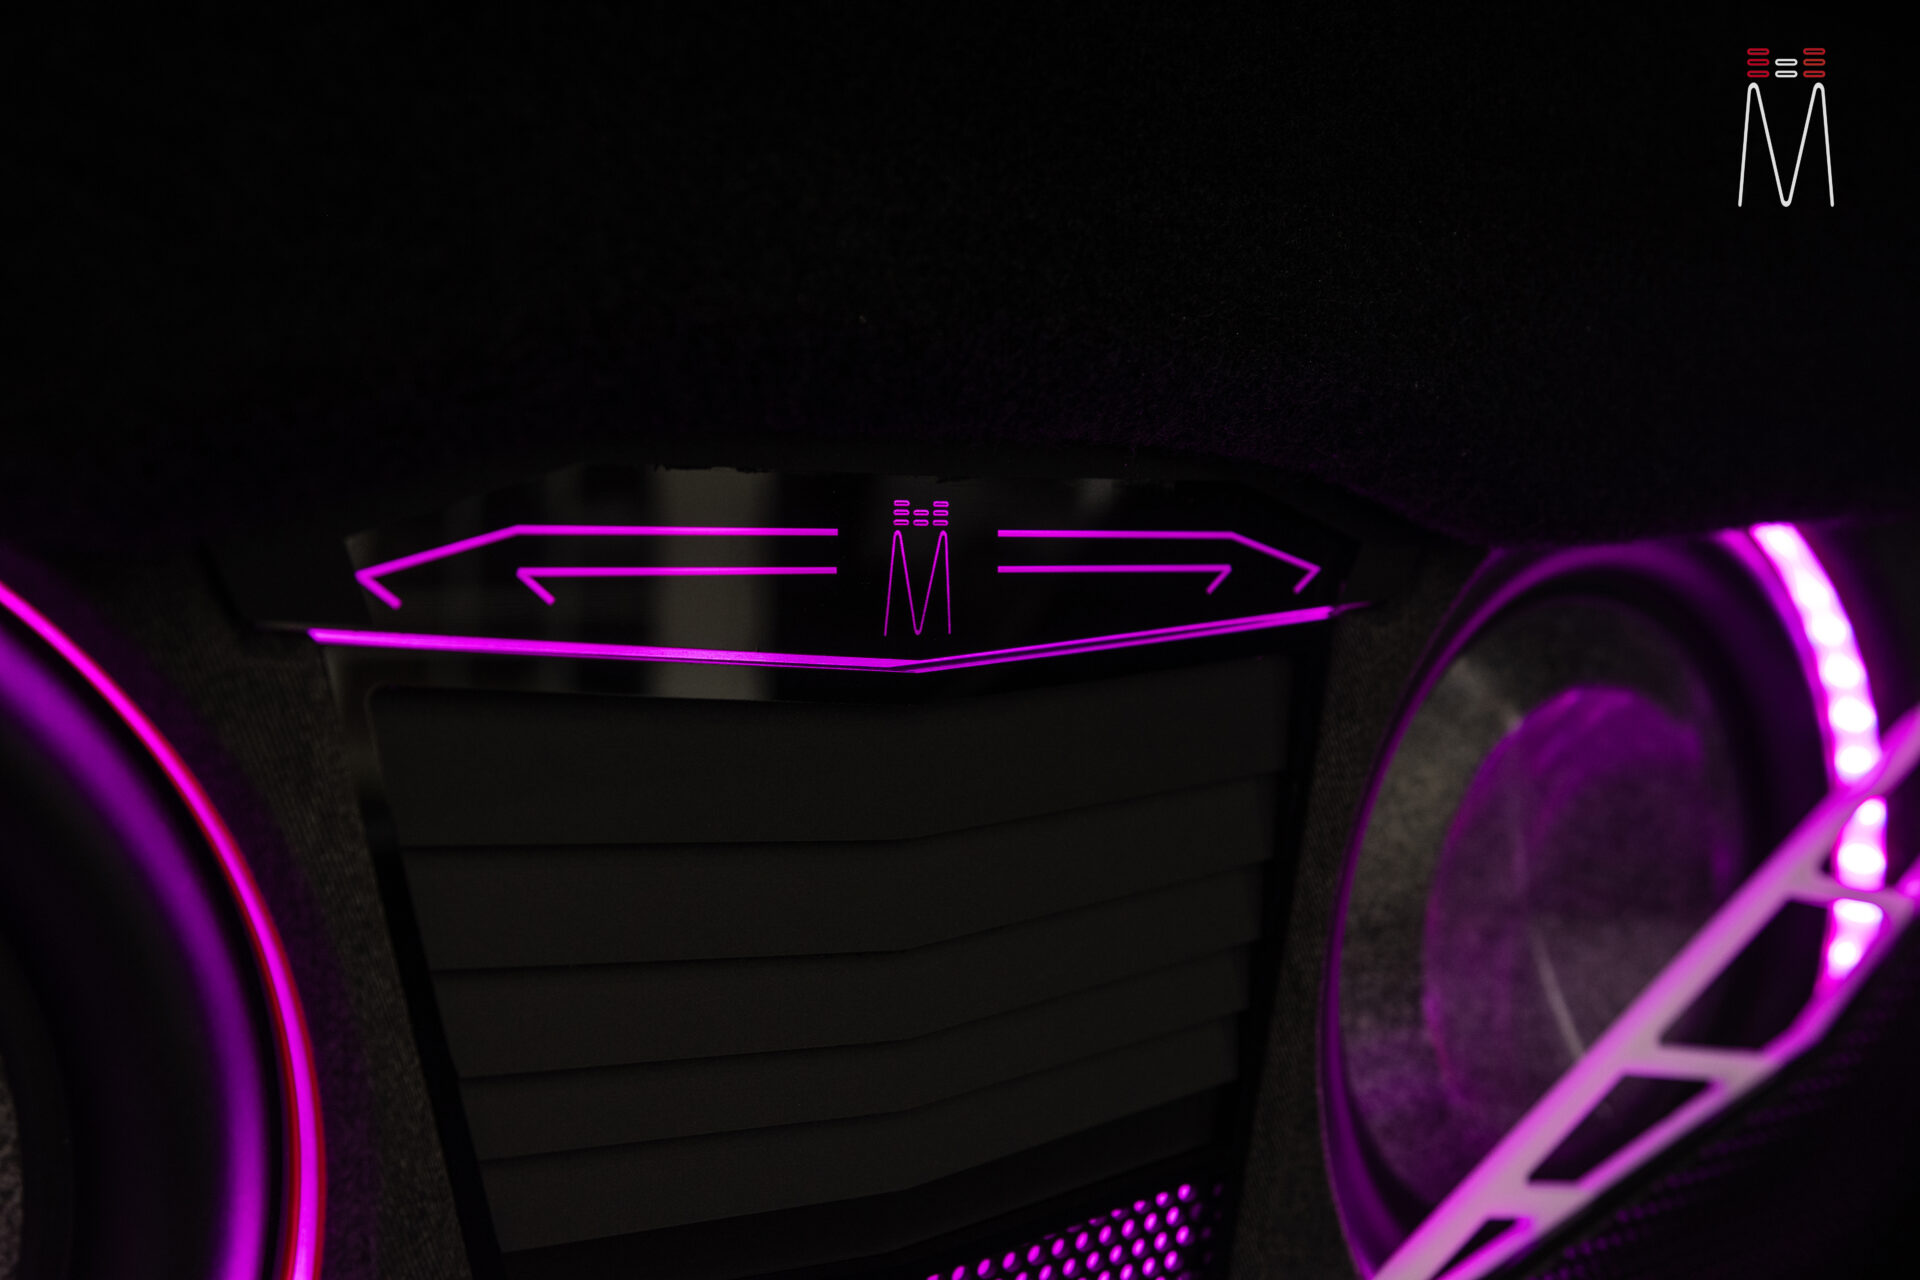
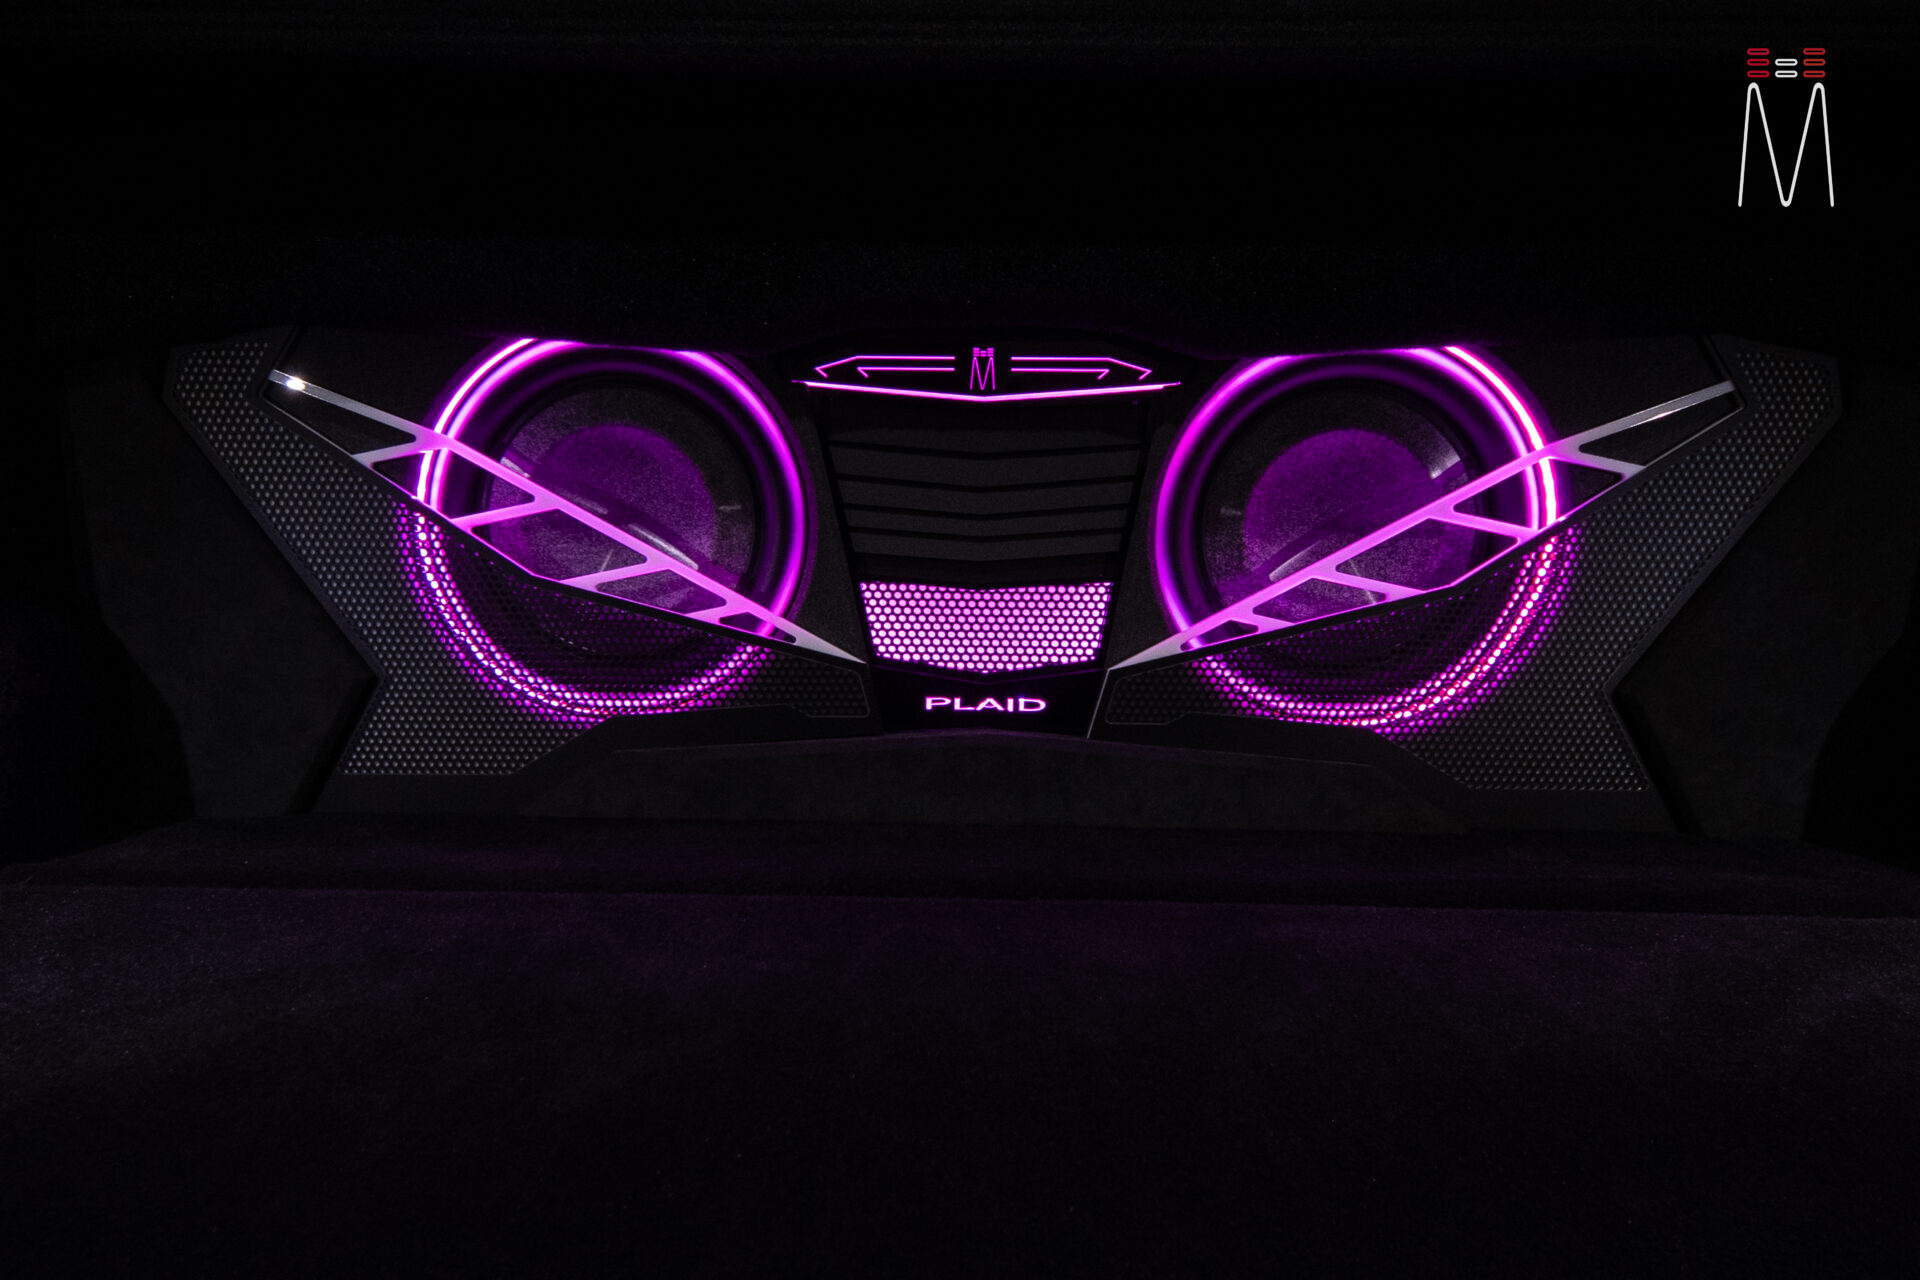
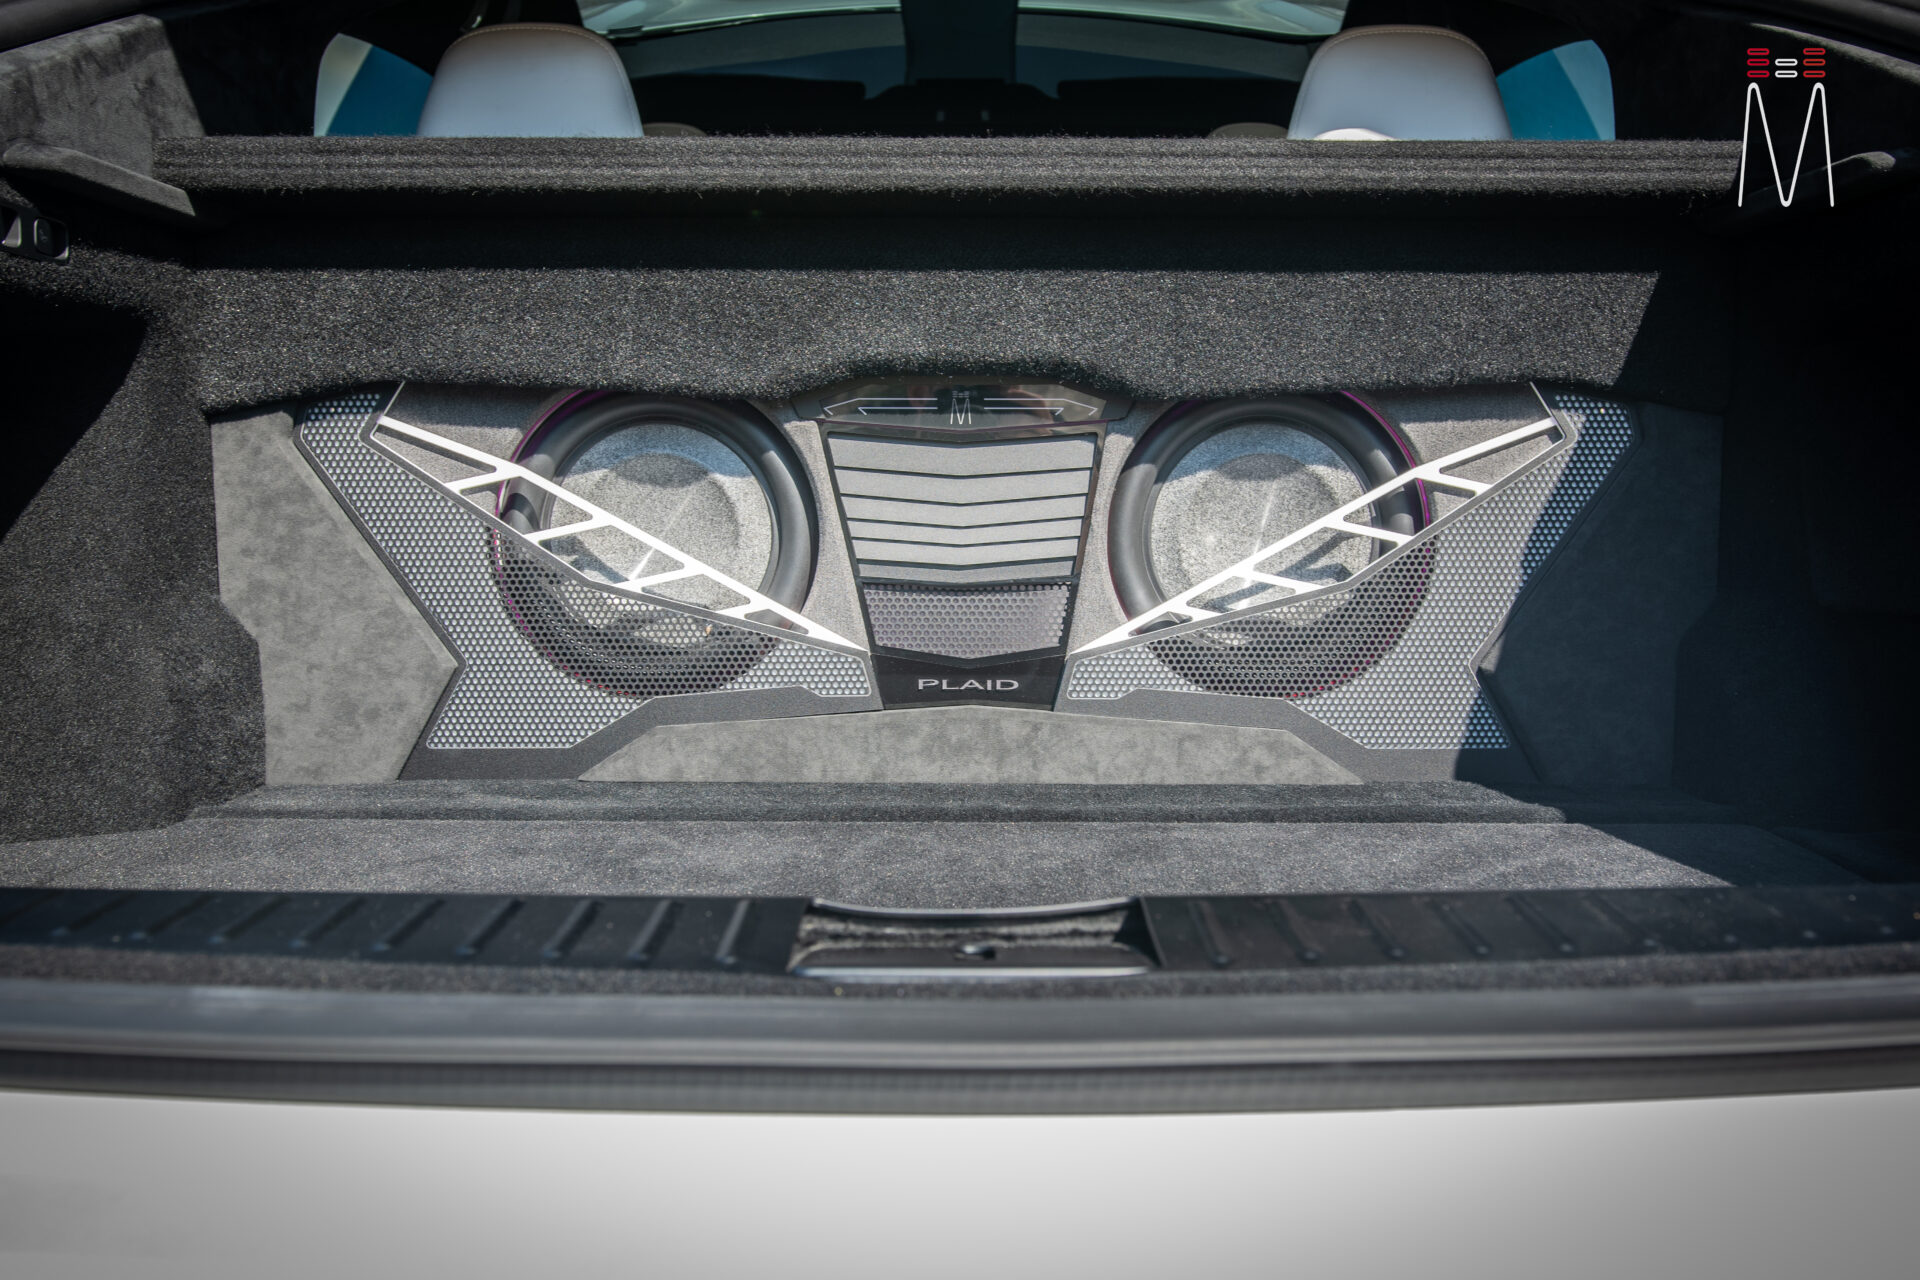
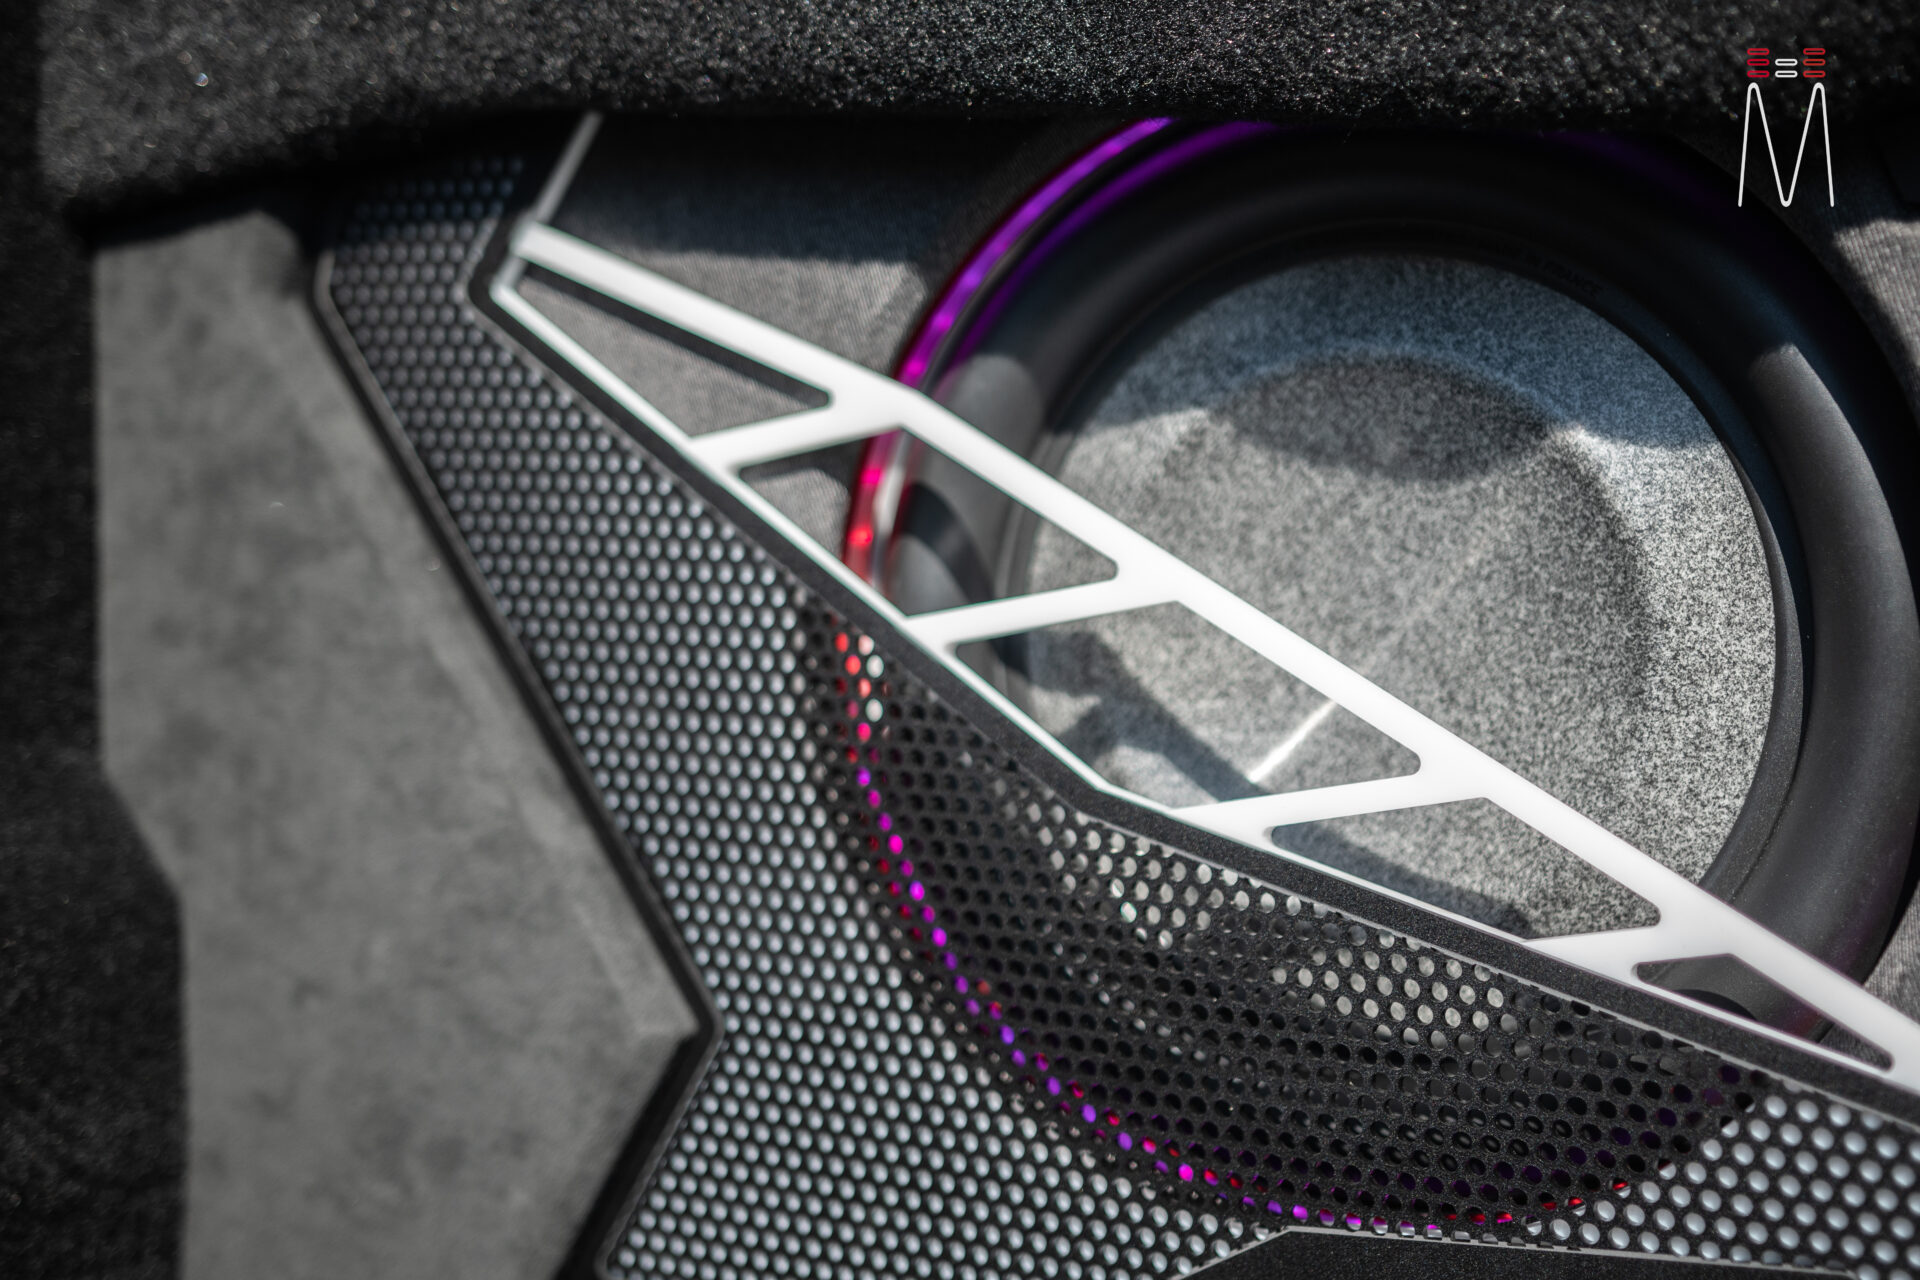
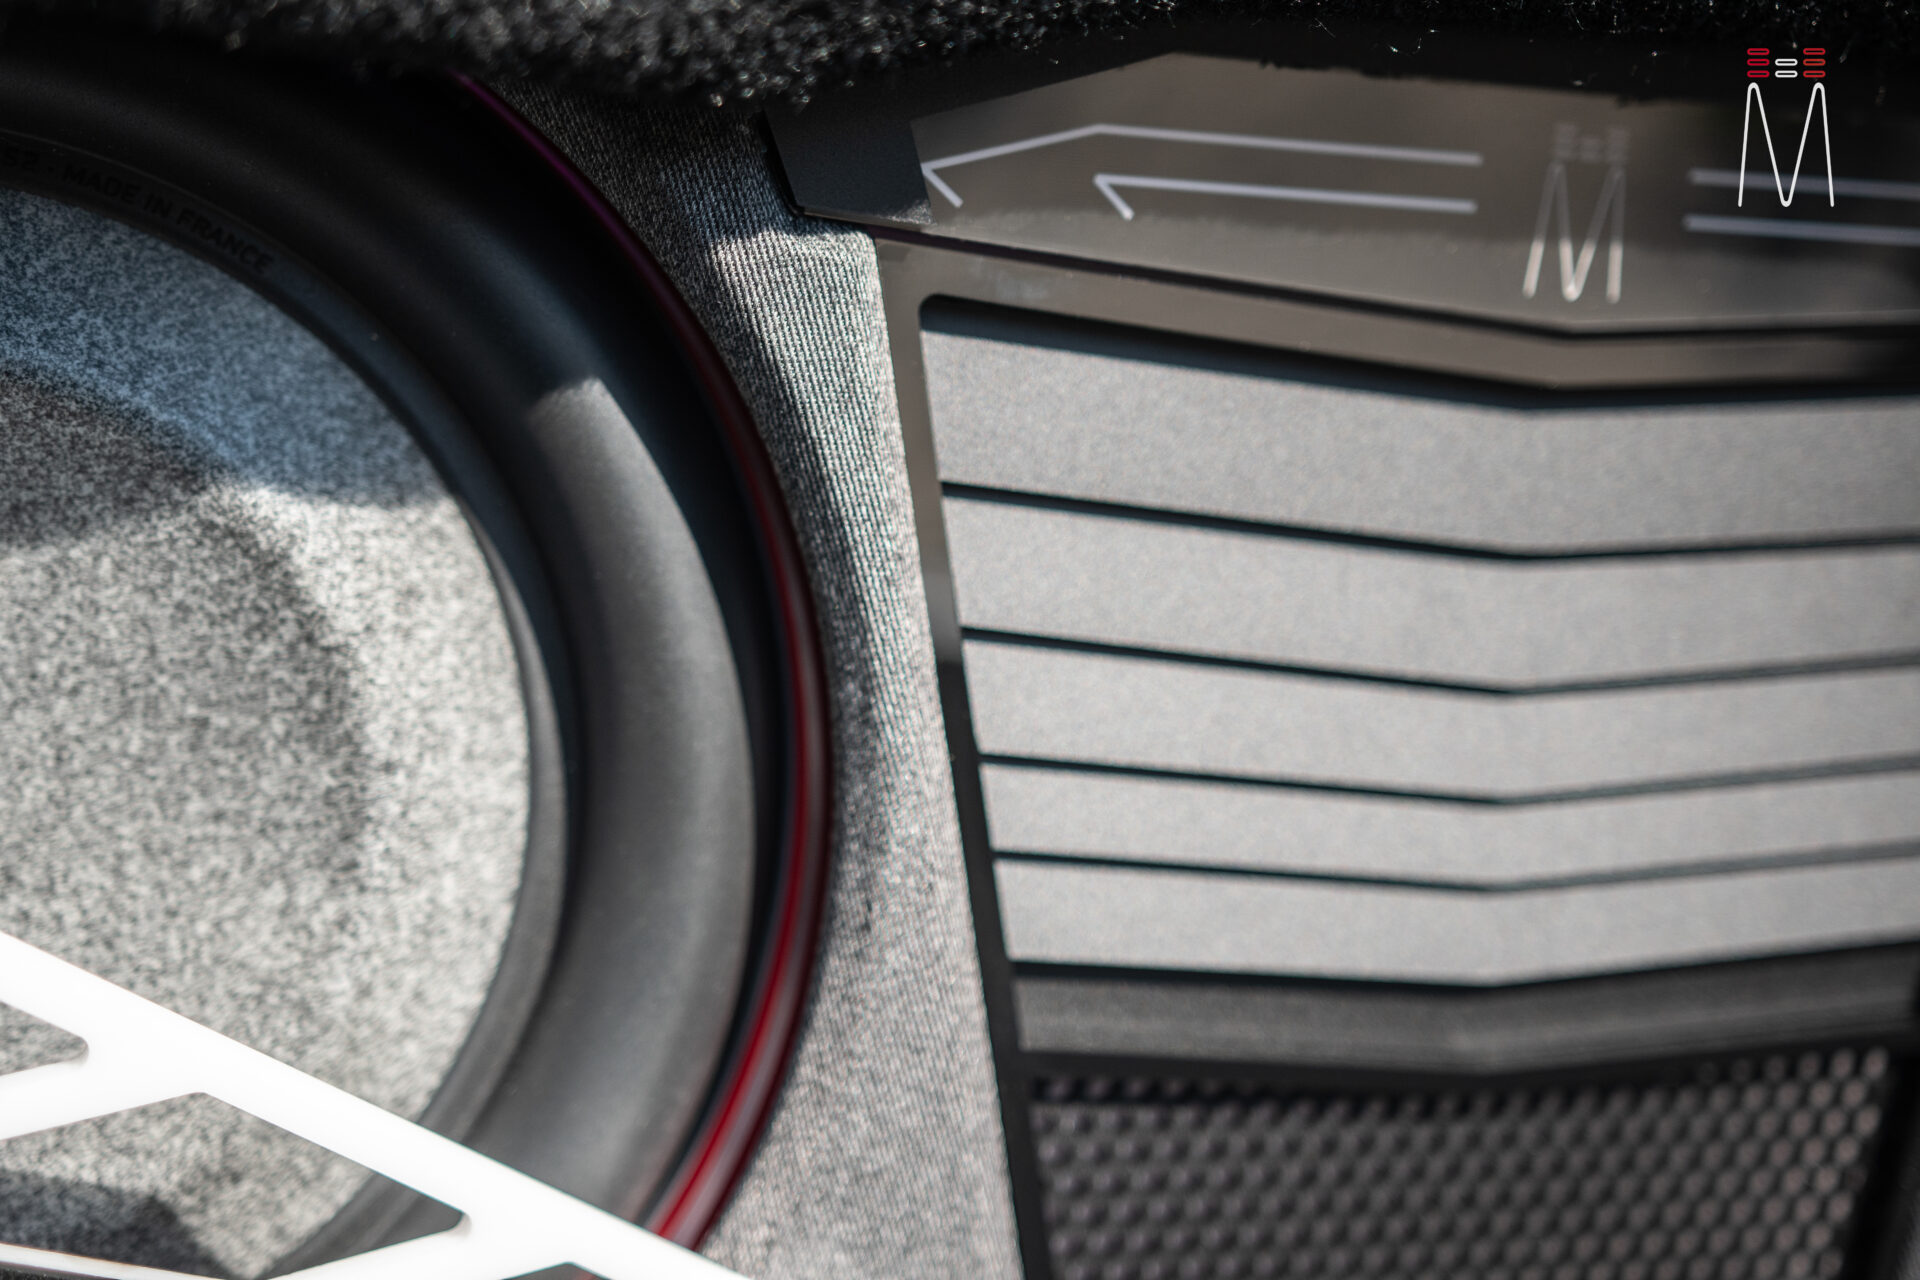
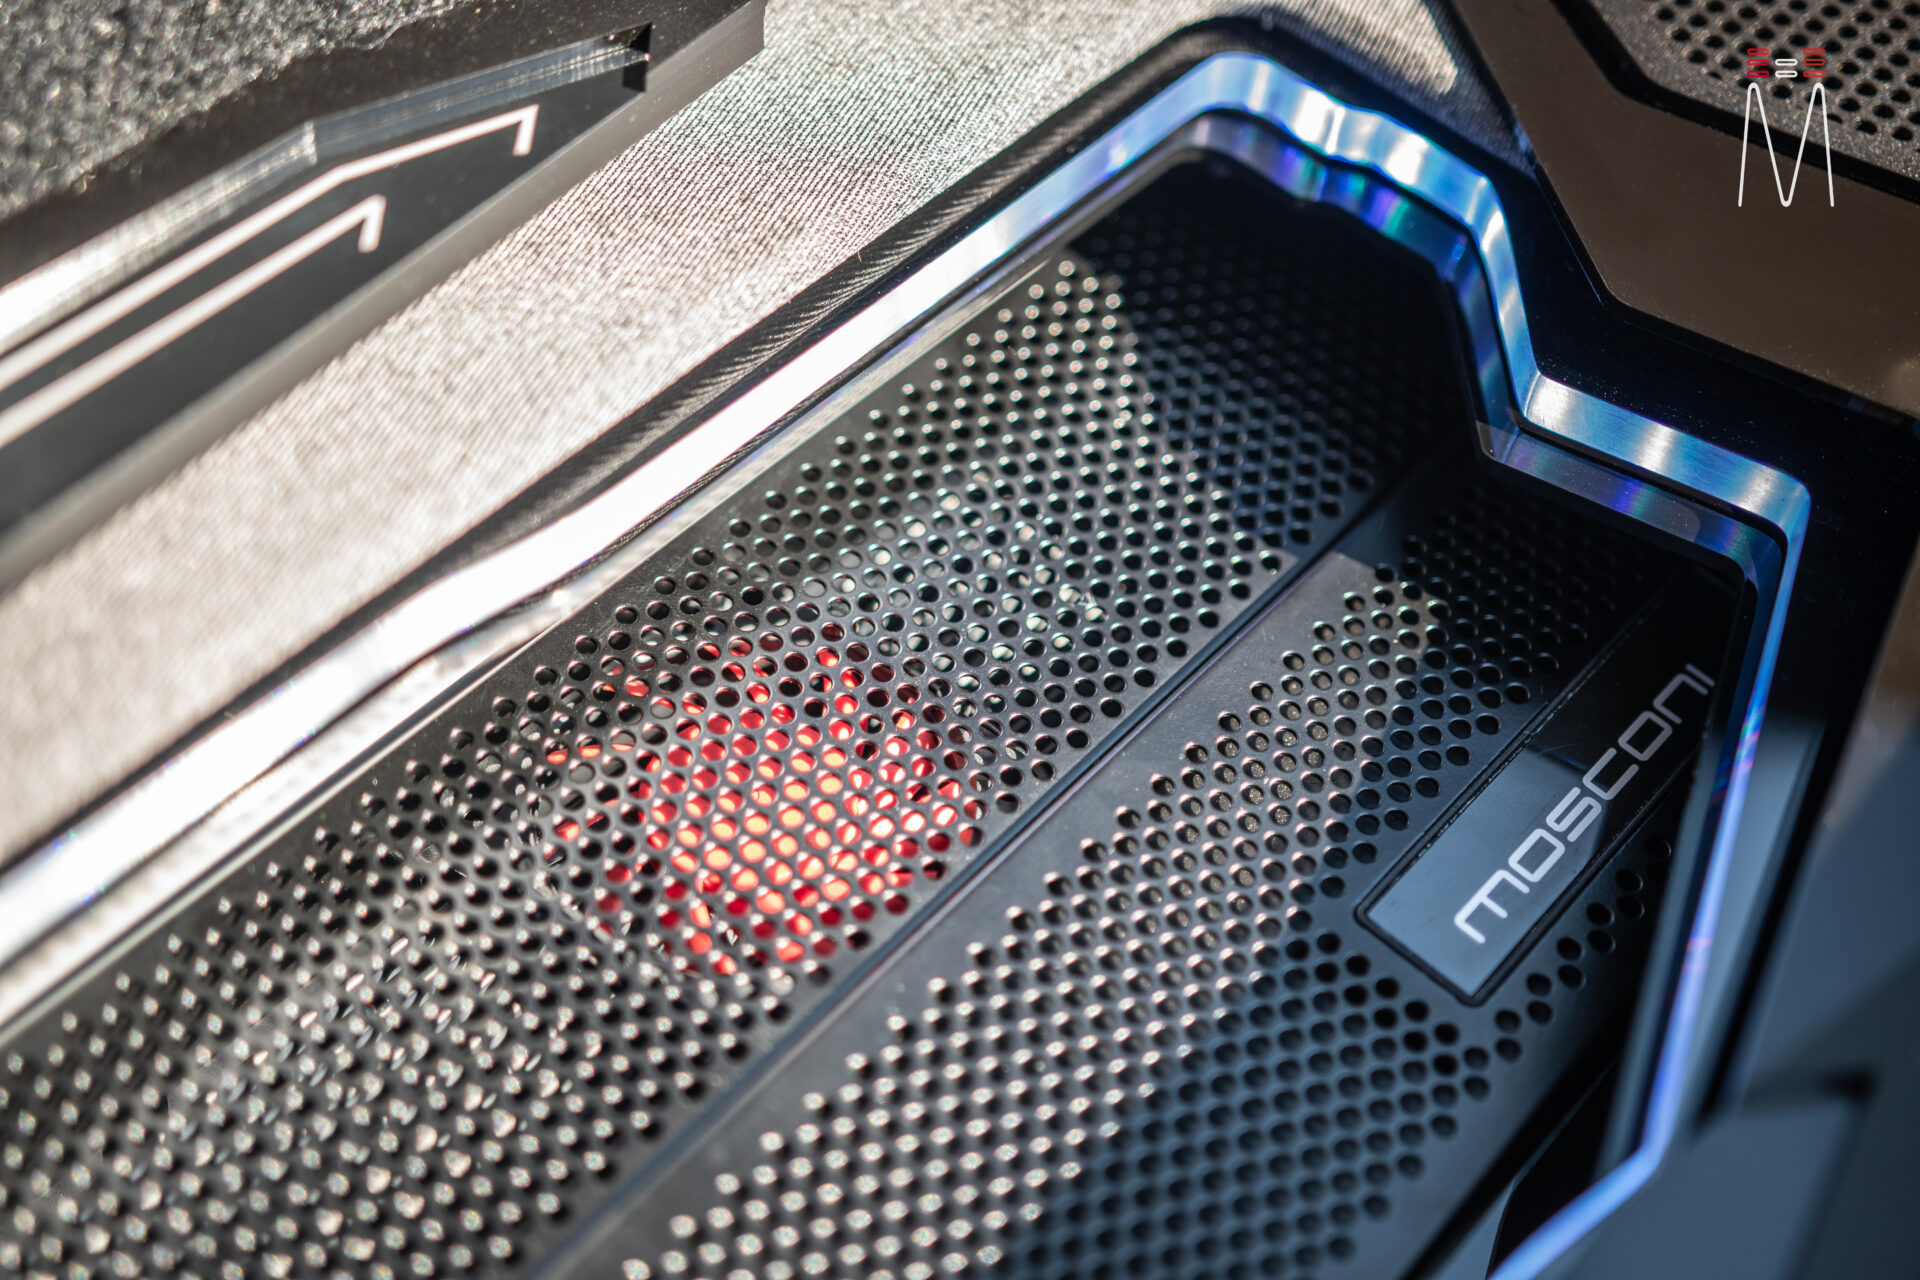
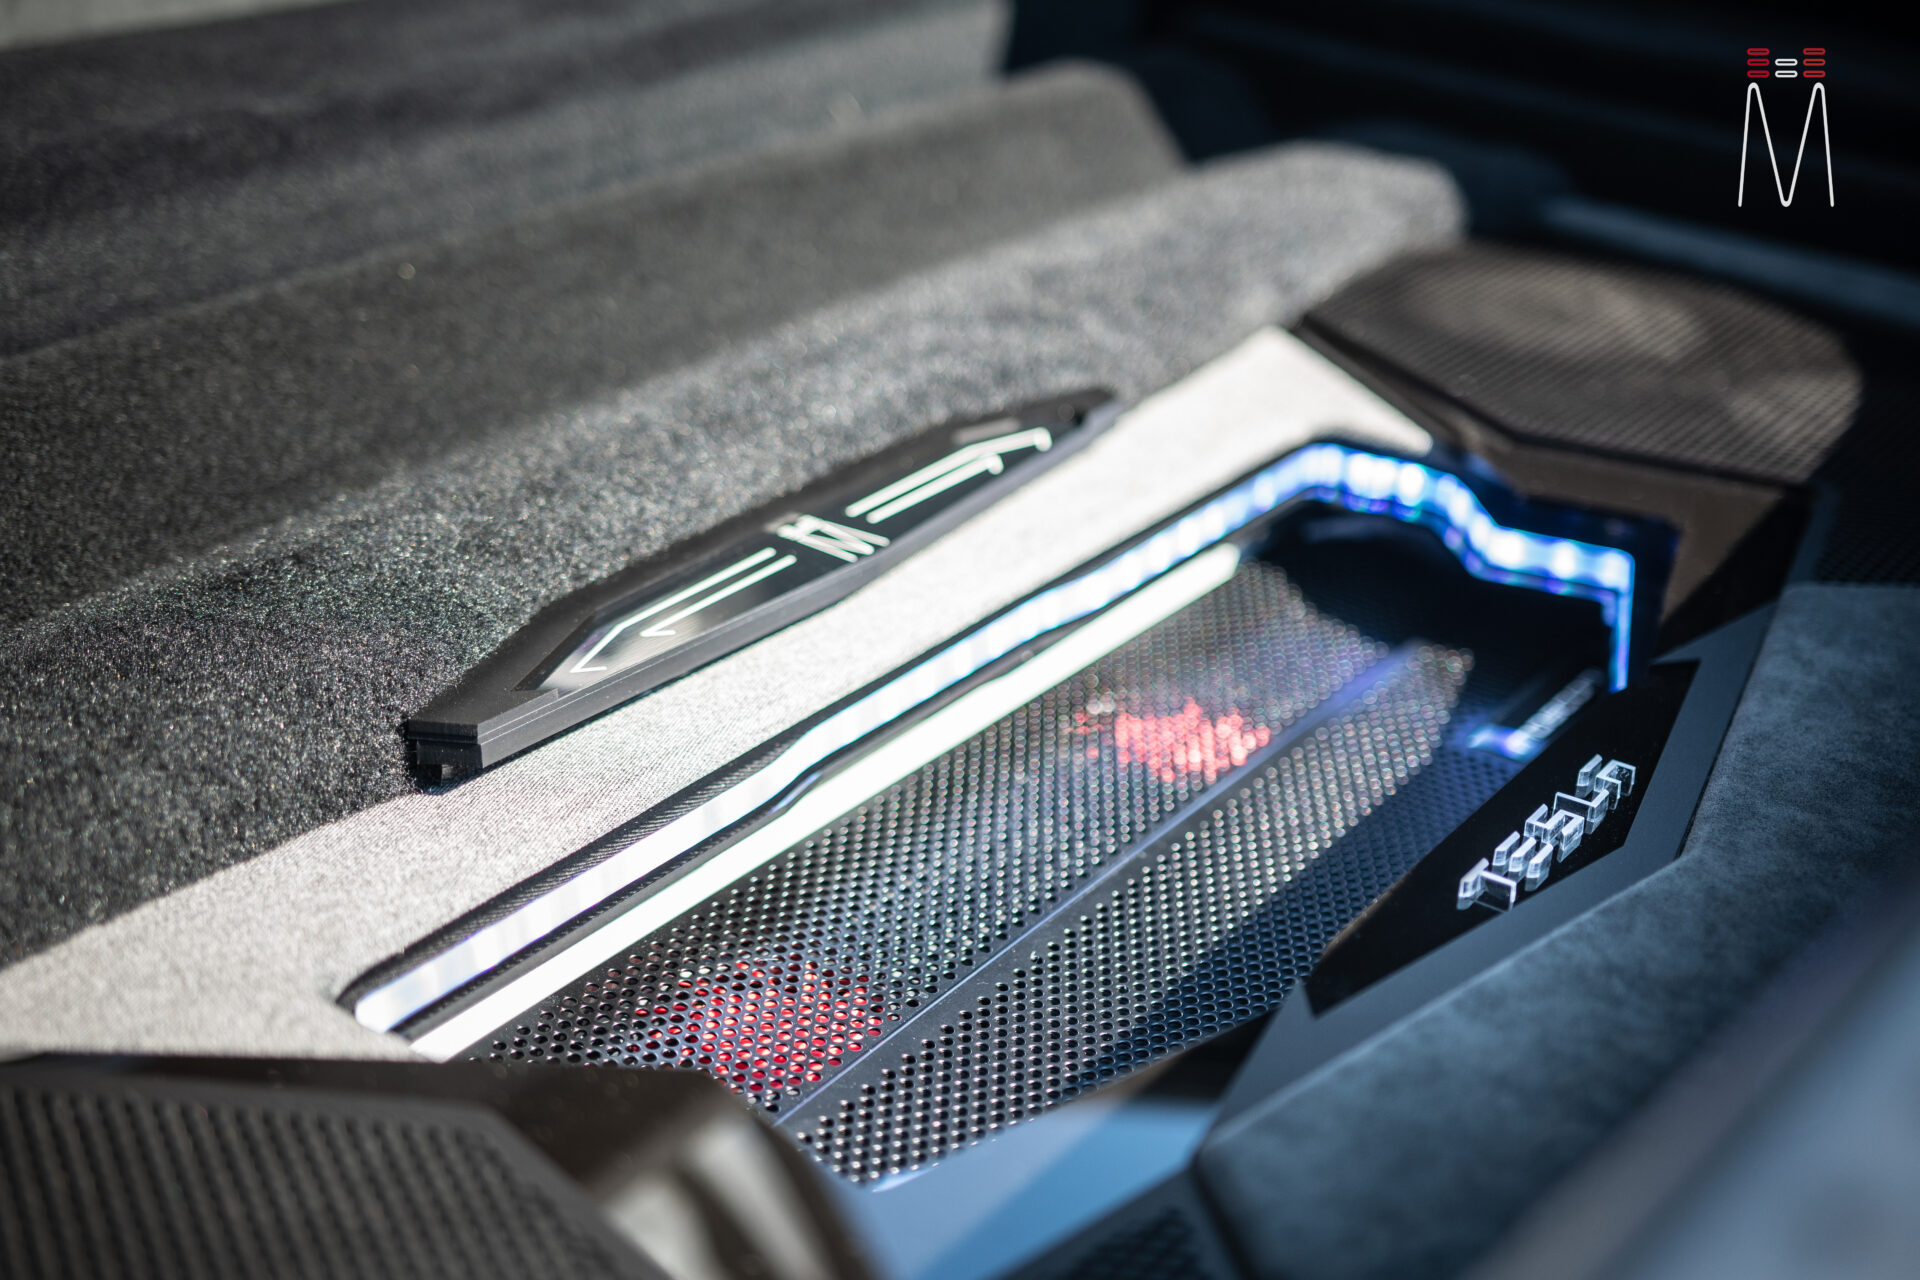
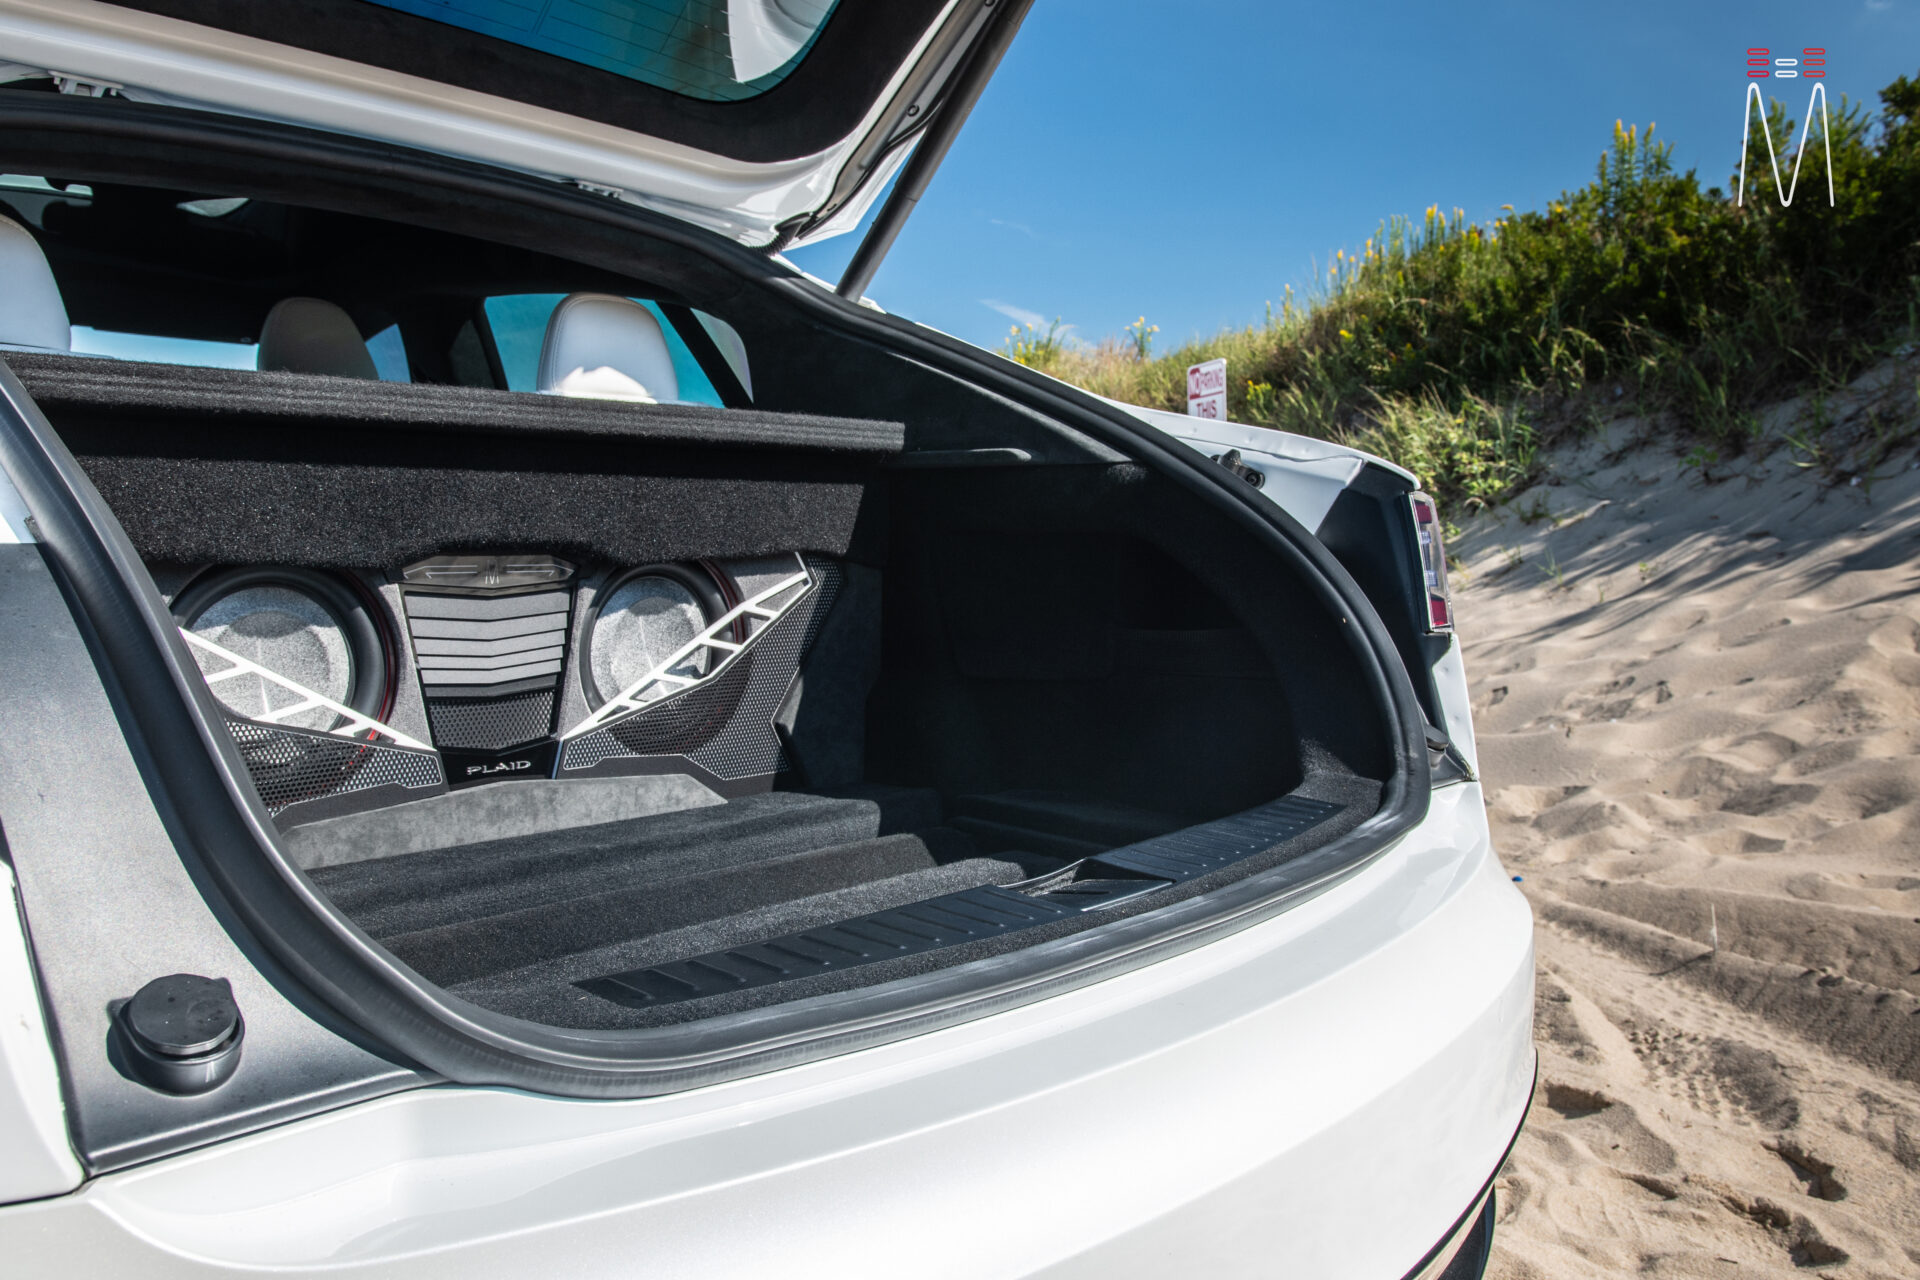
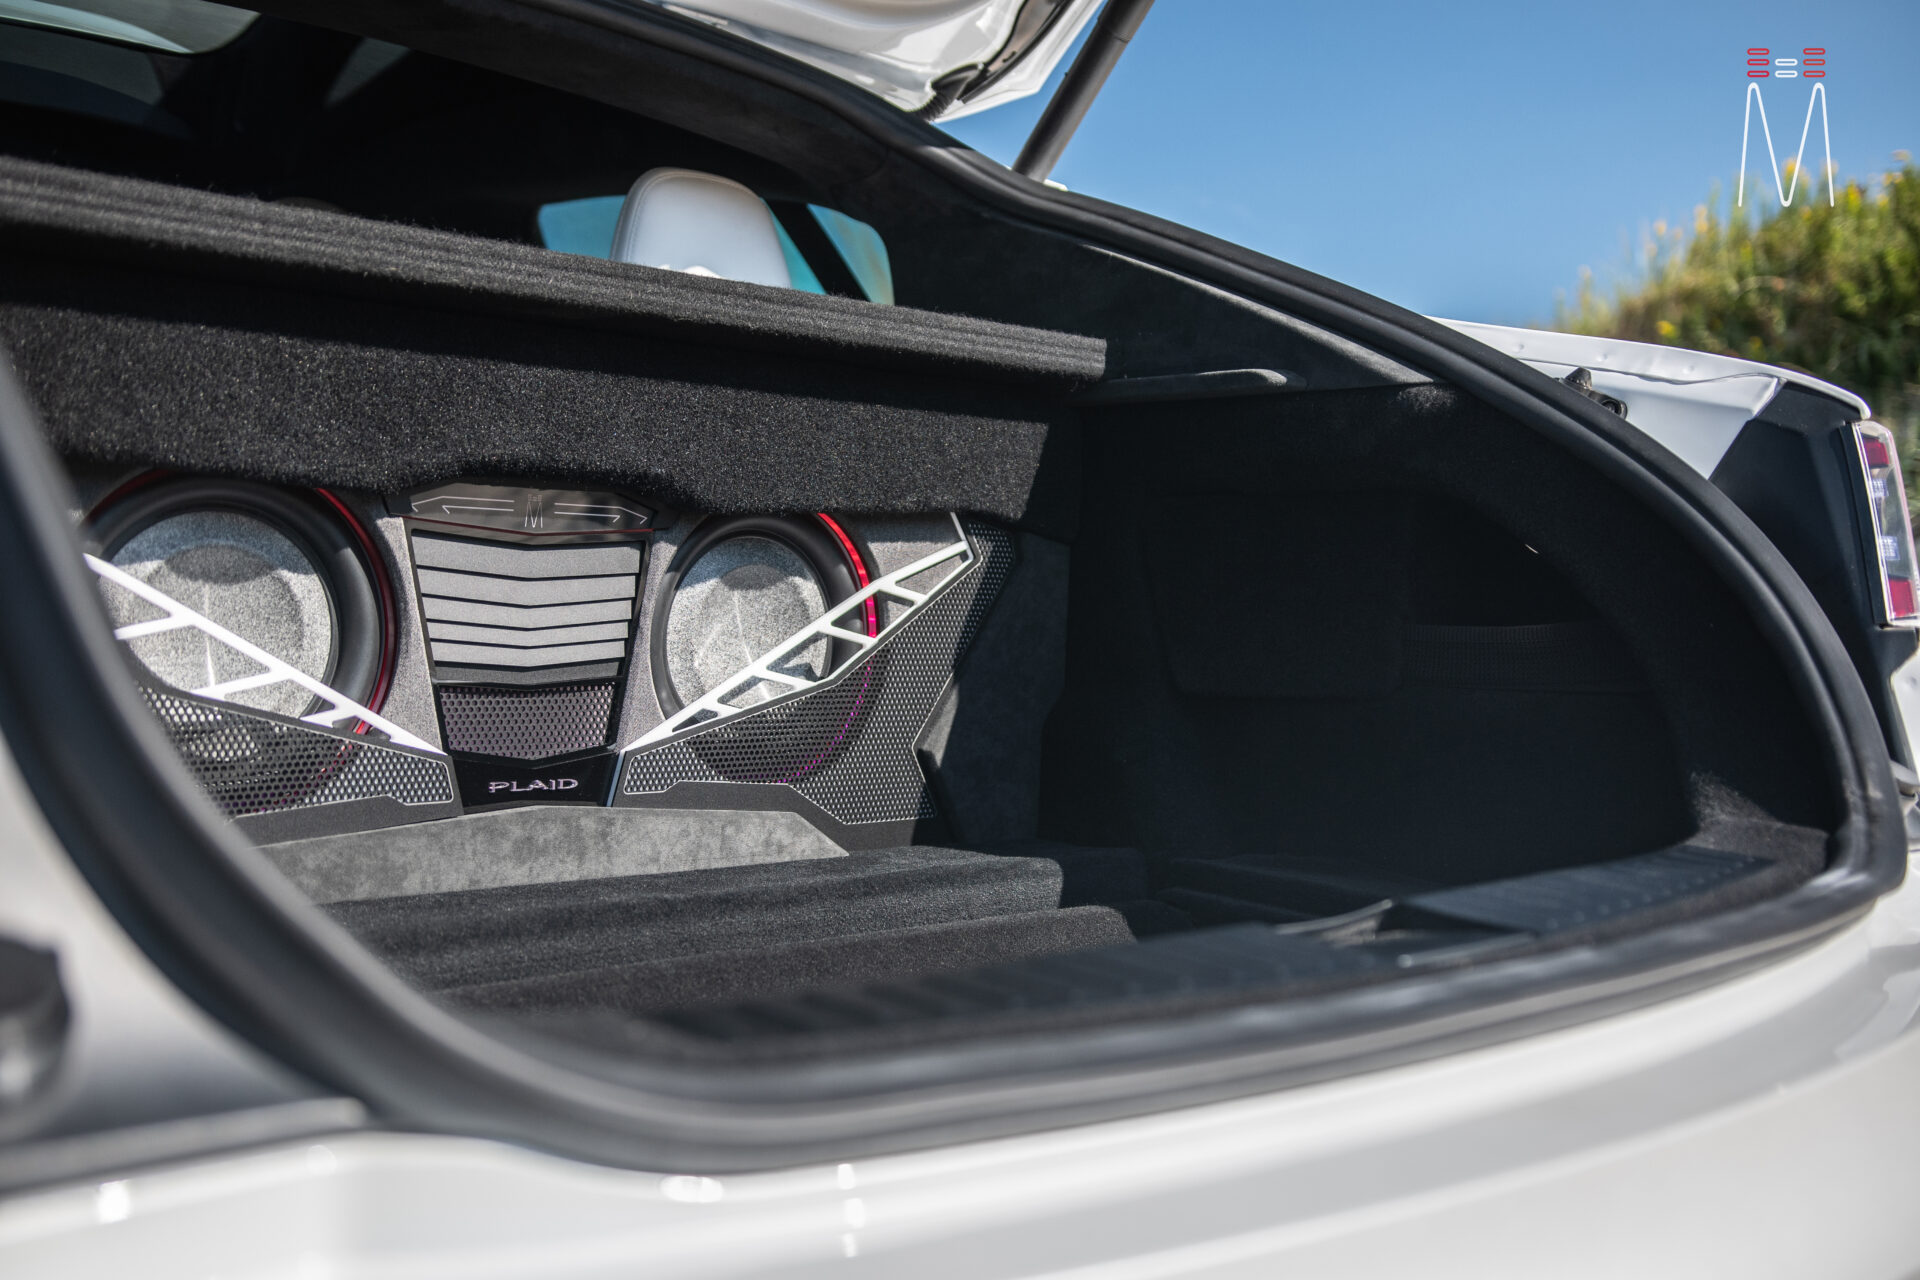
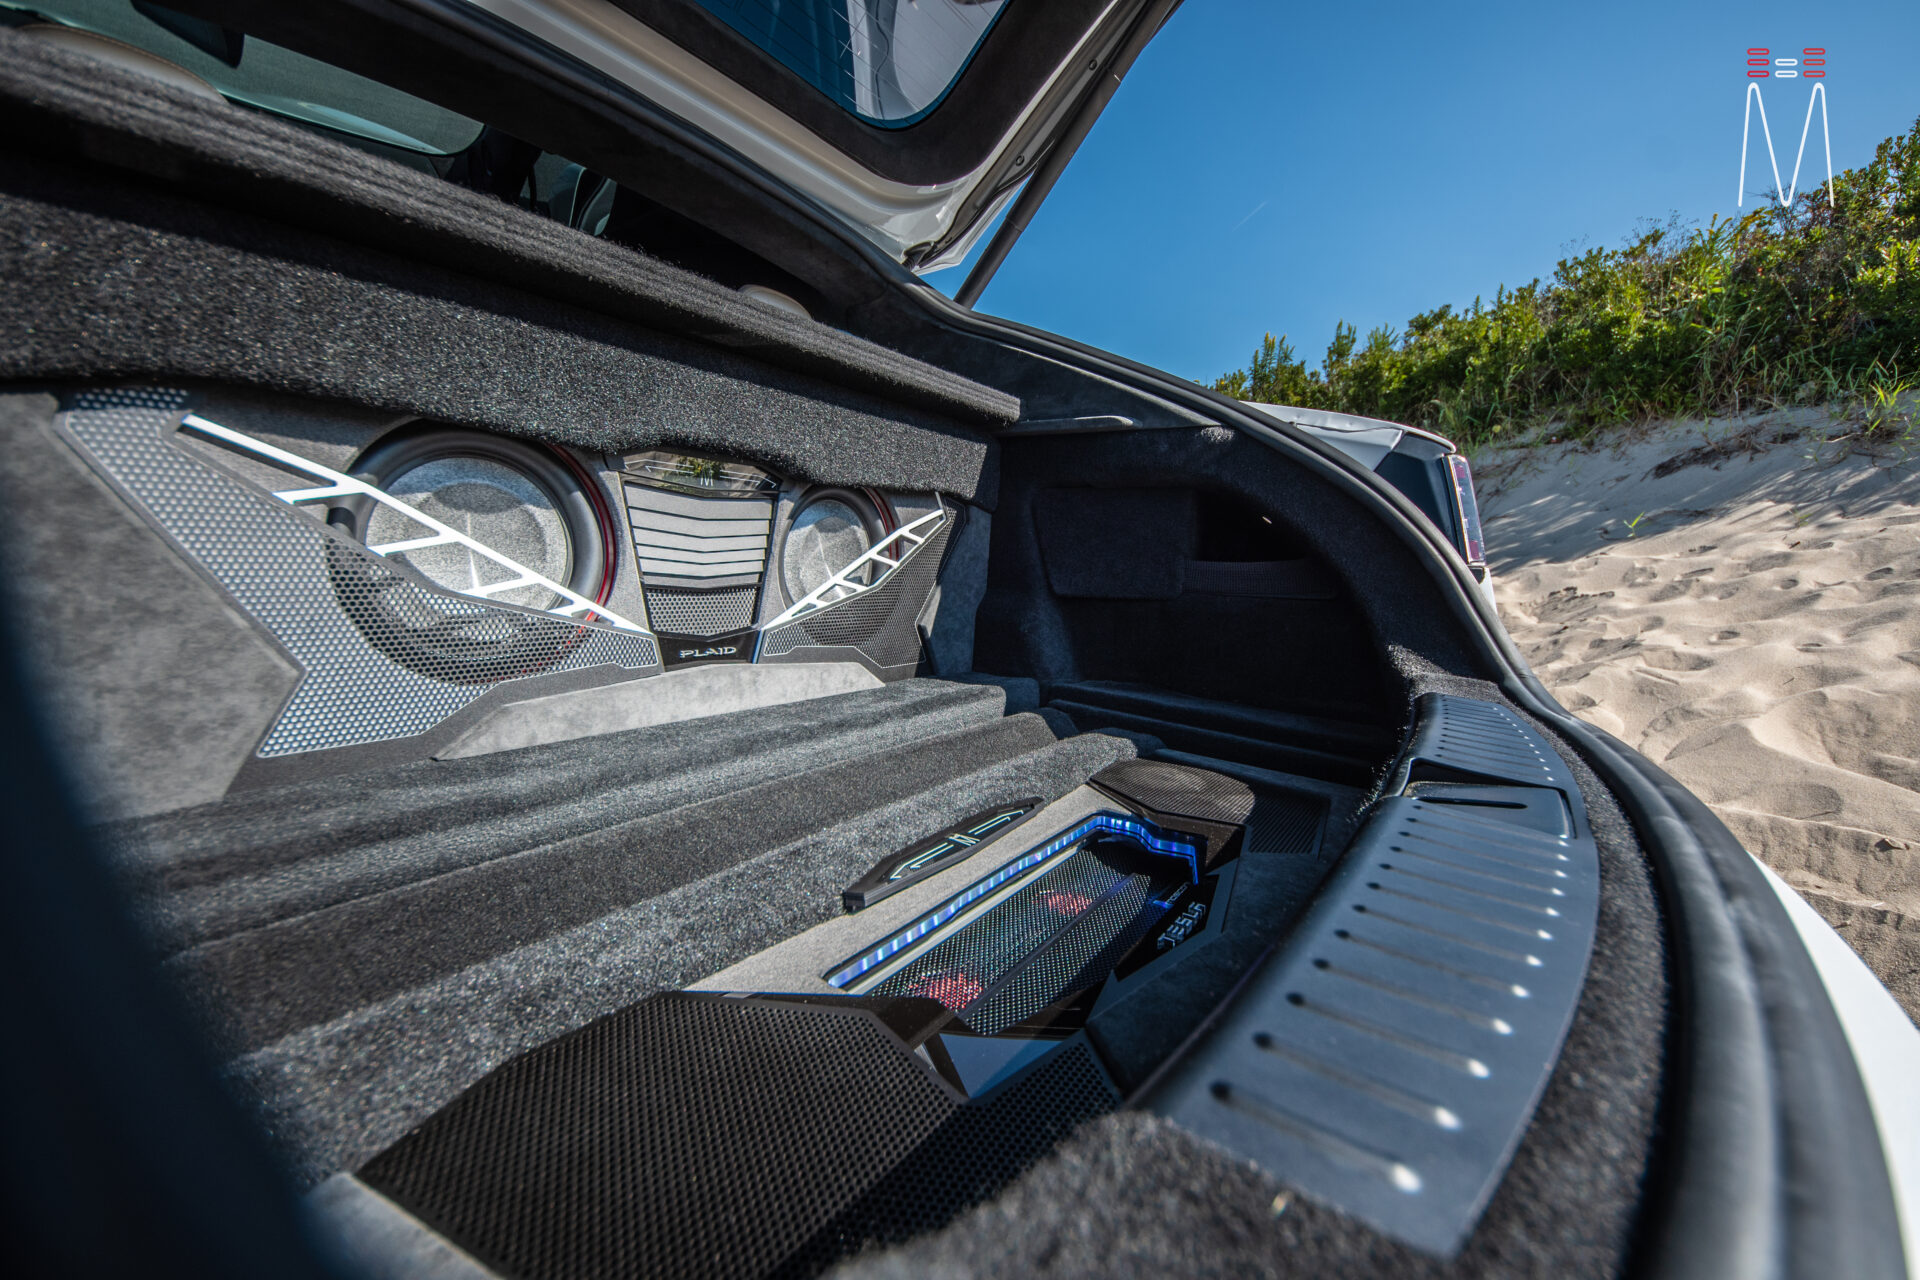
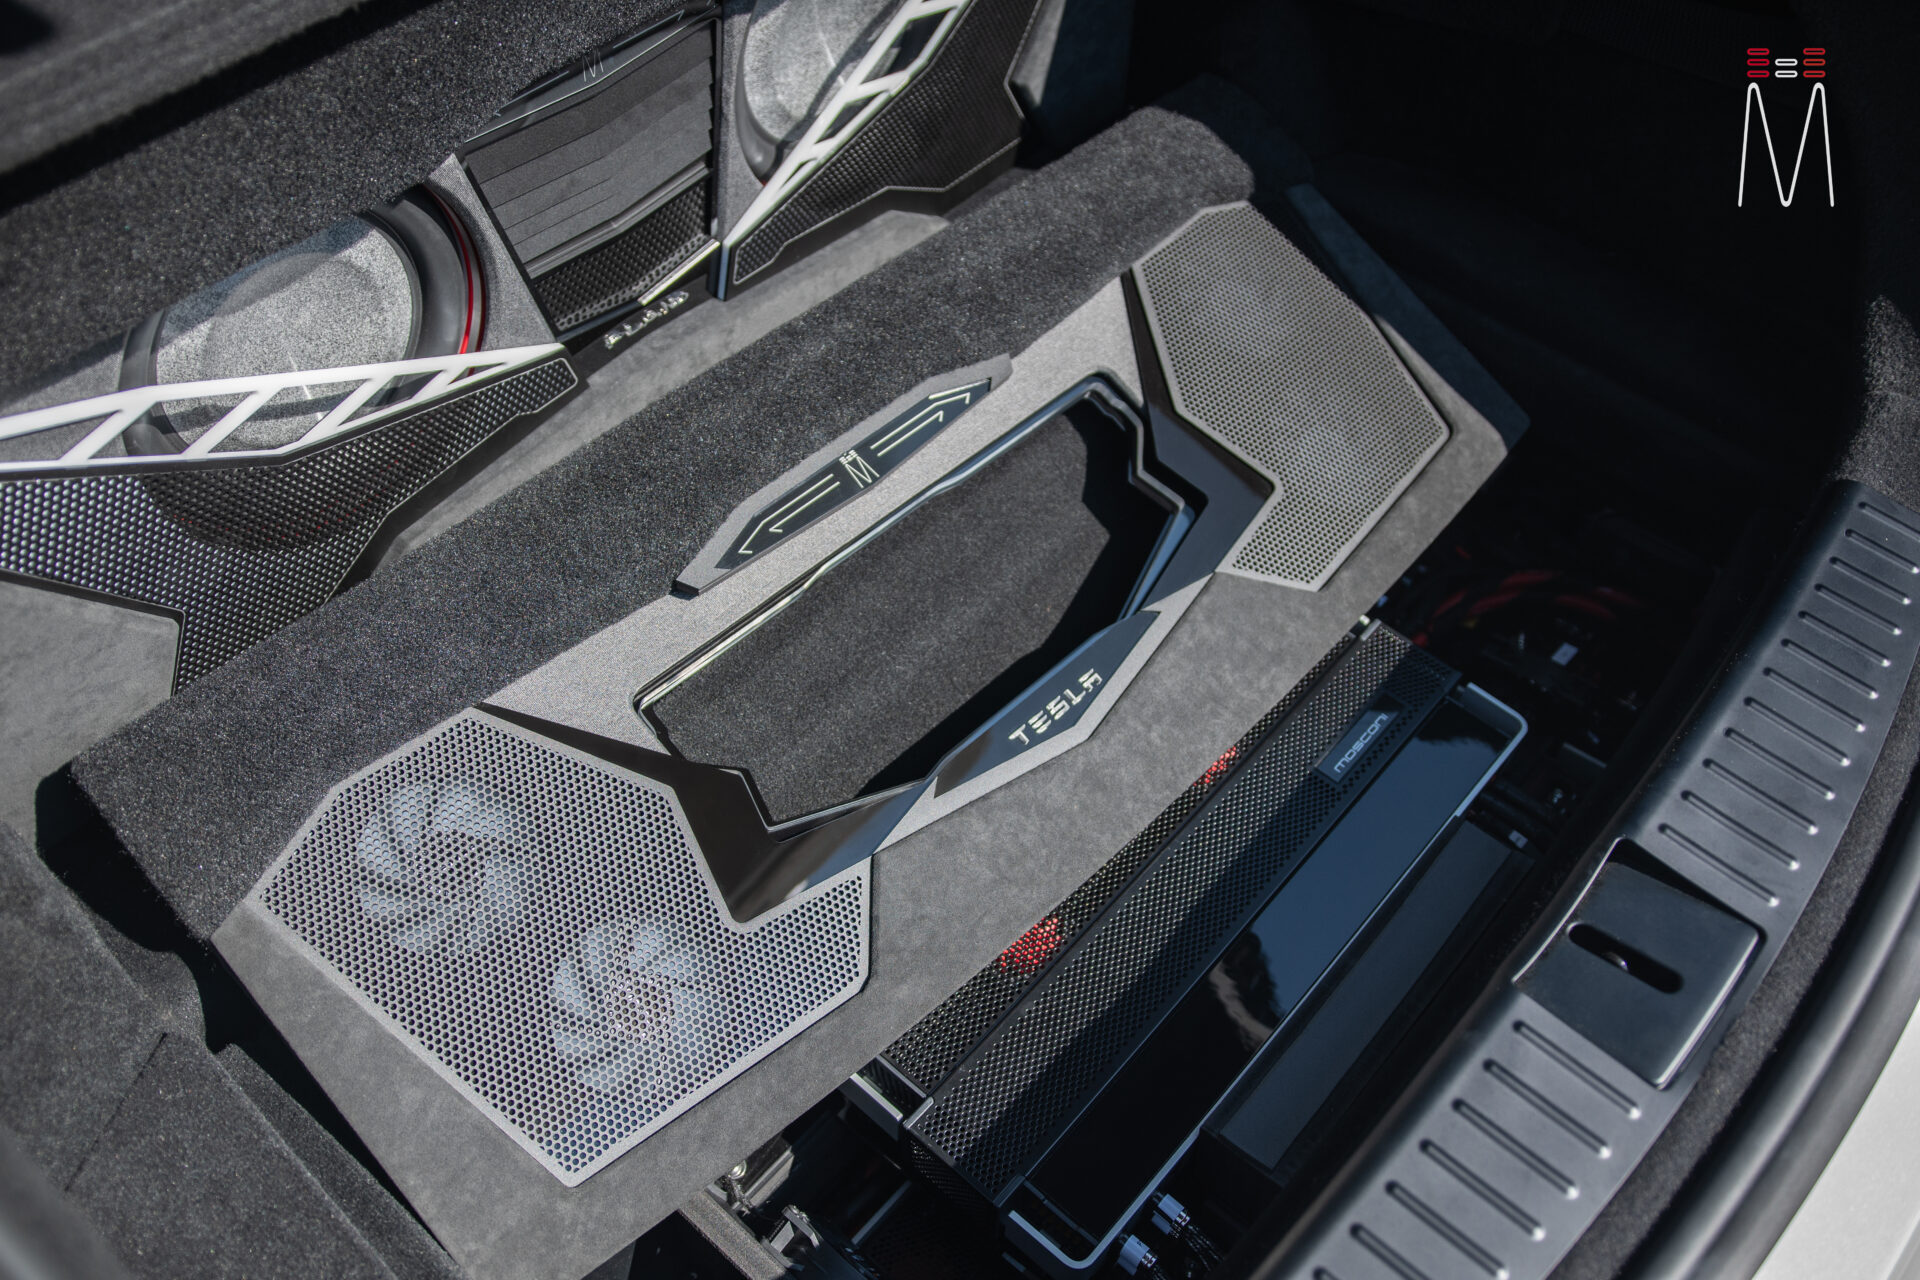
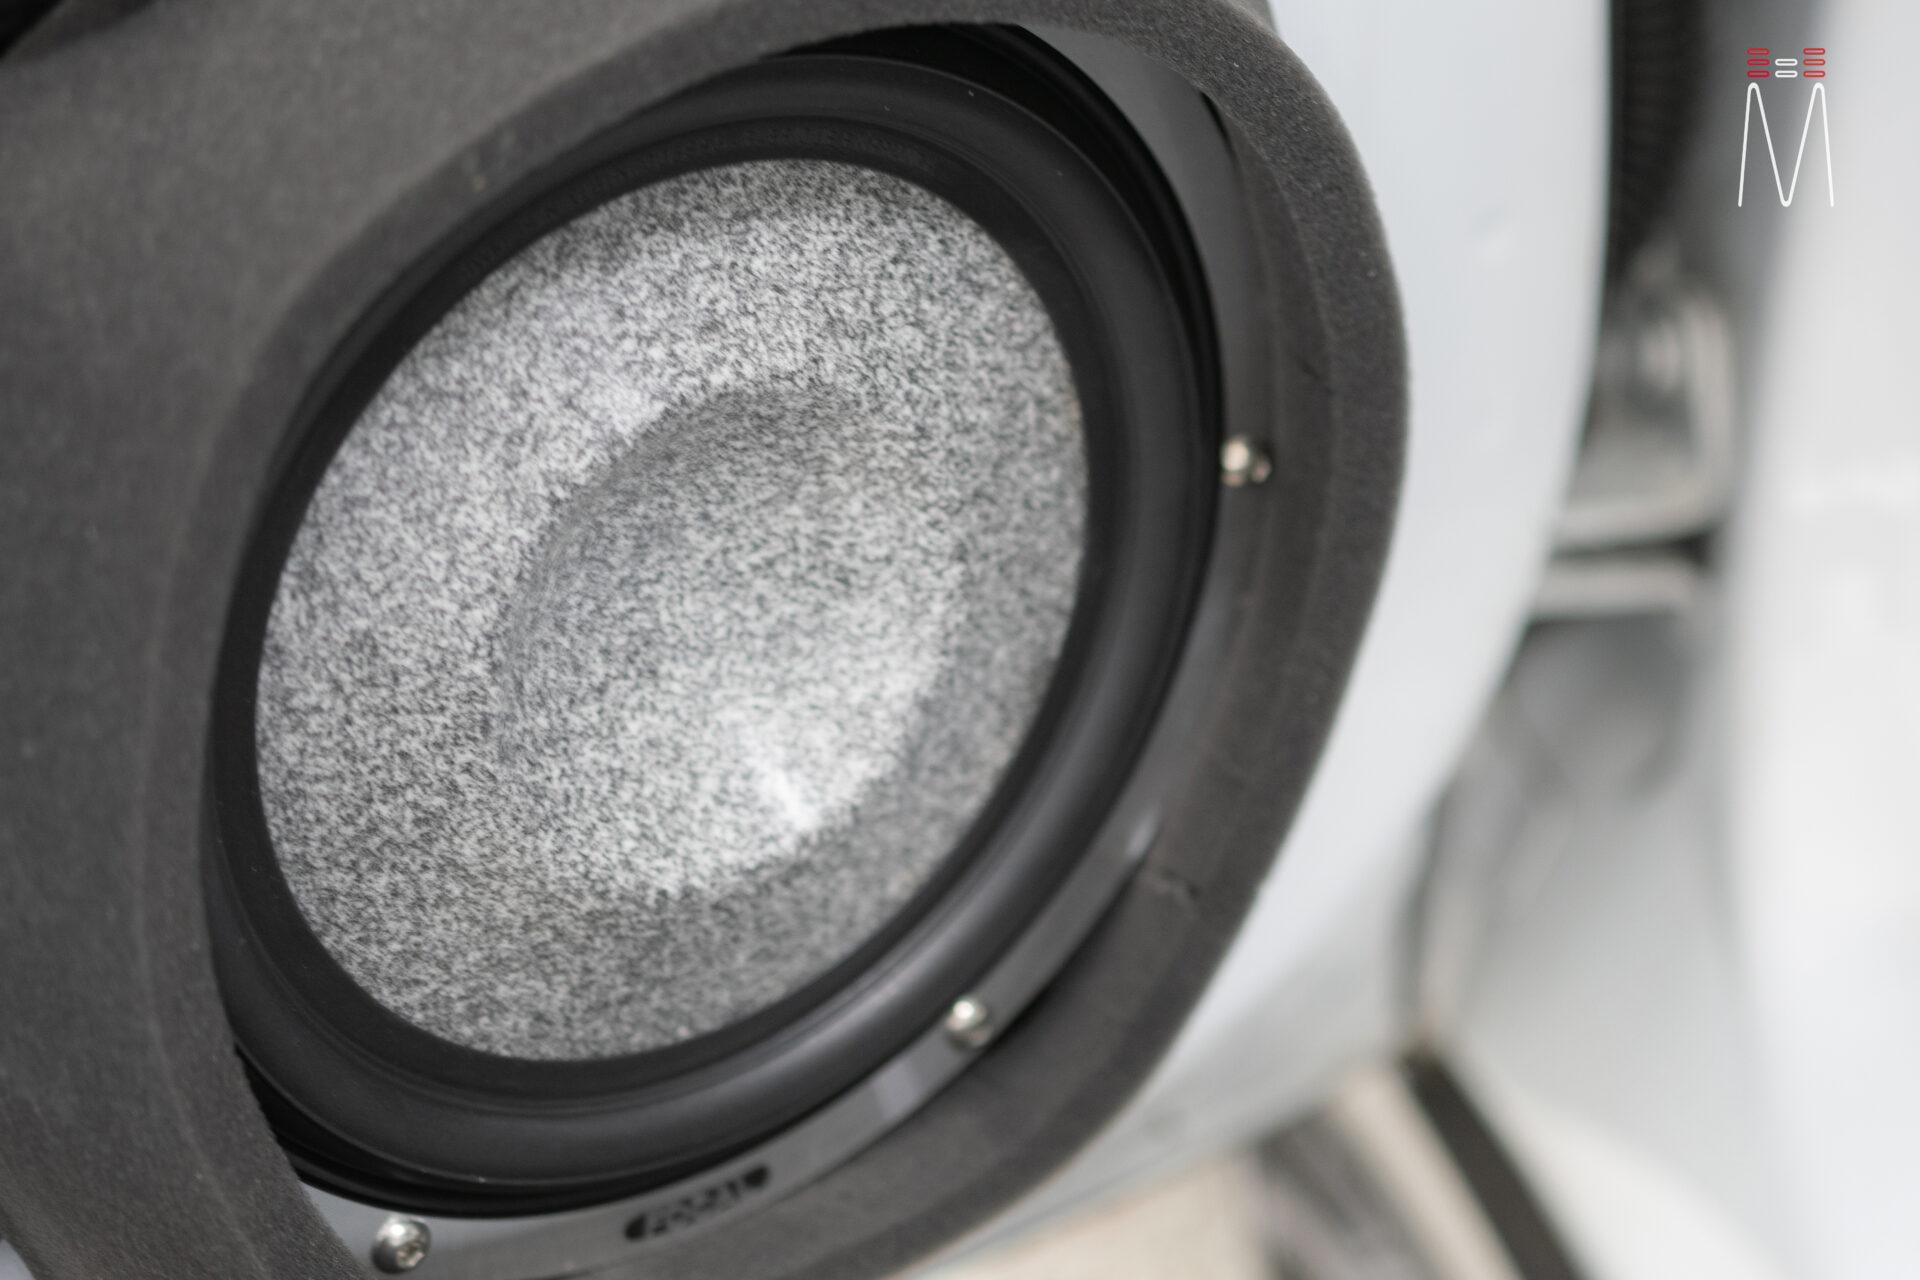
A custom subwoofer enclosure was created behind the rear seats. Multiple layers of trim to include different textures and fabrics which all can be found in the vehicle were used to finish off the enclosure. We used RGB lighting to accent different areas of the enclosure to create focal points.
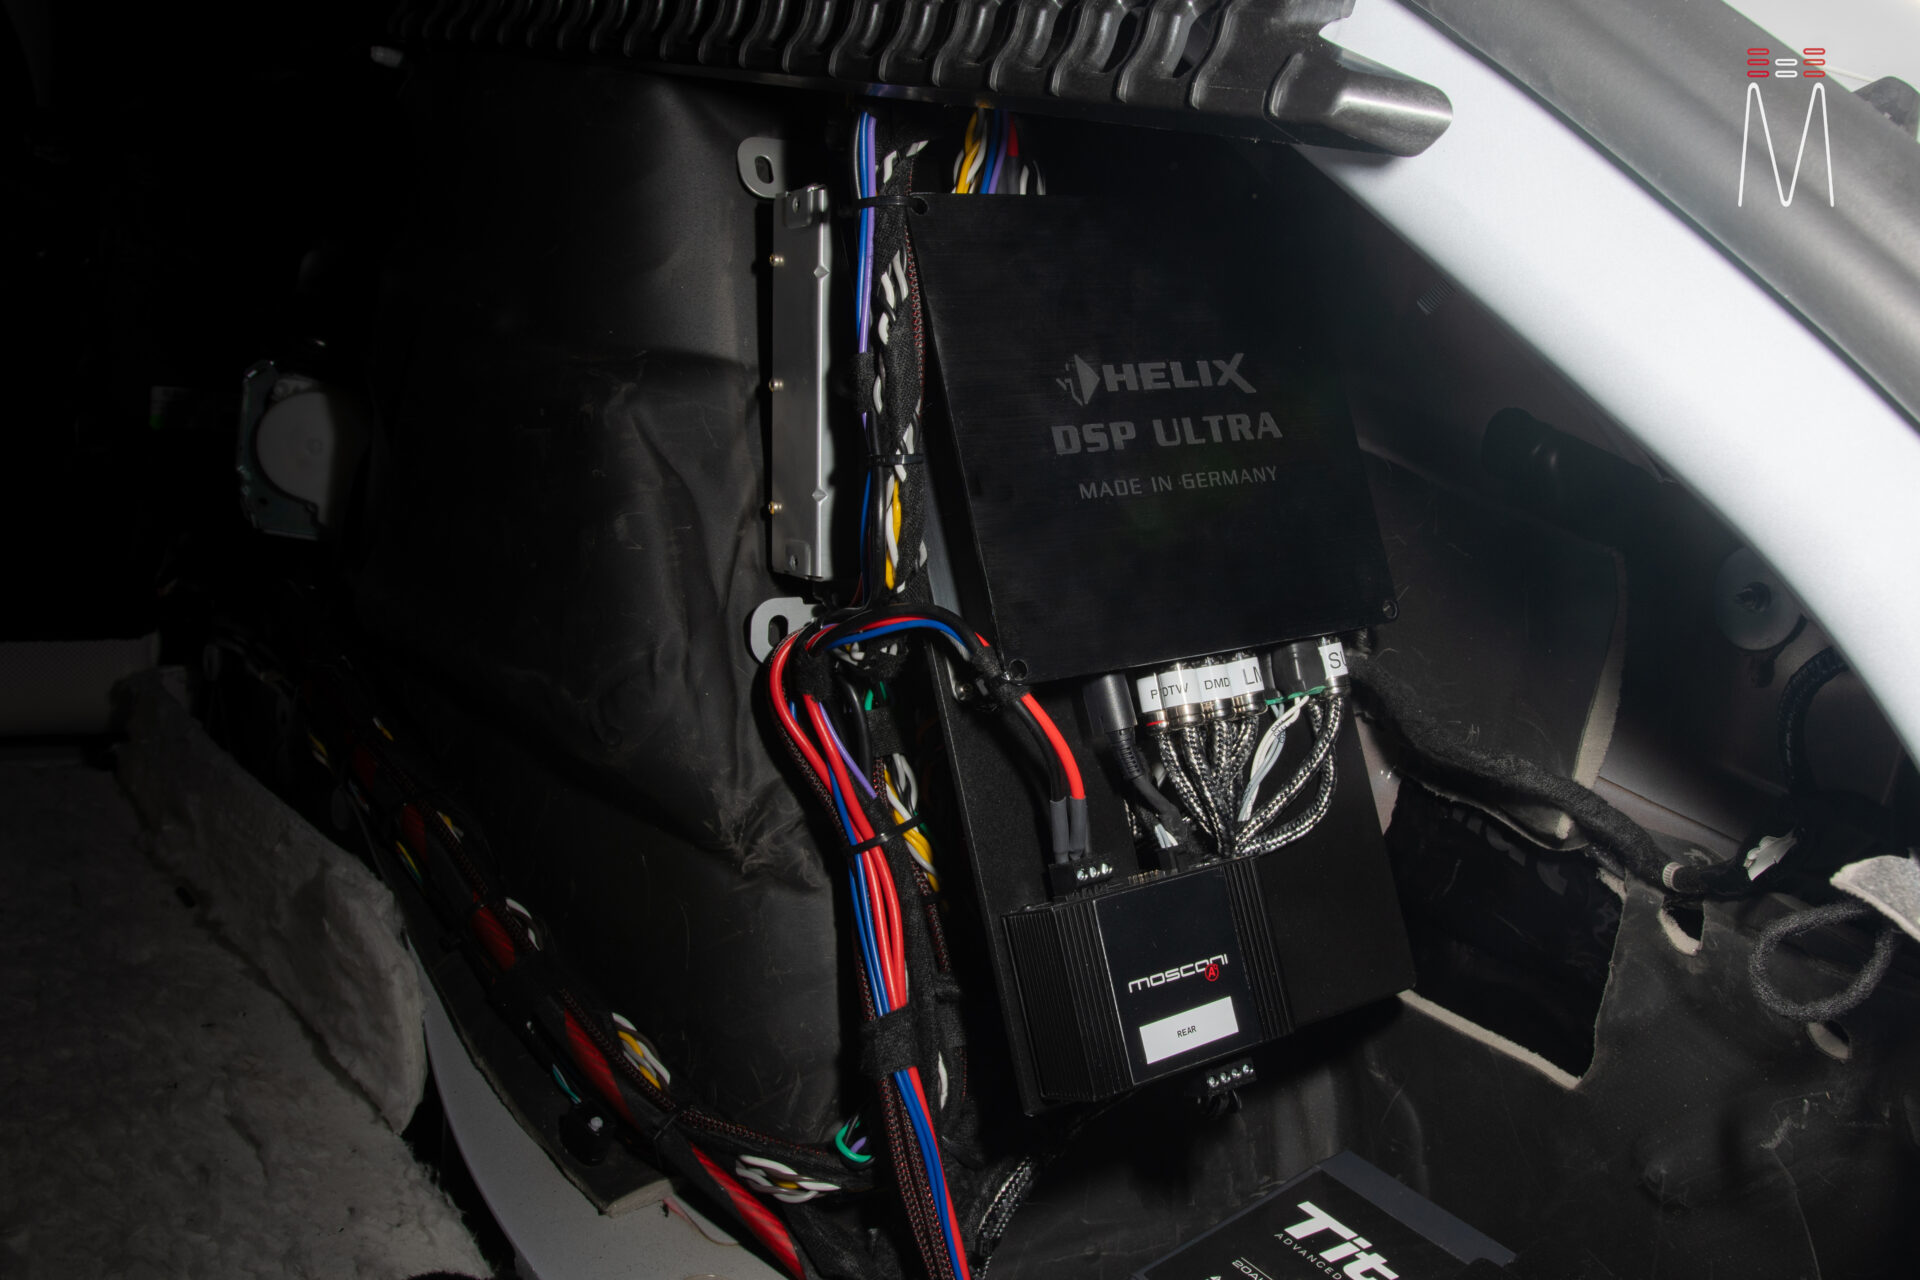
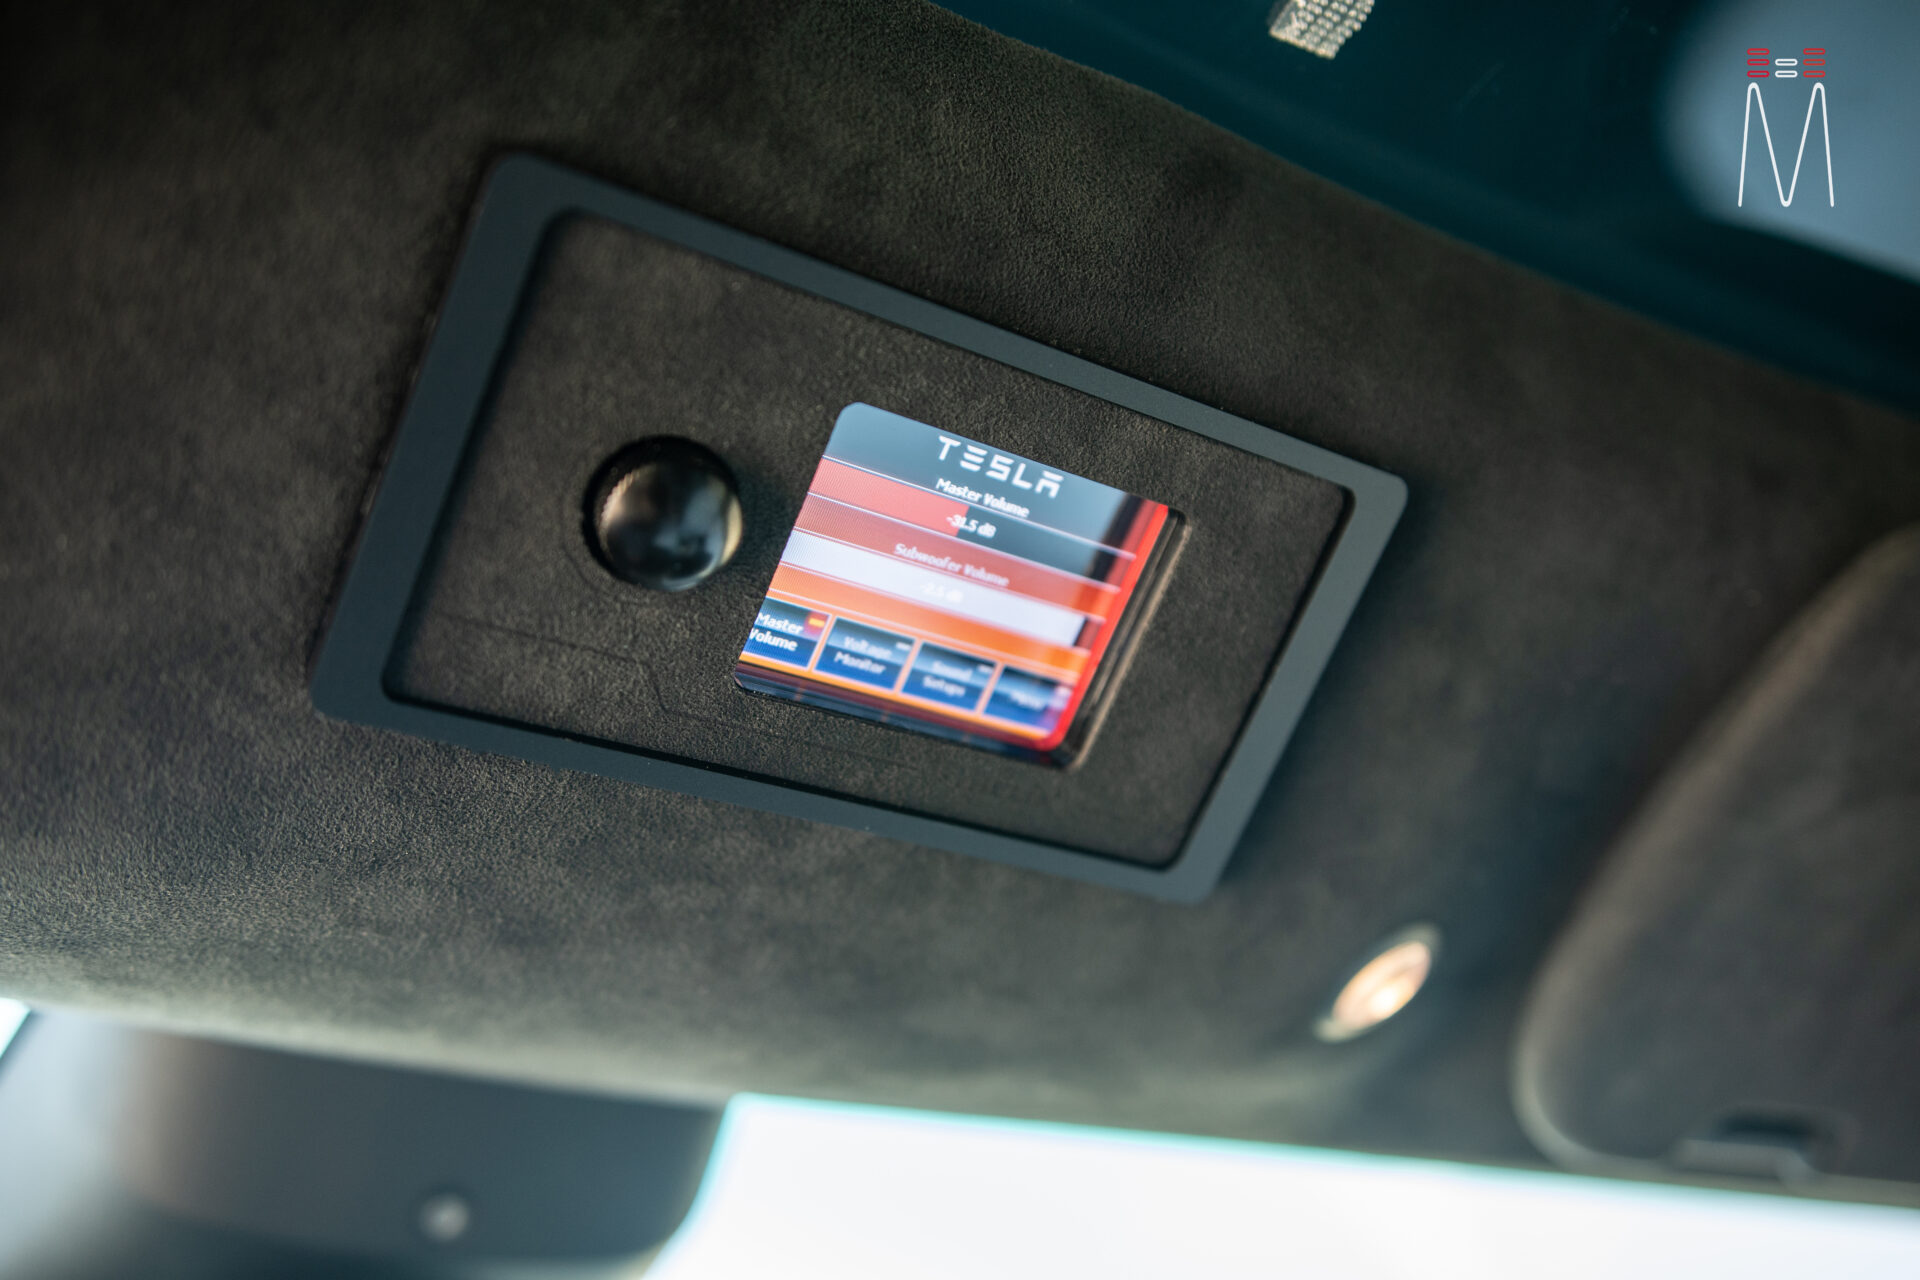
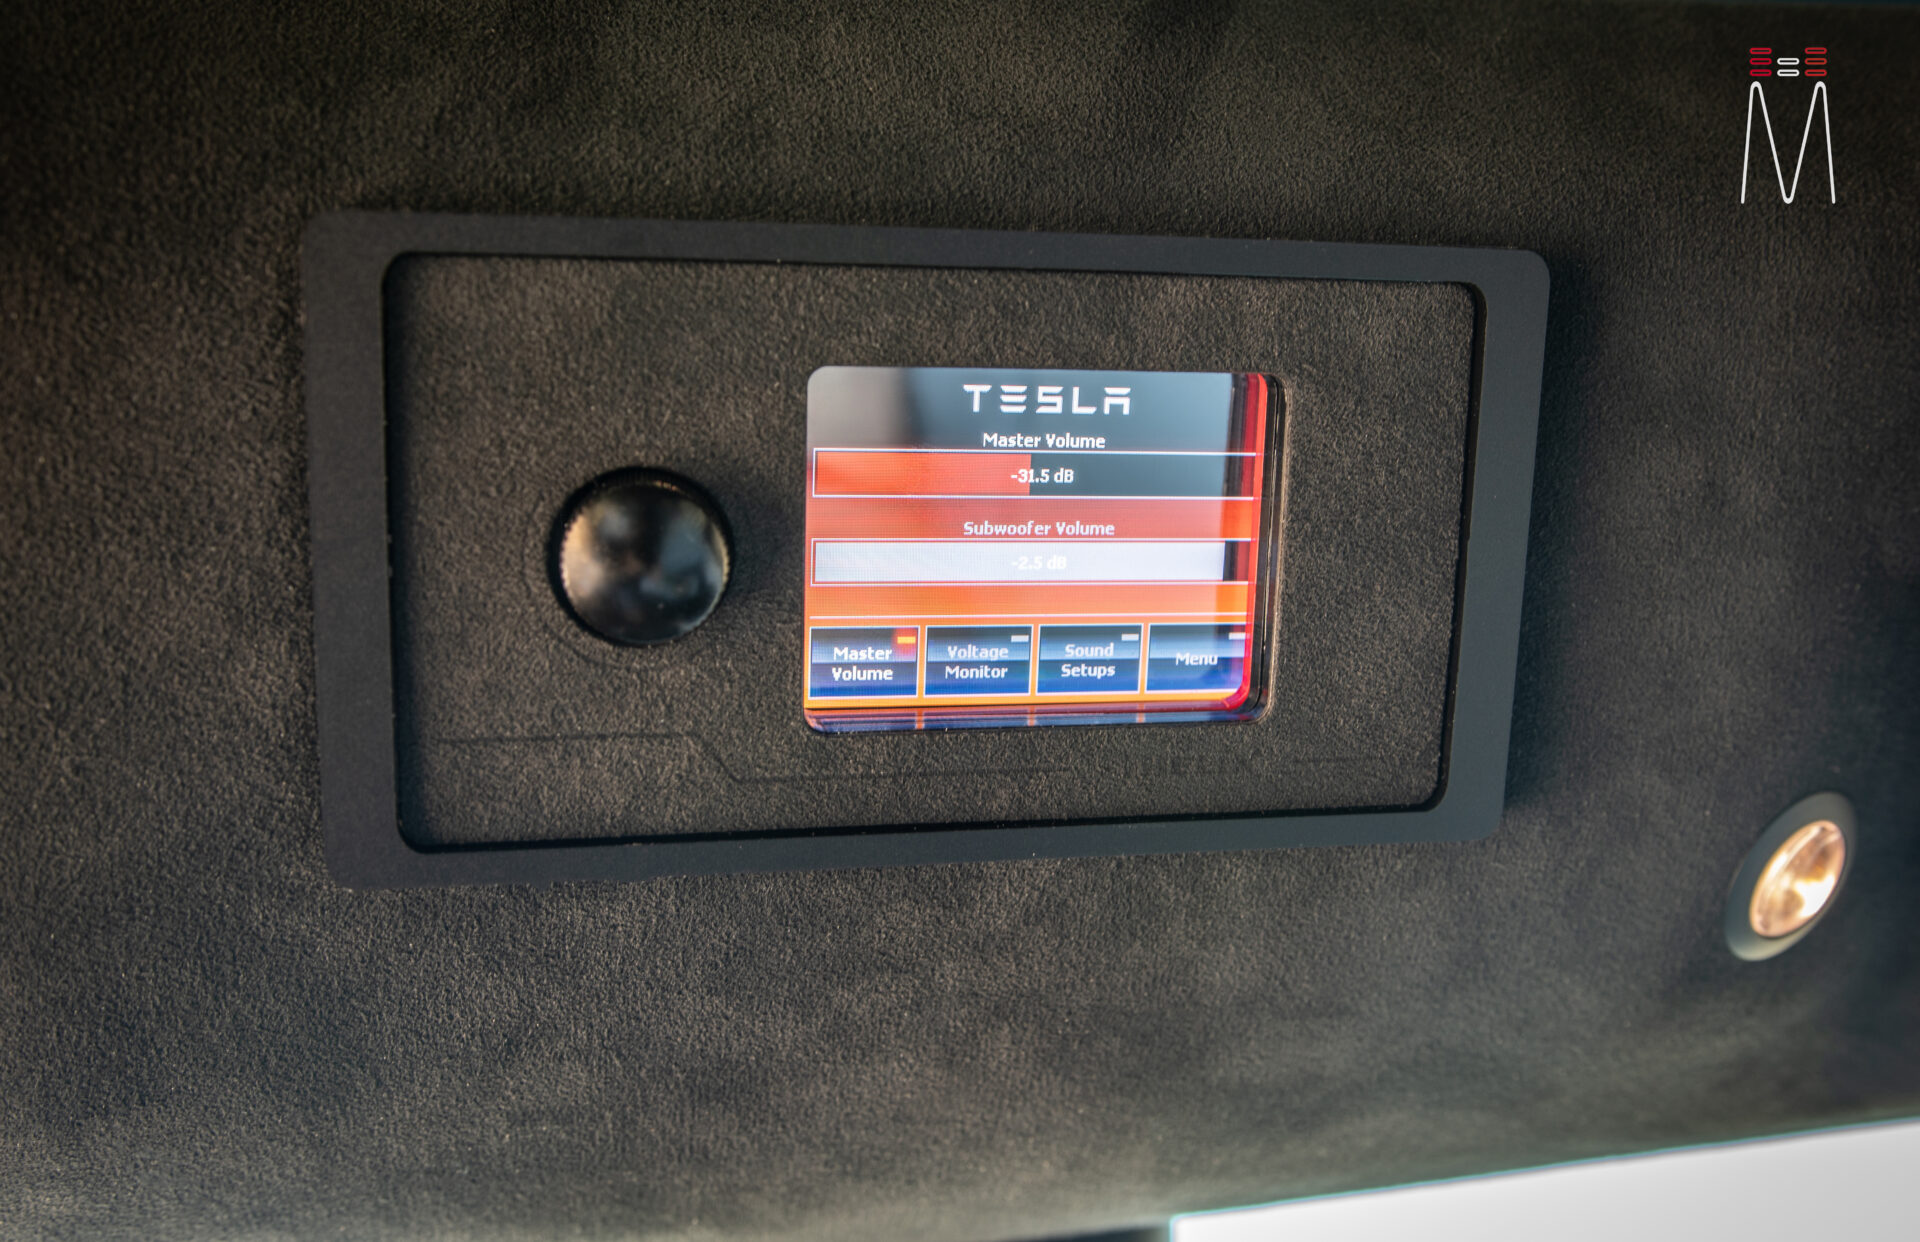
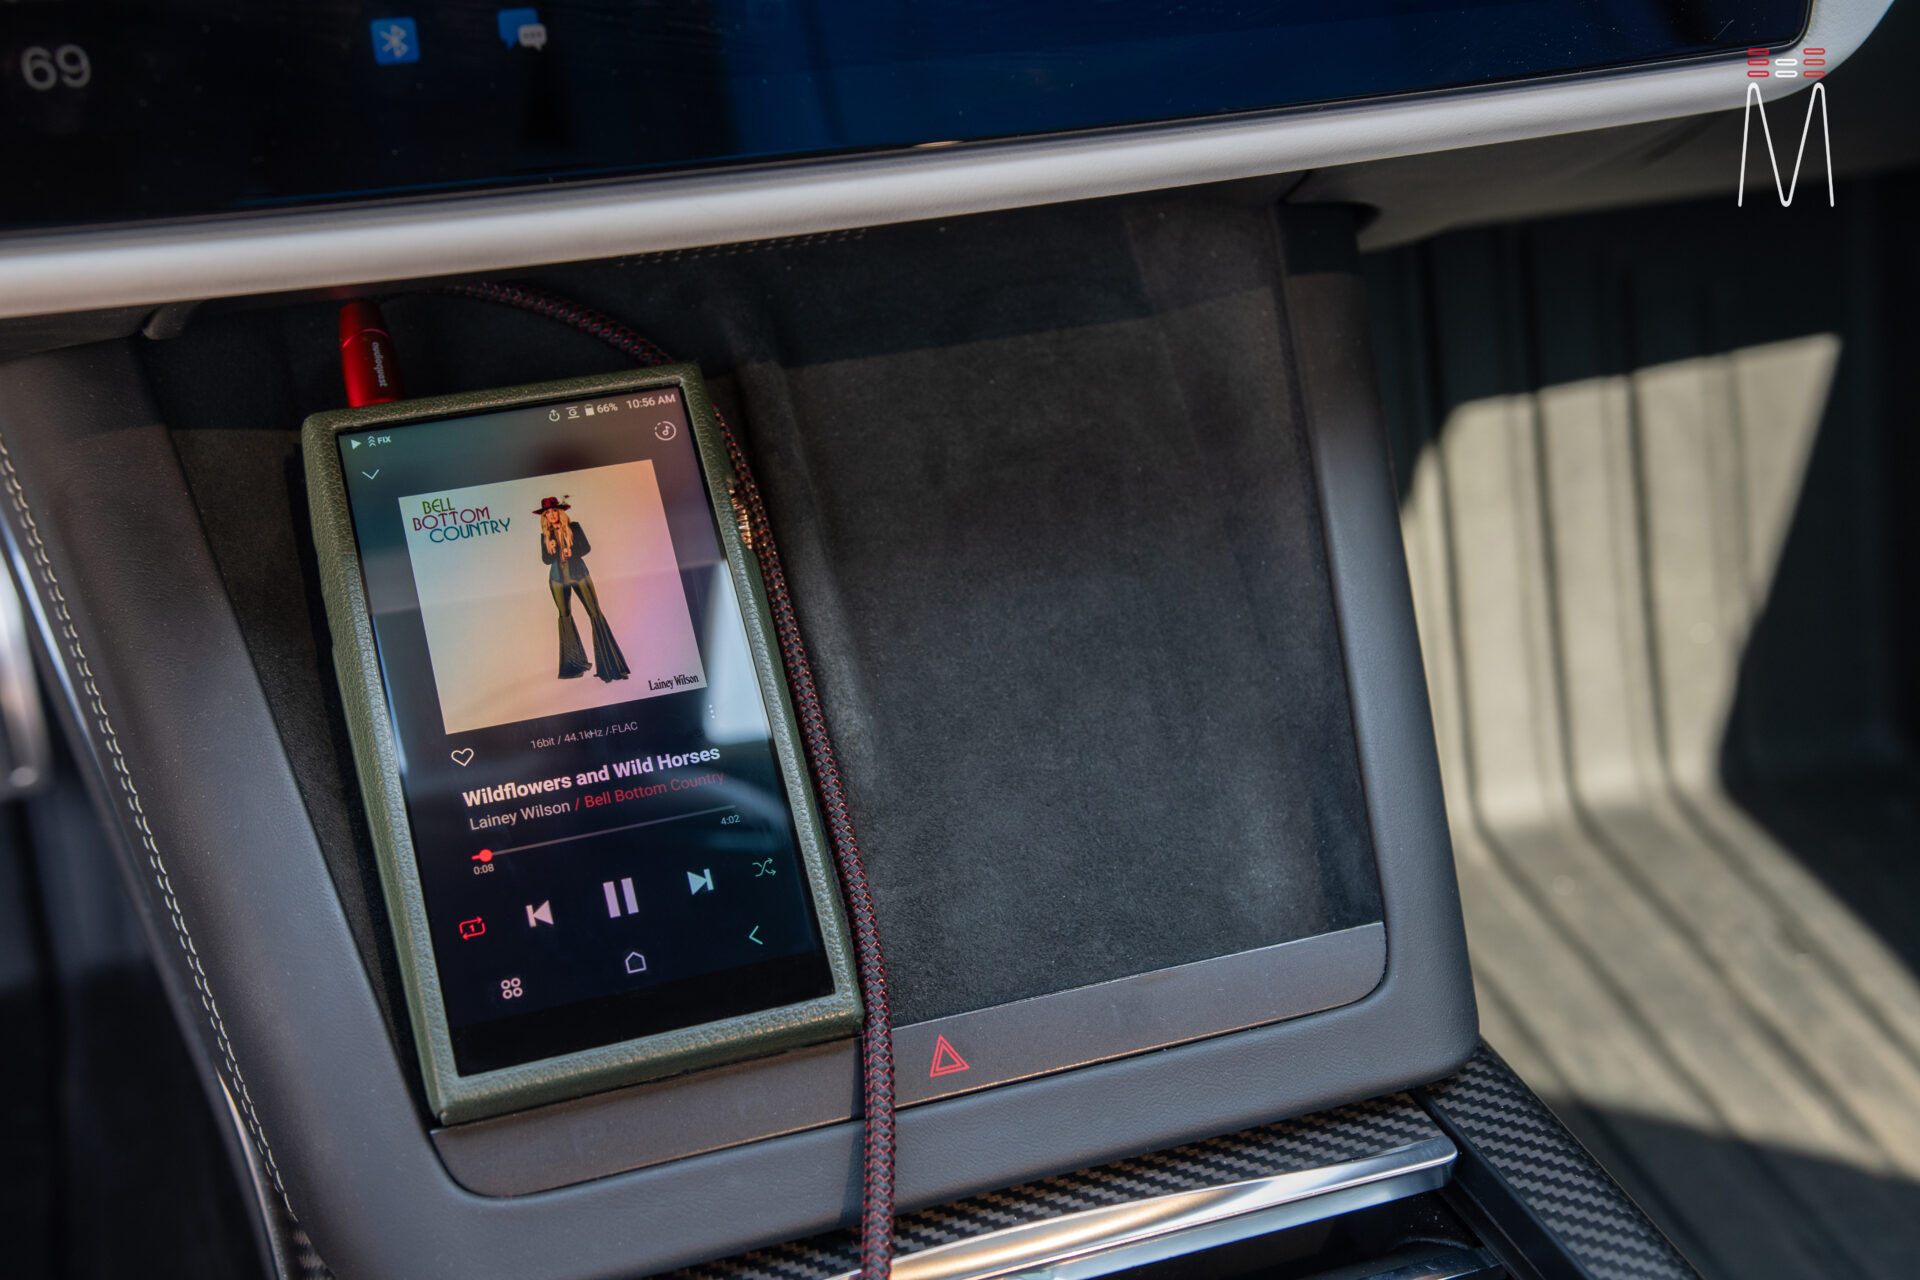
The brains of the audio system consists of a Helix DSP Ultra. We installed our Director create in a custom mount into the headliner. This was finished off with matching Alcantara suede to blend into the headliner. Our factory Tesla signal ran through preset 1. Preset number two features a tune for our HEC-BT streaming. Preset 3 gives us an analog input from our Astell & Kern SP2000 Hi-Res DAP. Our DSP resides on a custom aluminum bracket to hover over top the OEM Amplifier.
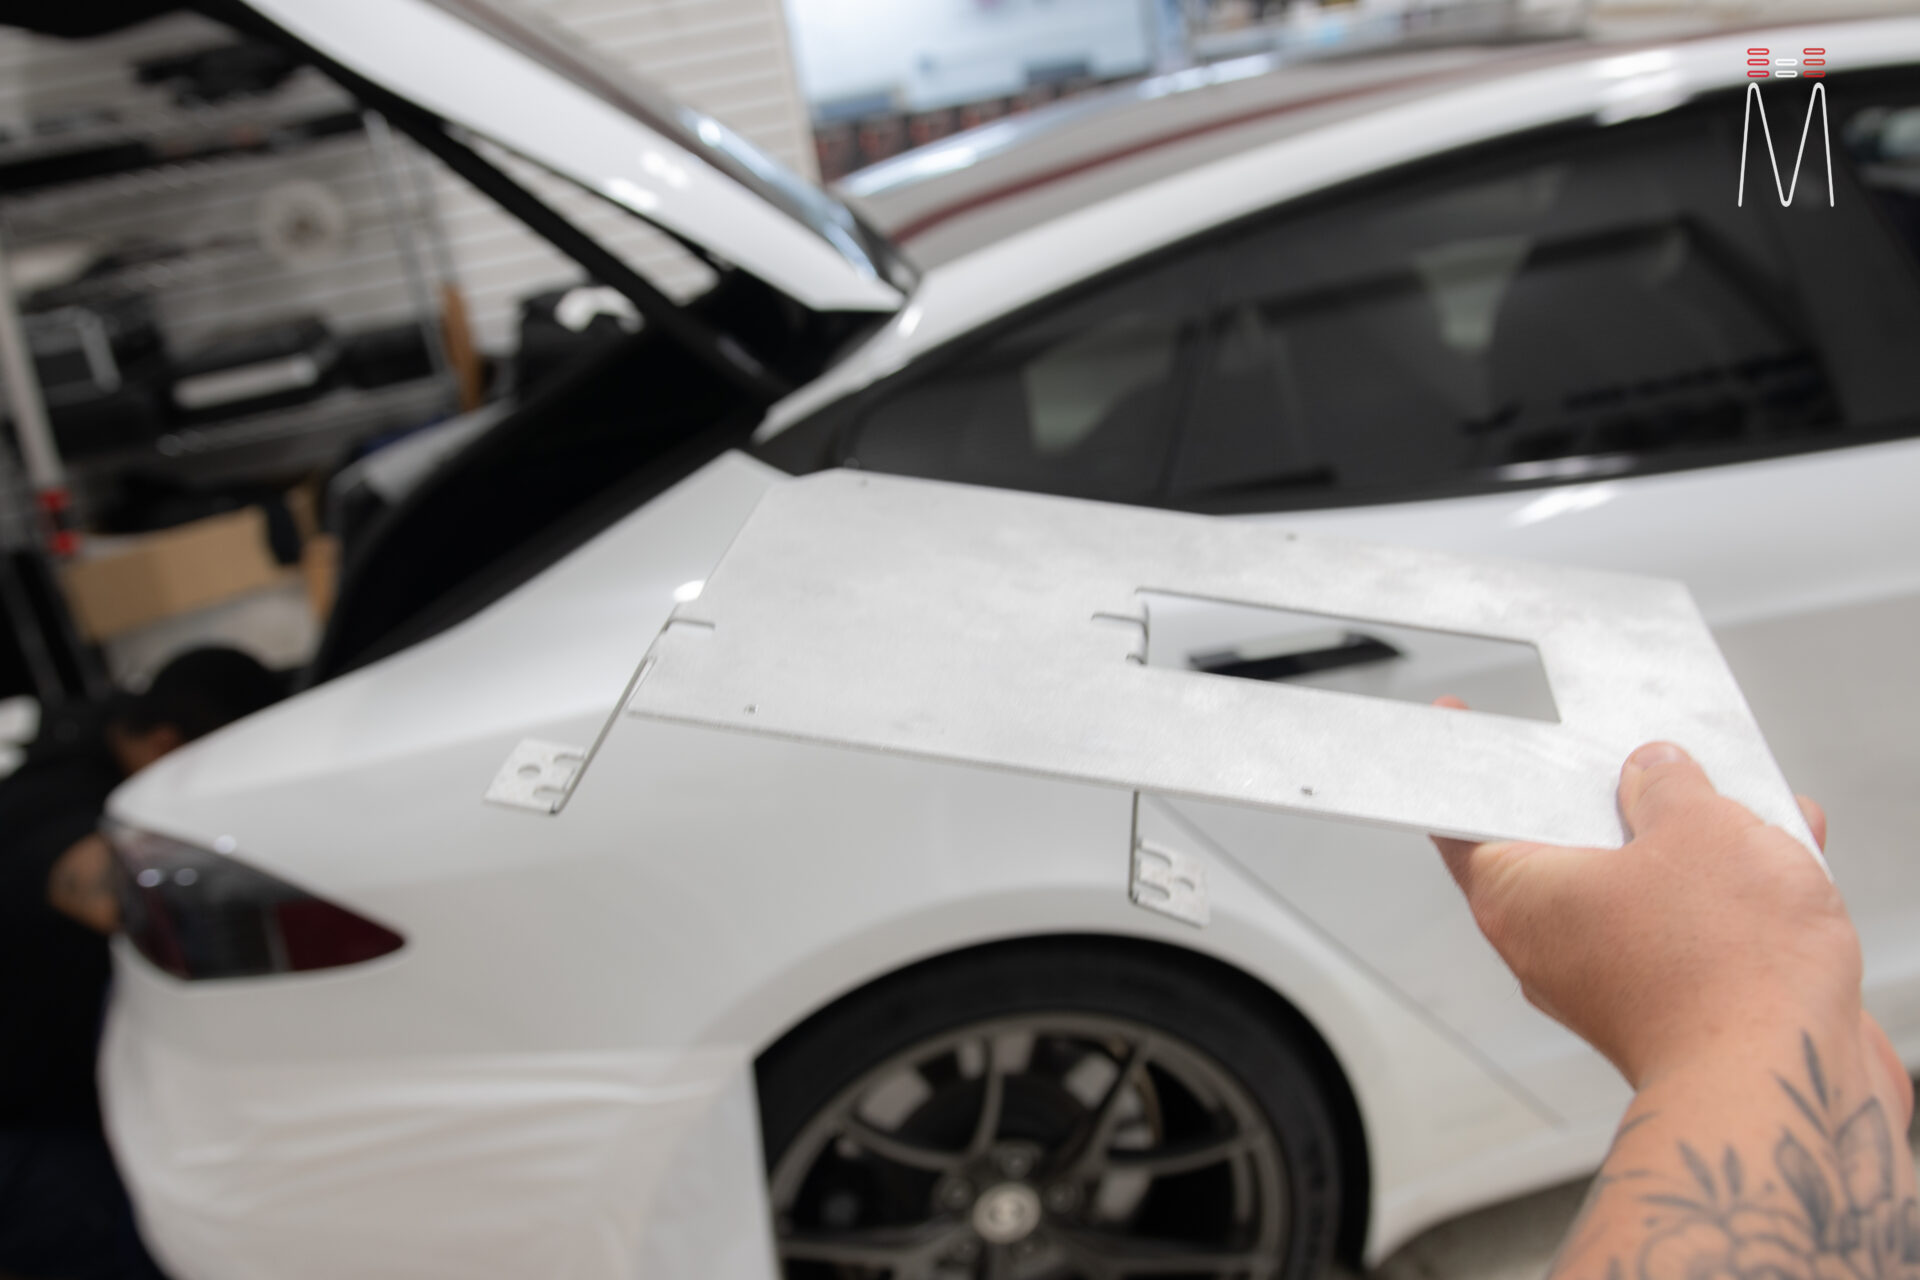
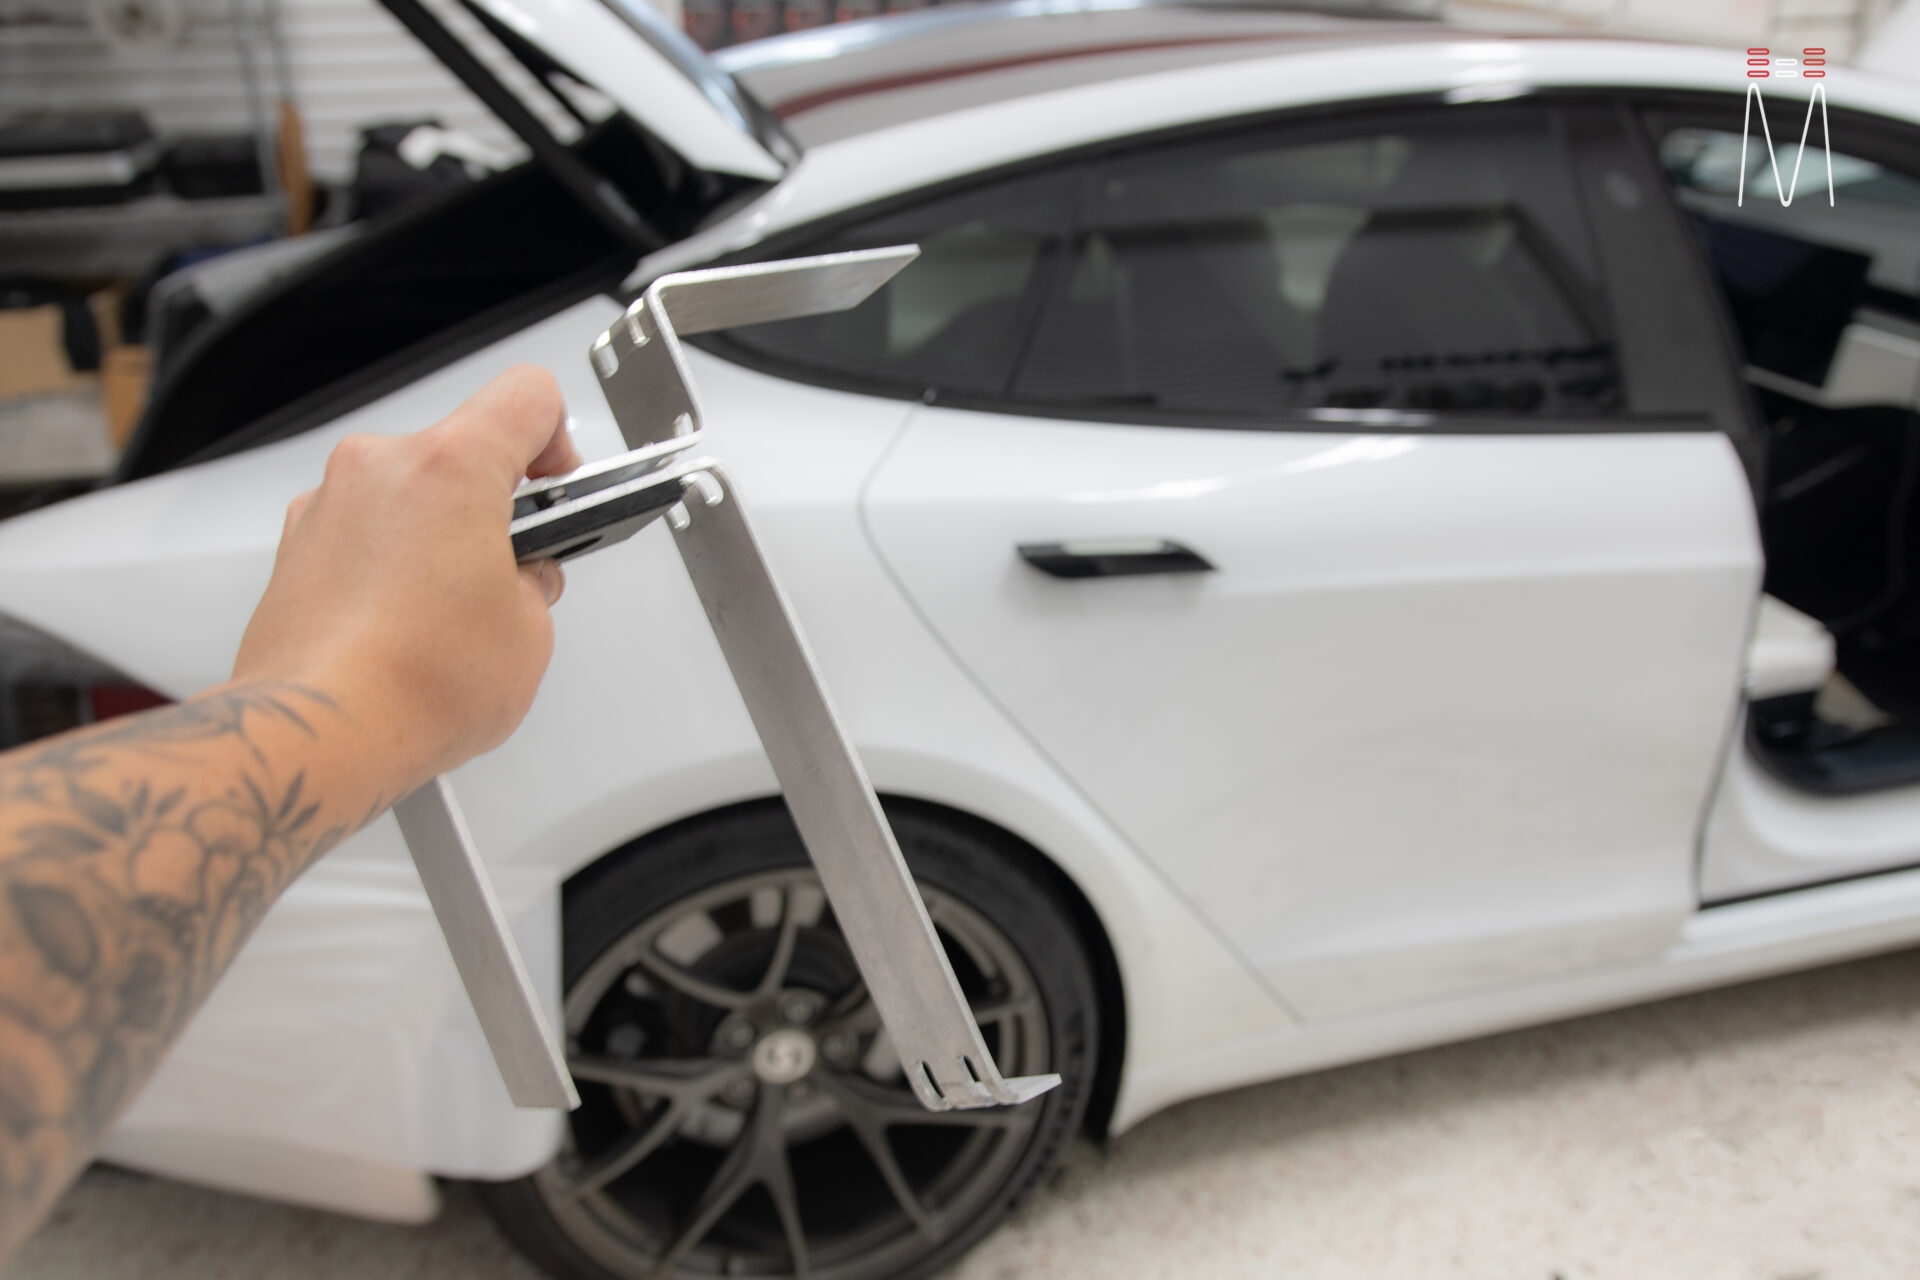
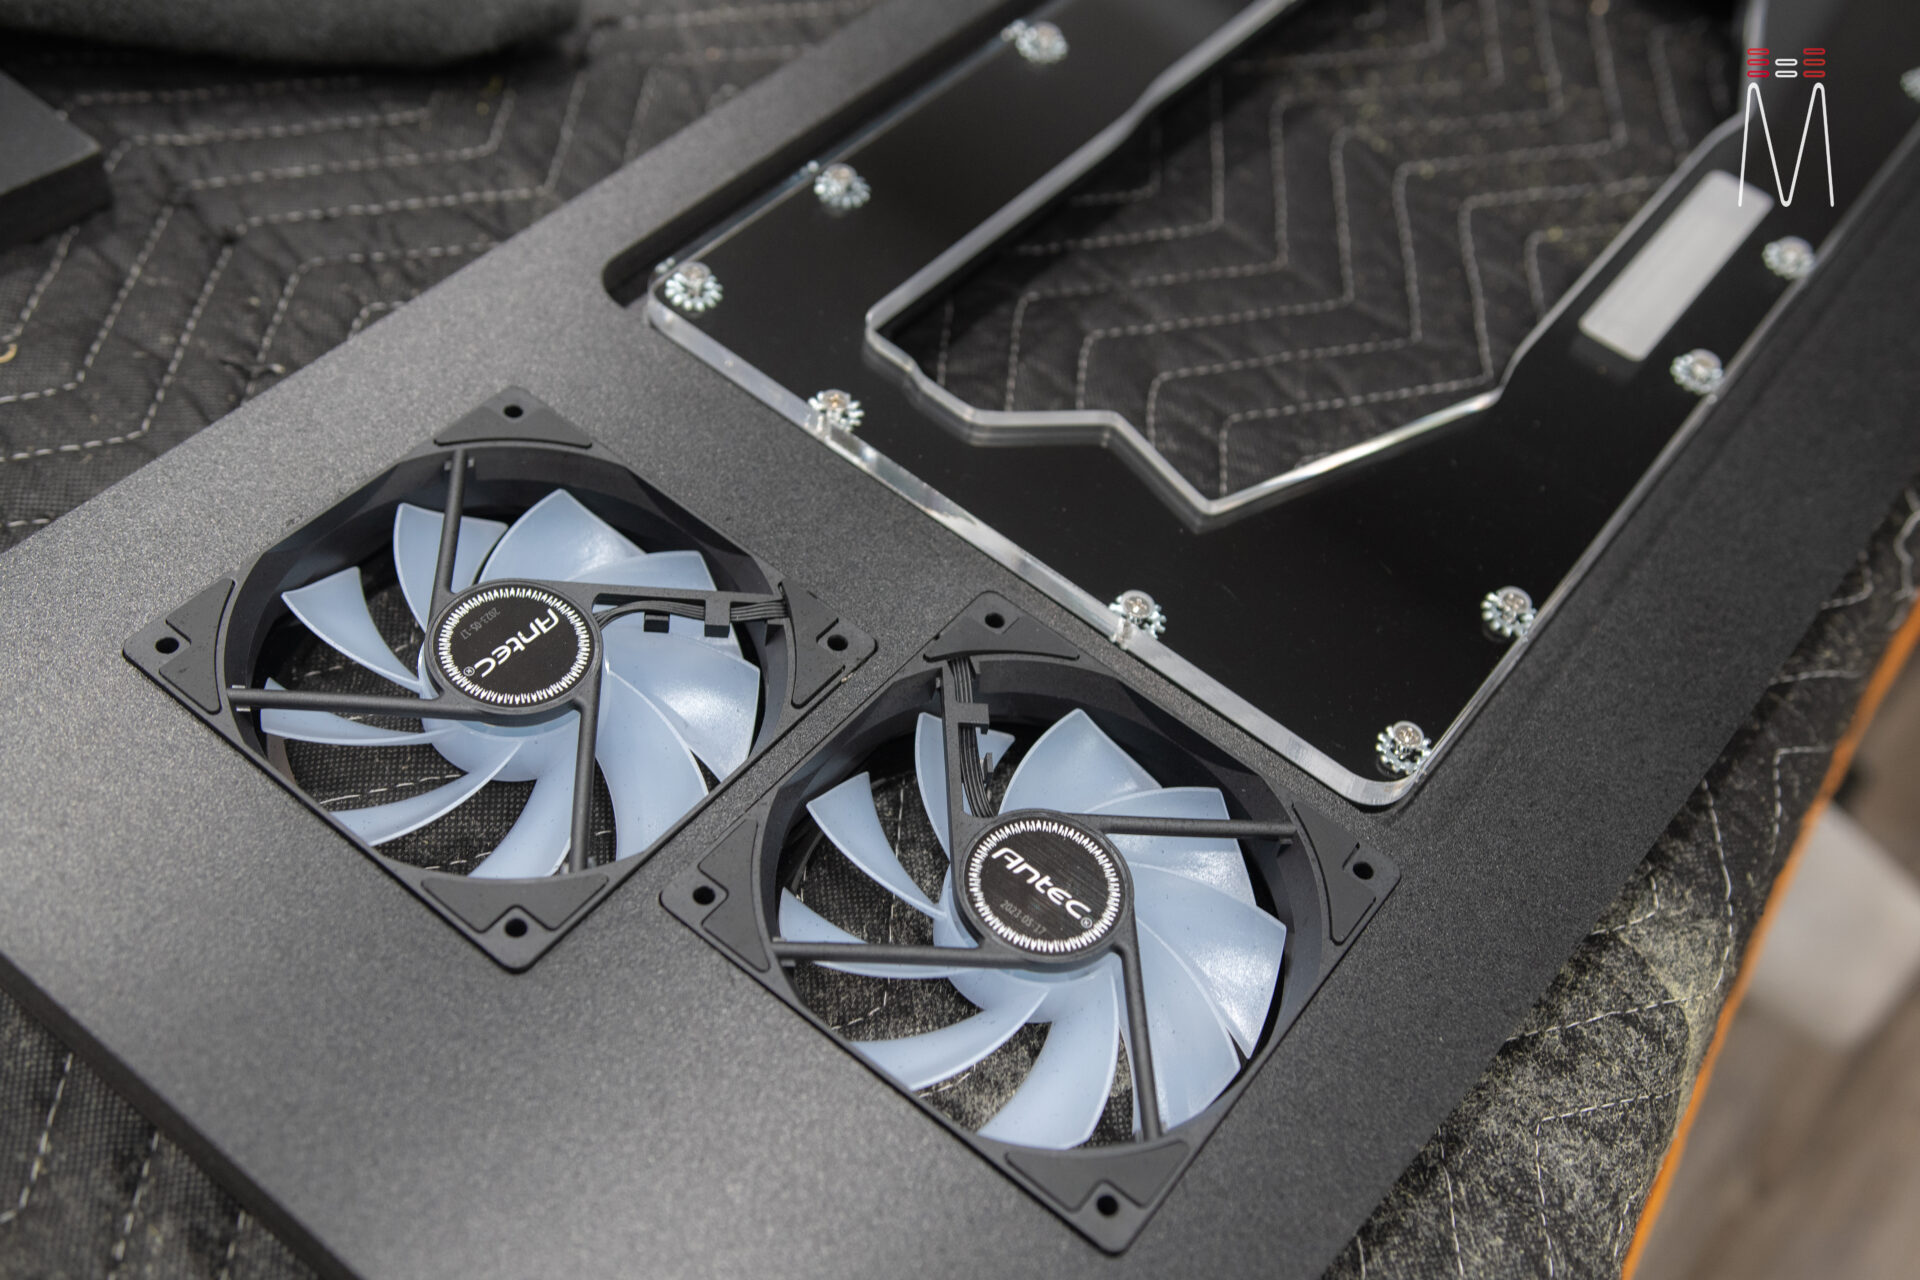
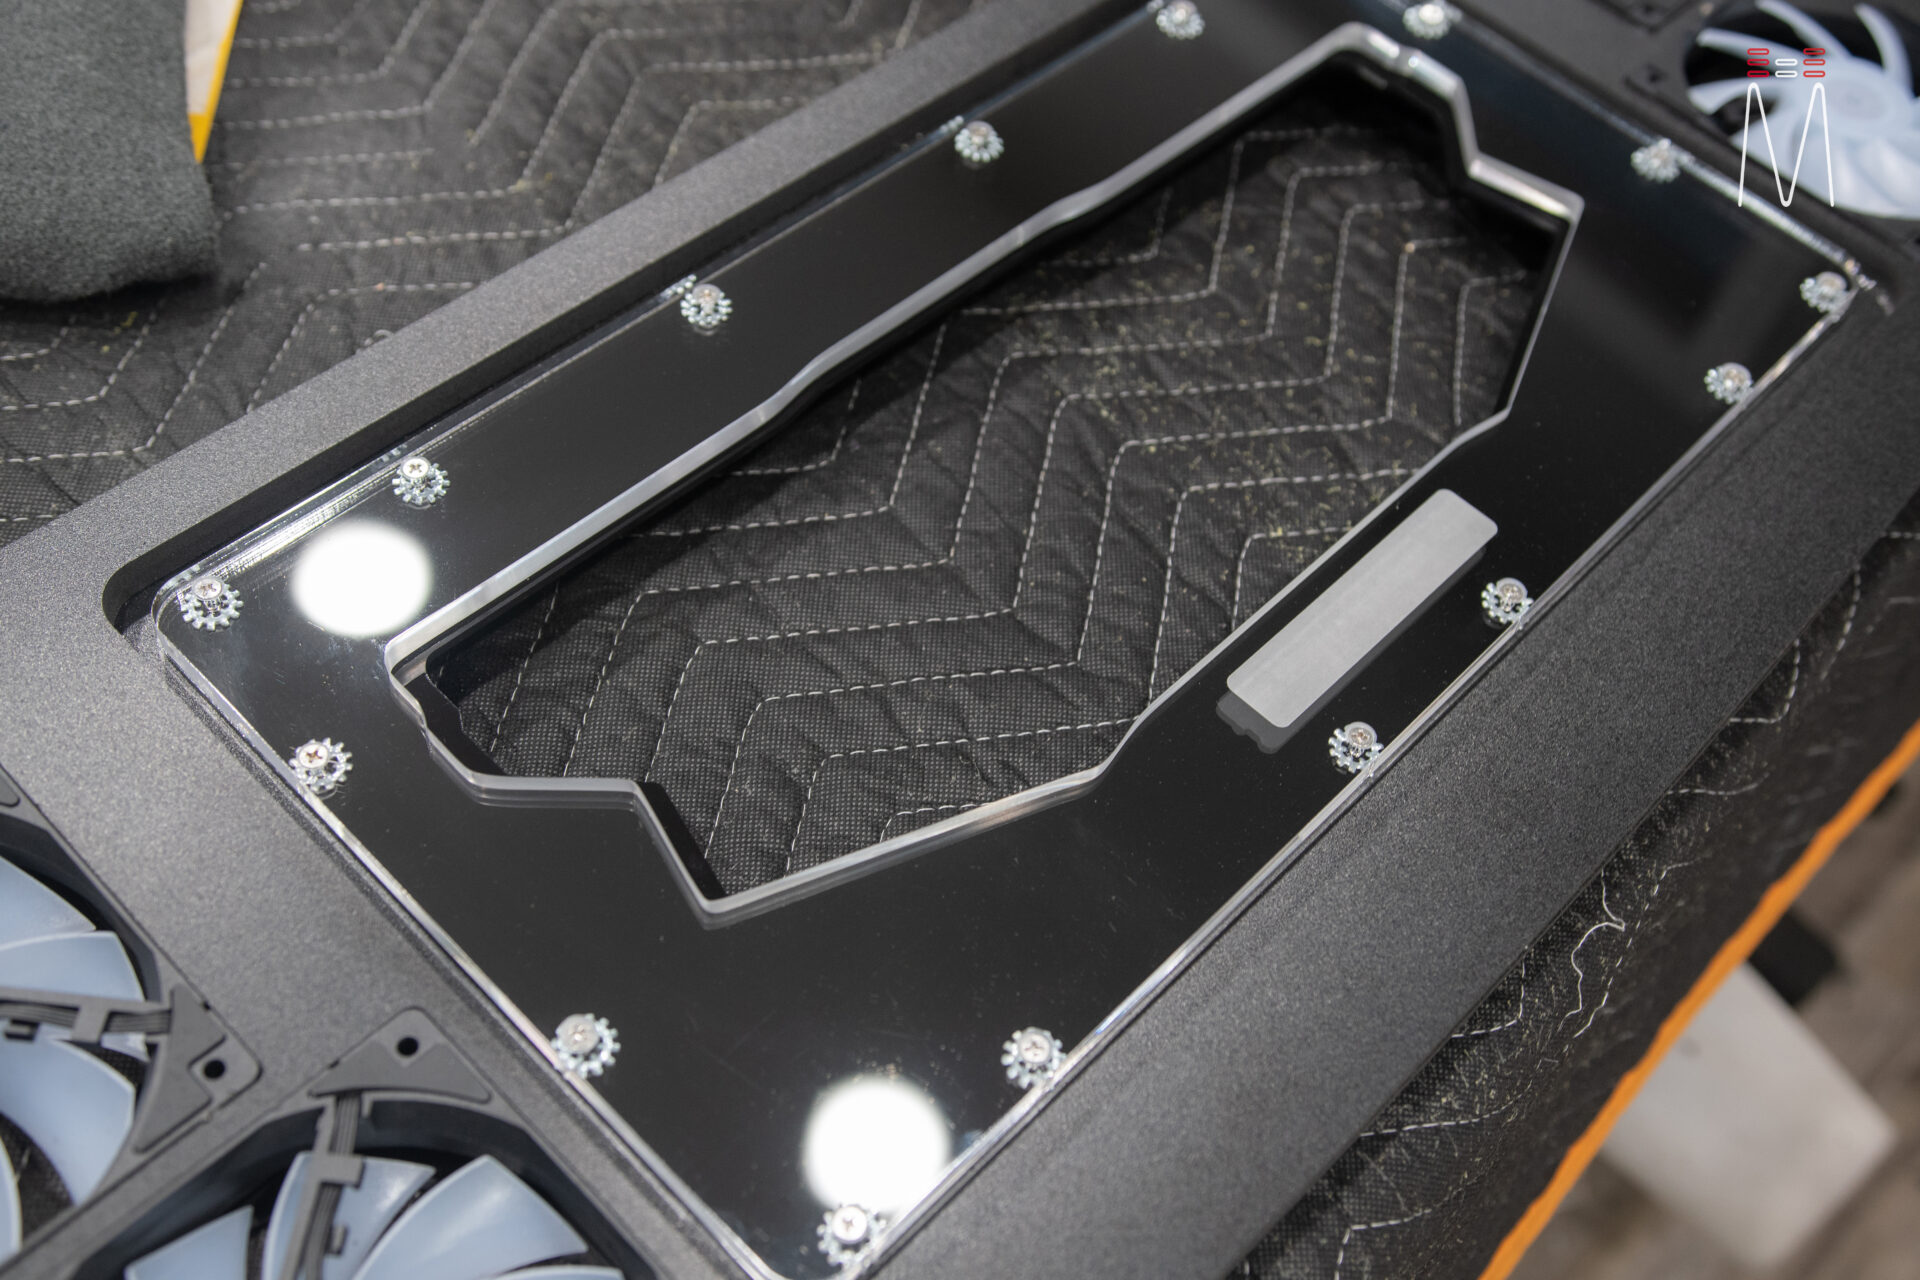
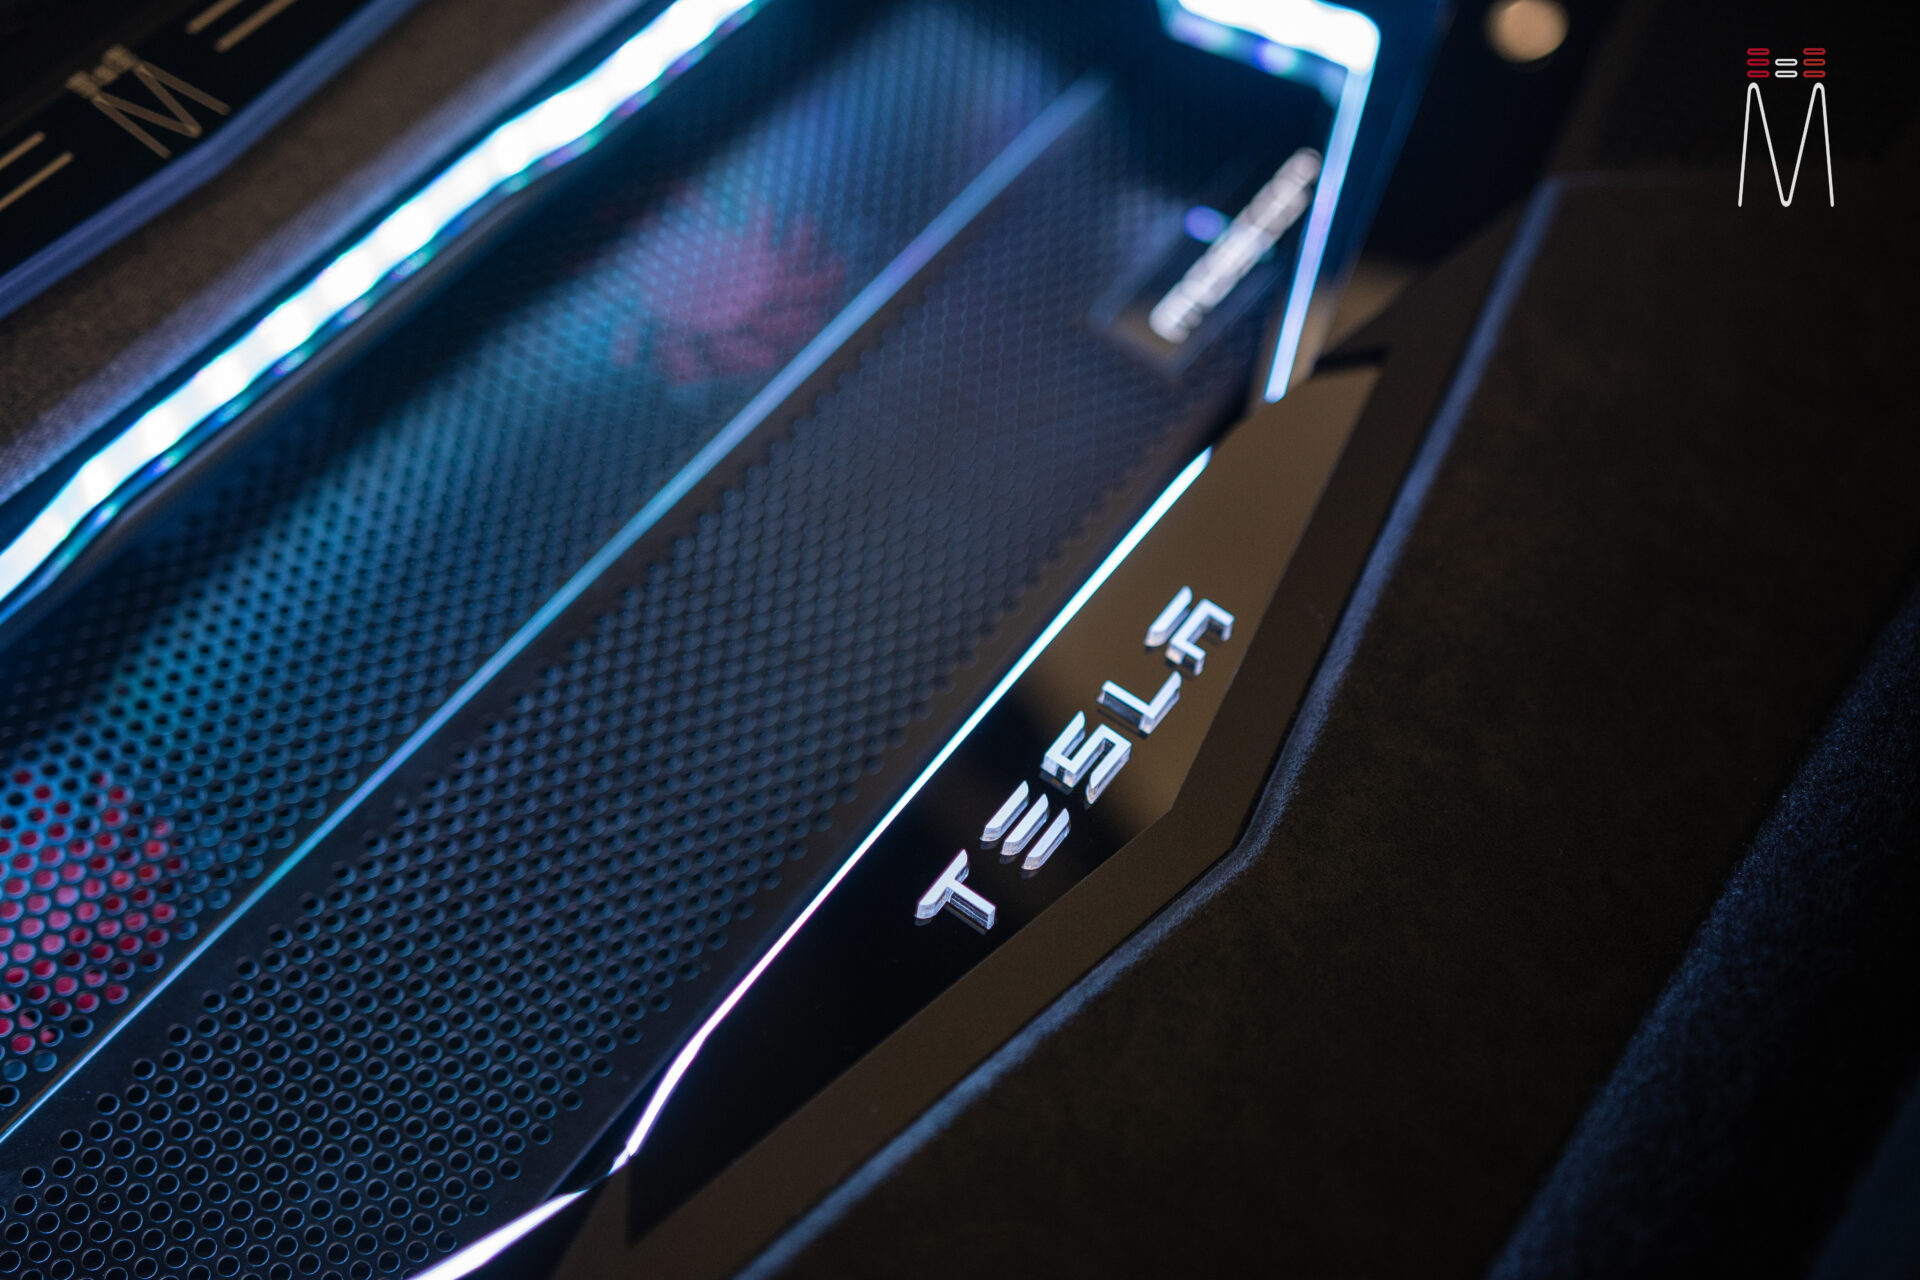
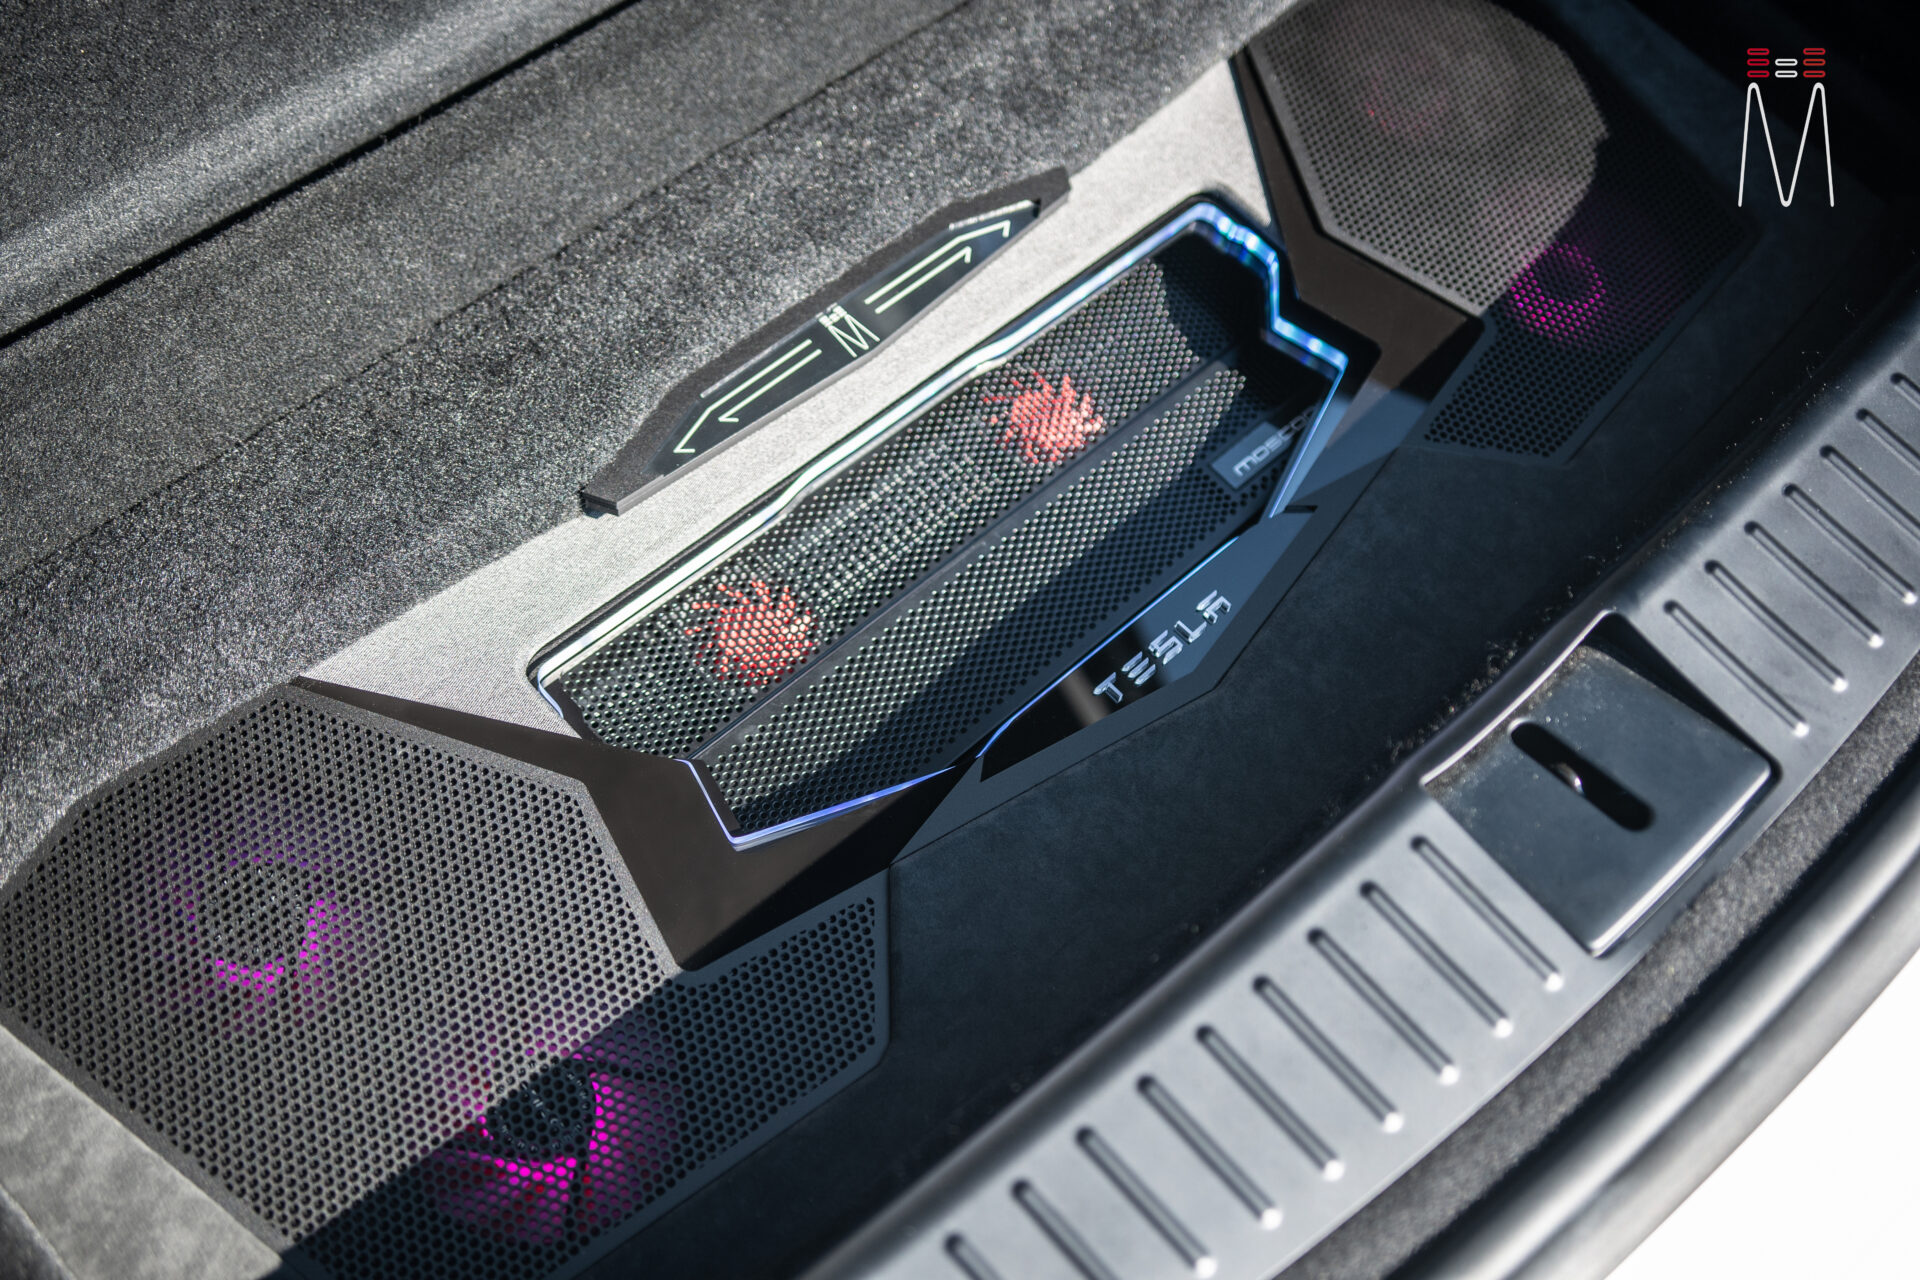
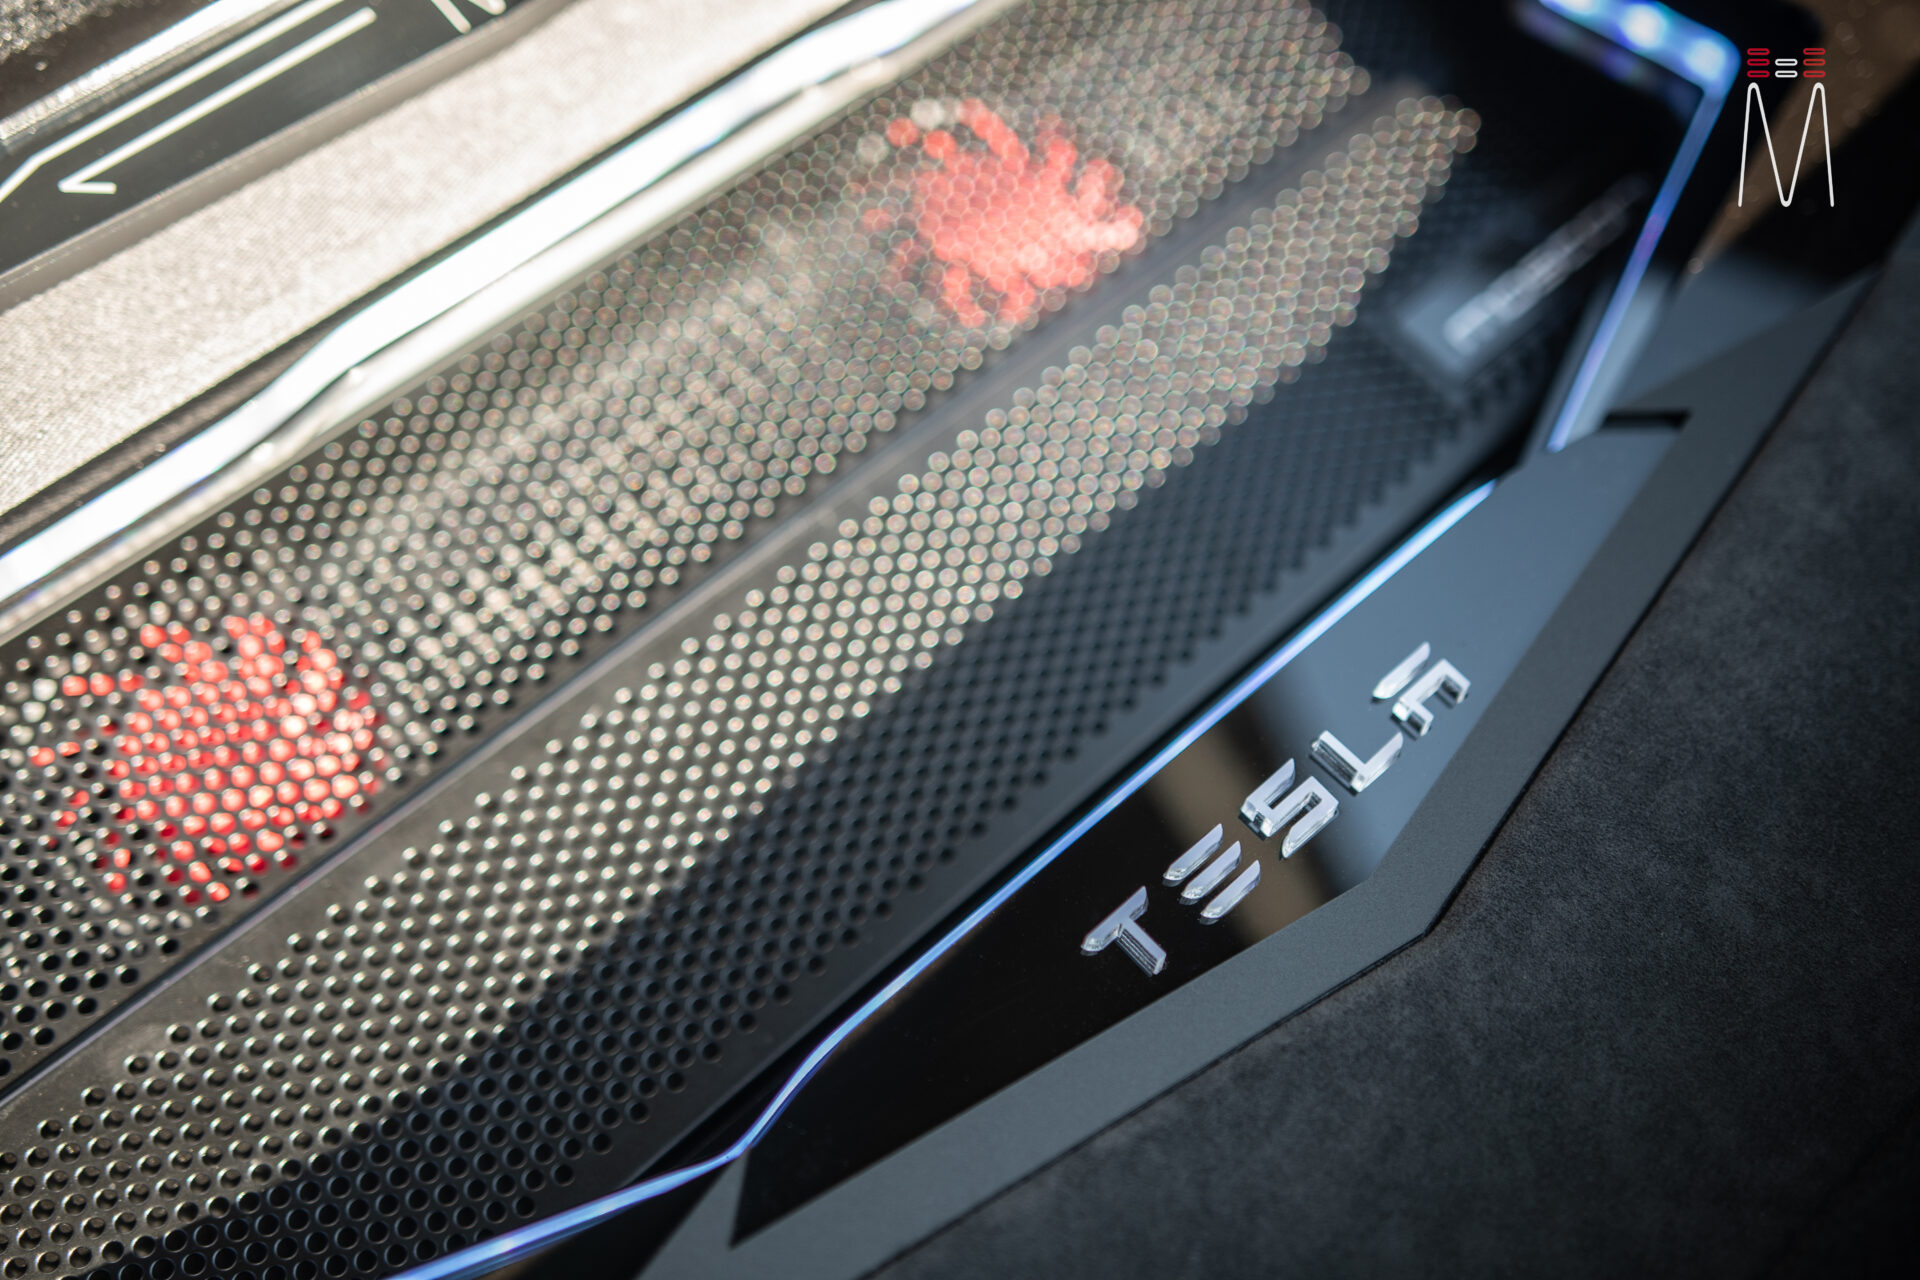
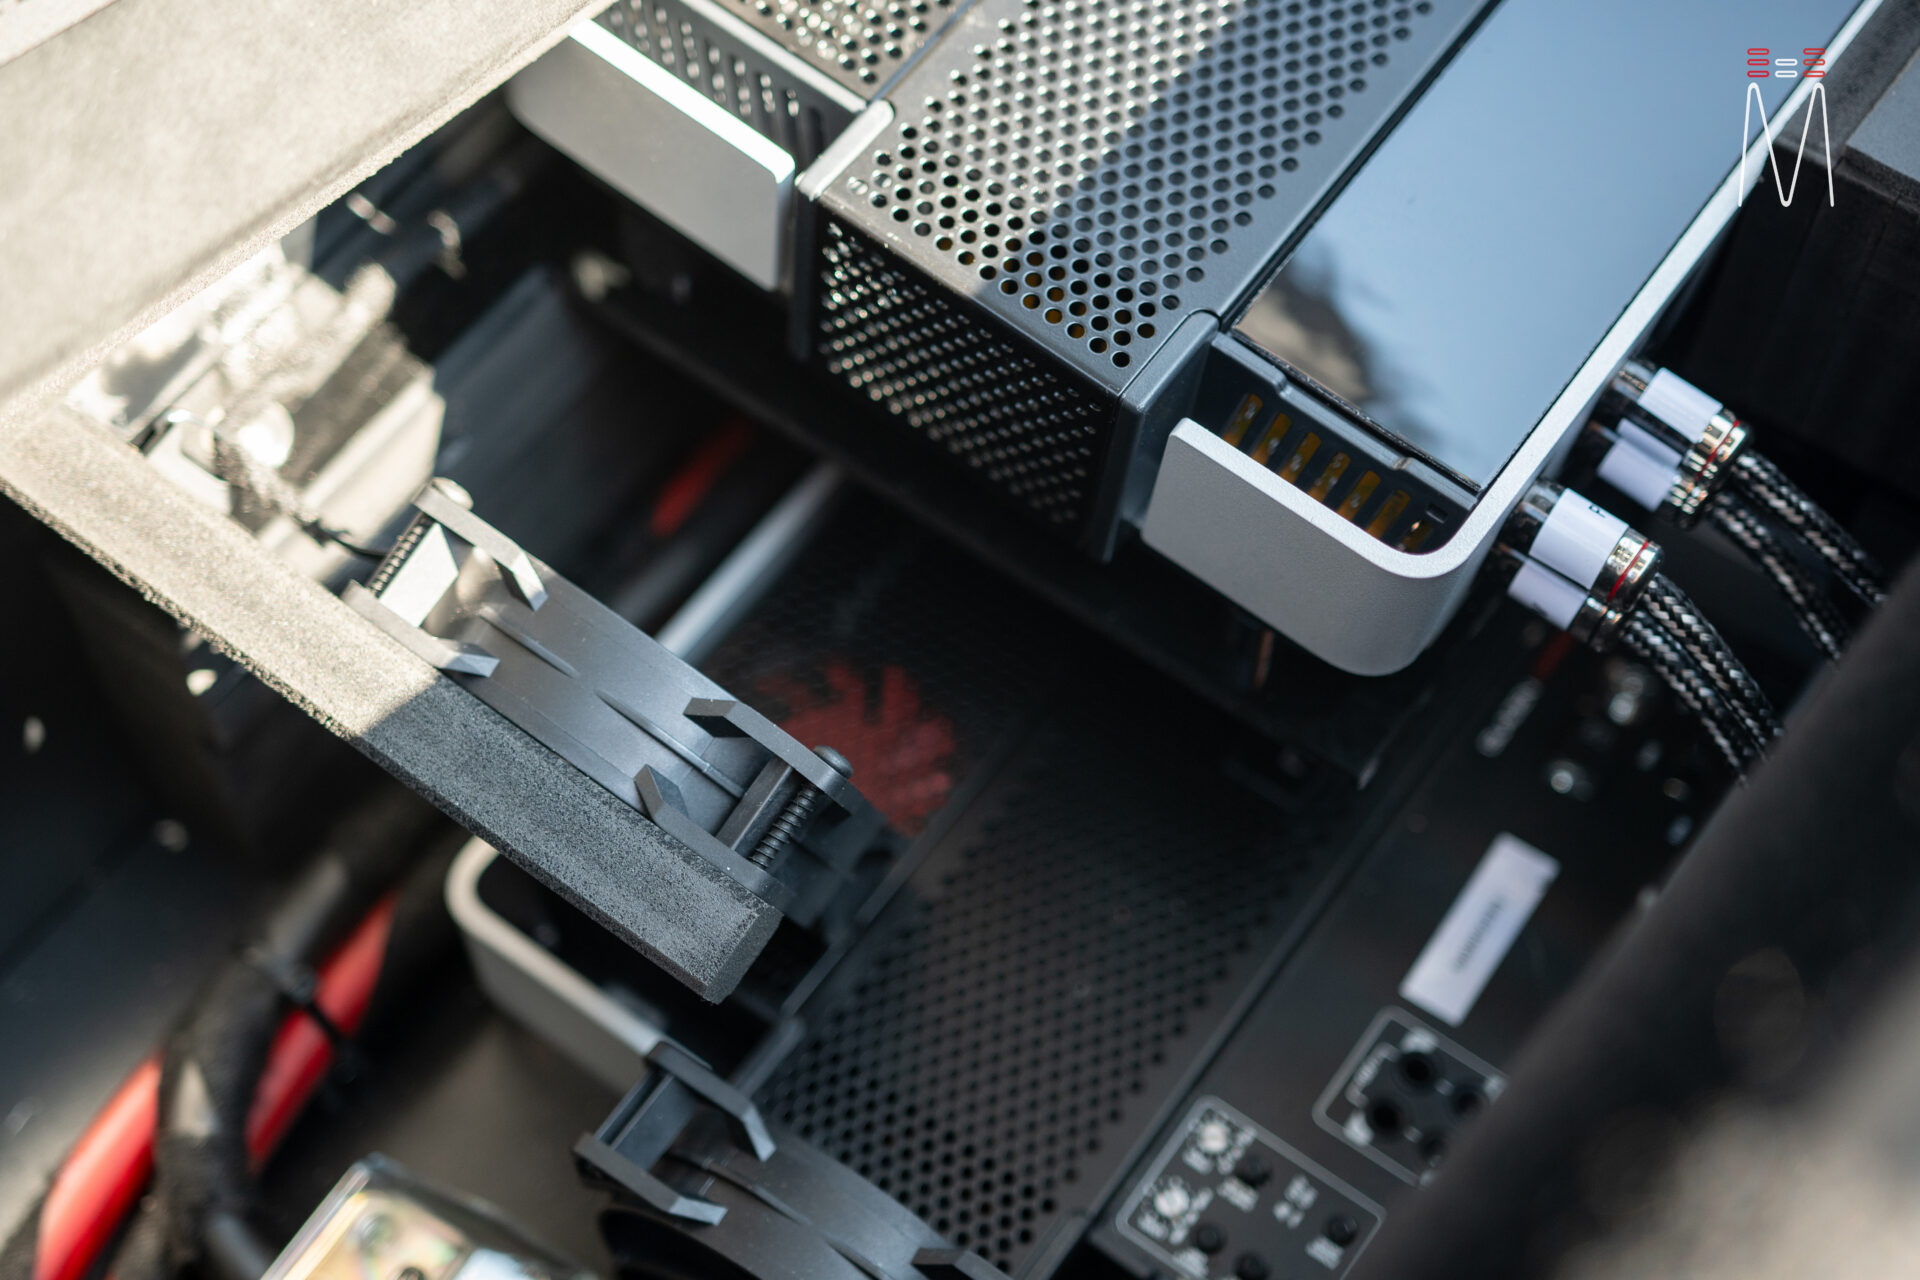
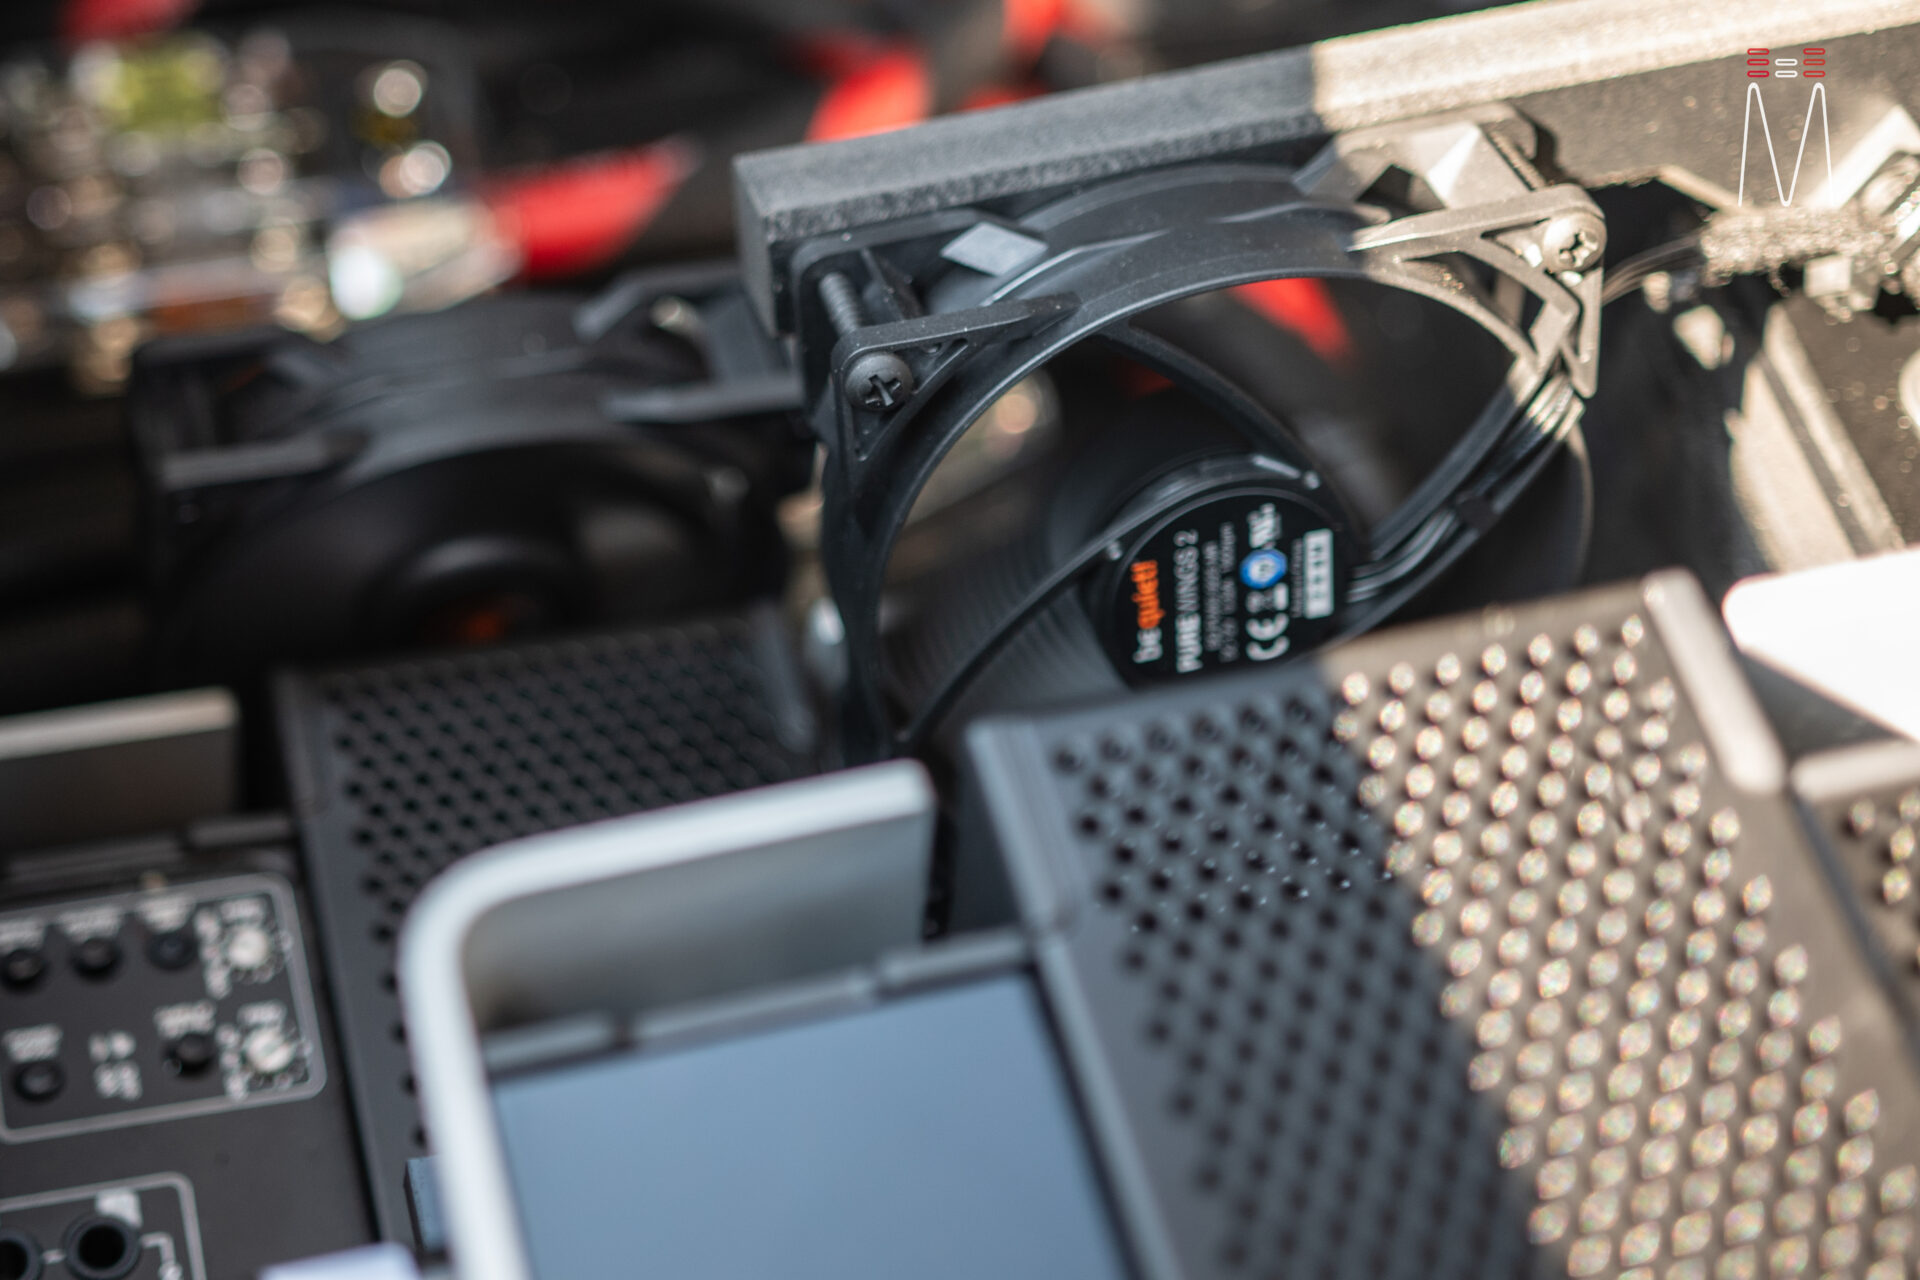
An amp rack was created in the rear storage compartment to hold all of our equipment. Multiple layers of acrylic and matching Alcantara and grill cloth was used to give an OEM appearance. The lighting runs off a XK glow controller to give various combinations of RGB lighting. This lighting automatically kicks on when the trunk lid is open. Parts of the acrylic amp cover were grated to allow air to move out of the amp rack. Both side panels are attached with magnets, allowing these inserts to be removed to gain access to all system fusing and additional components. Multiple fans (including RGB fan) were used to maintain a constant air flow through the amp rack.